by Always A Sweep Team | Jun 8, 2026 | Always Home Repair Services, chimney repair, inspections & sweeping, installation
Ultimate Wood Stove Installation Near Me Guide: Clearance, Weight & Safety
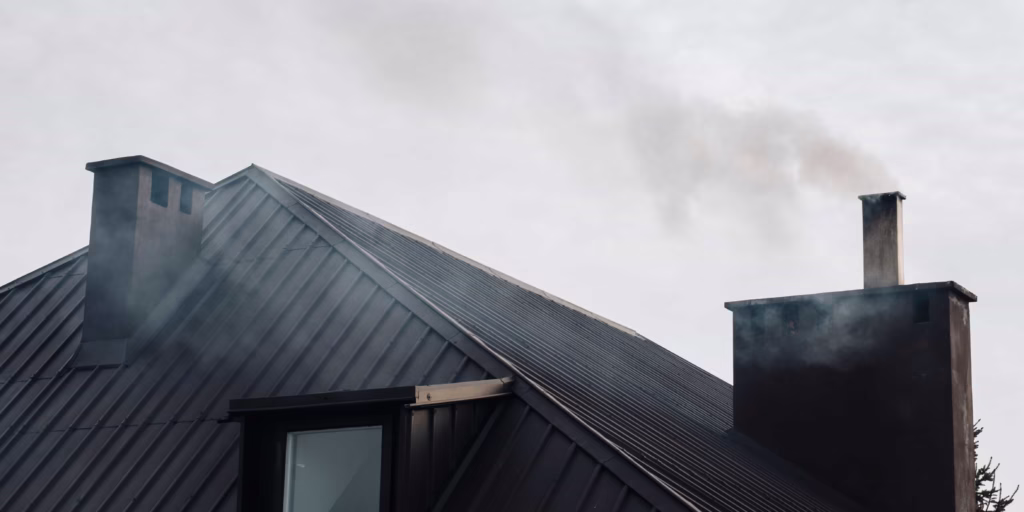
Finding a certified expert for a wood stove installation near me ensures your new solid-fuel heating appliance operates with maximum efficiency and adheres to strict residential fire codes. Whether you want to slash high winter utility bills or enjoy the unmatched ambiance of a crackling fire, proper placement and venting are non-negotiable.
At Always A Sweep, we understand that upgrading your home heating system is a major investment. As our brand transitions to reflect our comprehensive hearth safety services, our commitment to technical precision remains our priority.
This guide breaks down exactly what to expect from professional hearth installations, including floor protection rules, clearance requirements, and how to select certified local experts.
📌 Key Takeaways
-
Never skip clearances: Unlisted wood stoves require a minimum 36-inch clearance from combustible walls without specialized heat shields.
-
Verify your floor support: Cast iron stoves and masonry hearth pads can weigh over 800 pounds, often requiring floor joist reinforcement.
-
Check CSIA credentials: Always hire installers certified by the Chimney Safety Institute of America (CSIA) to guarantee compliance and safety.
-
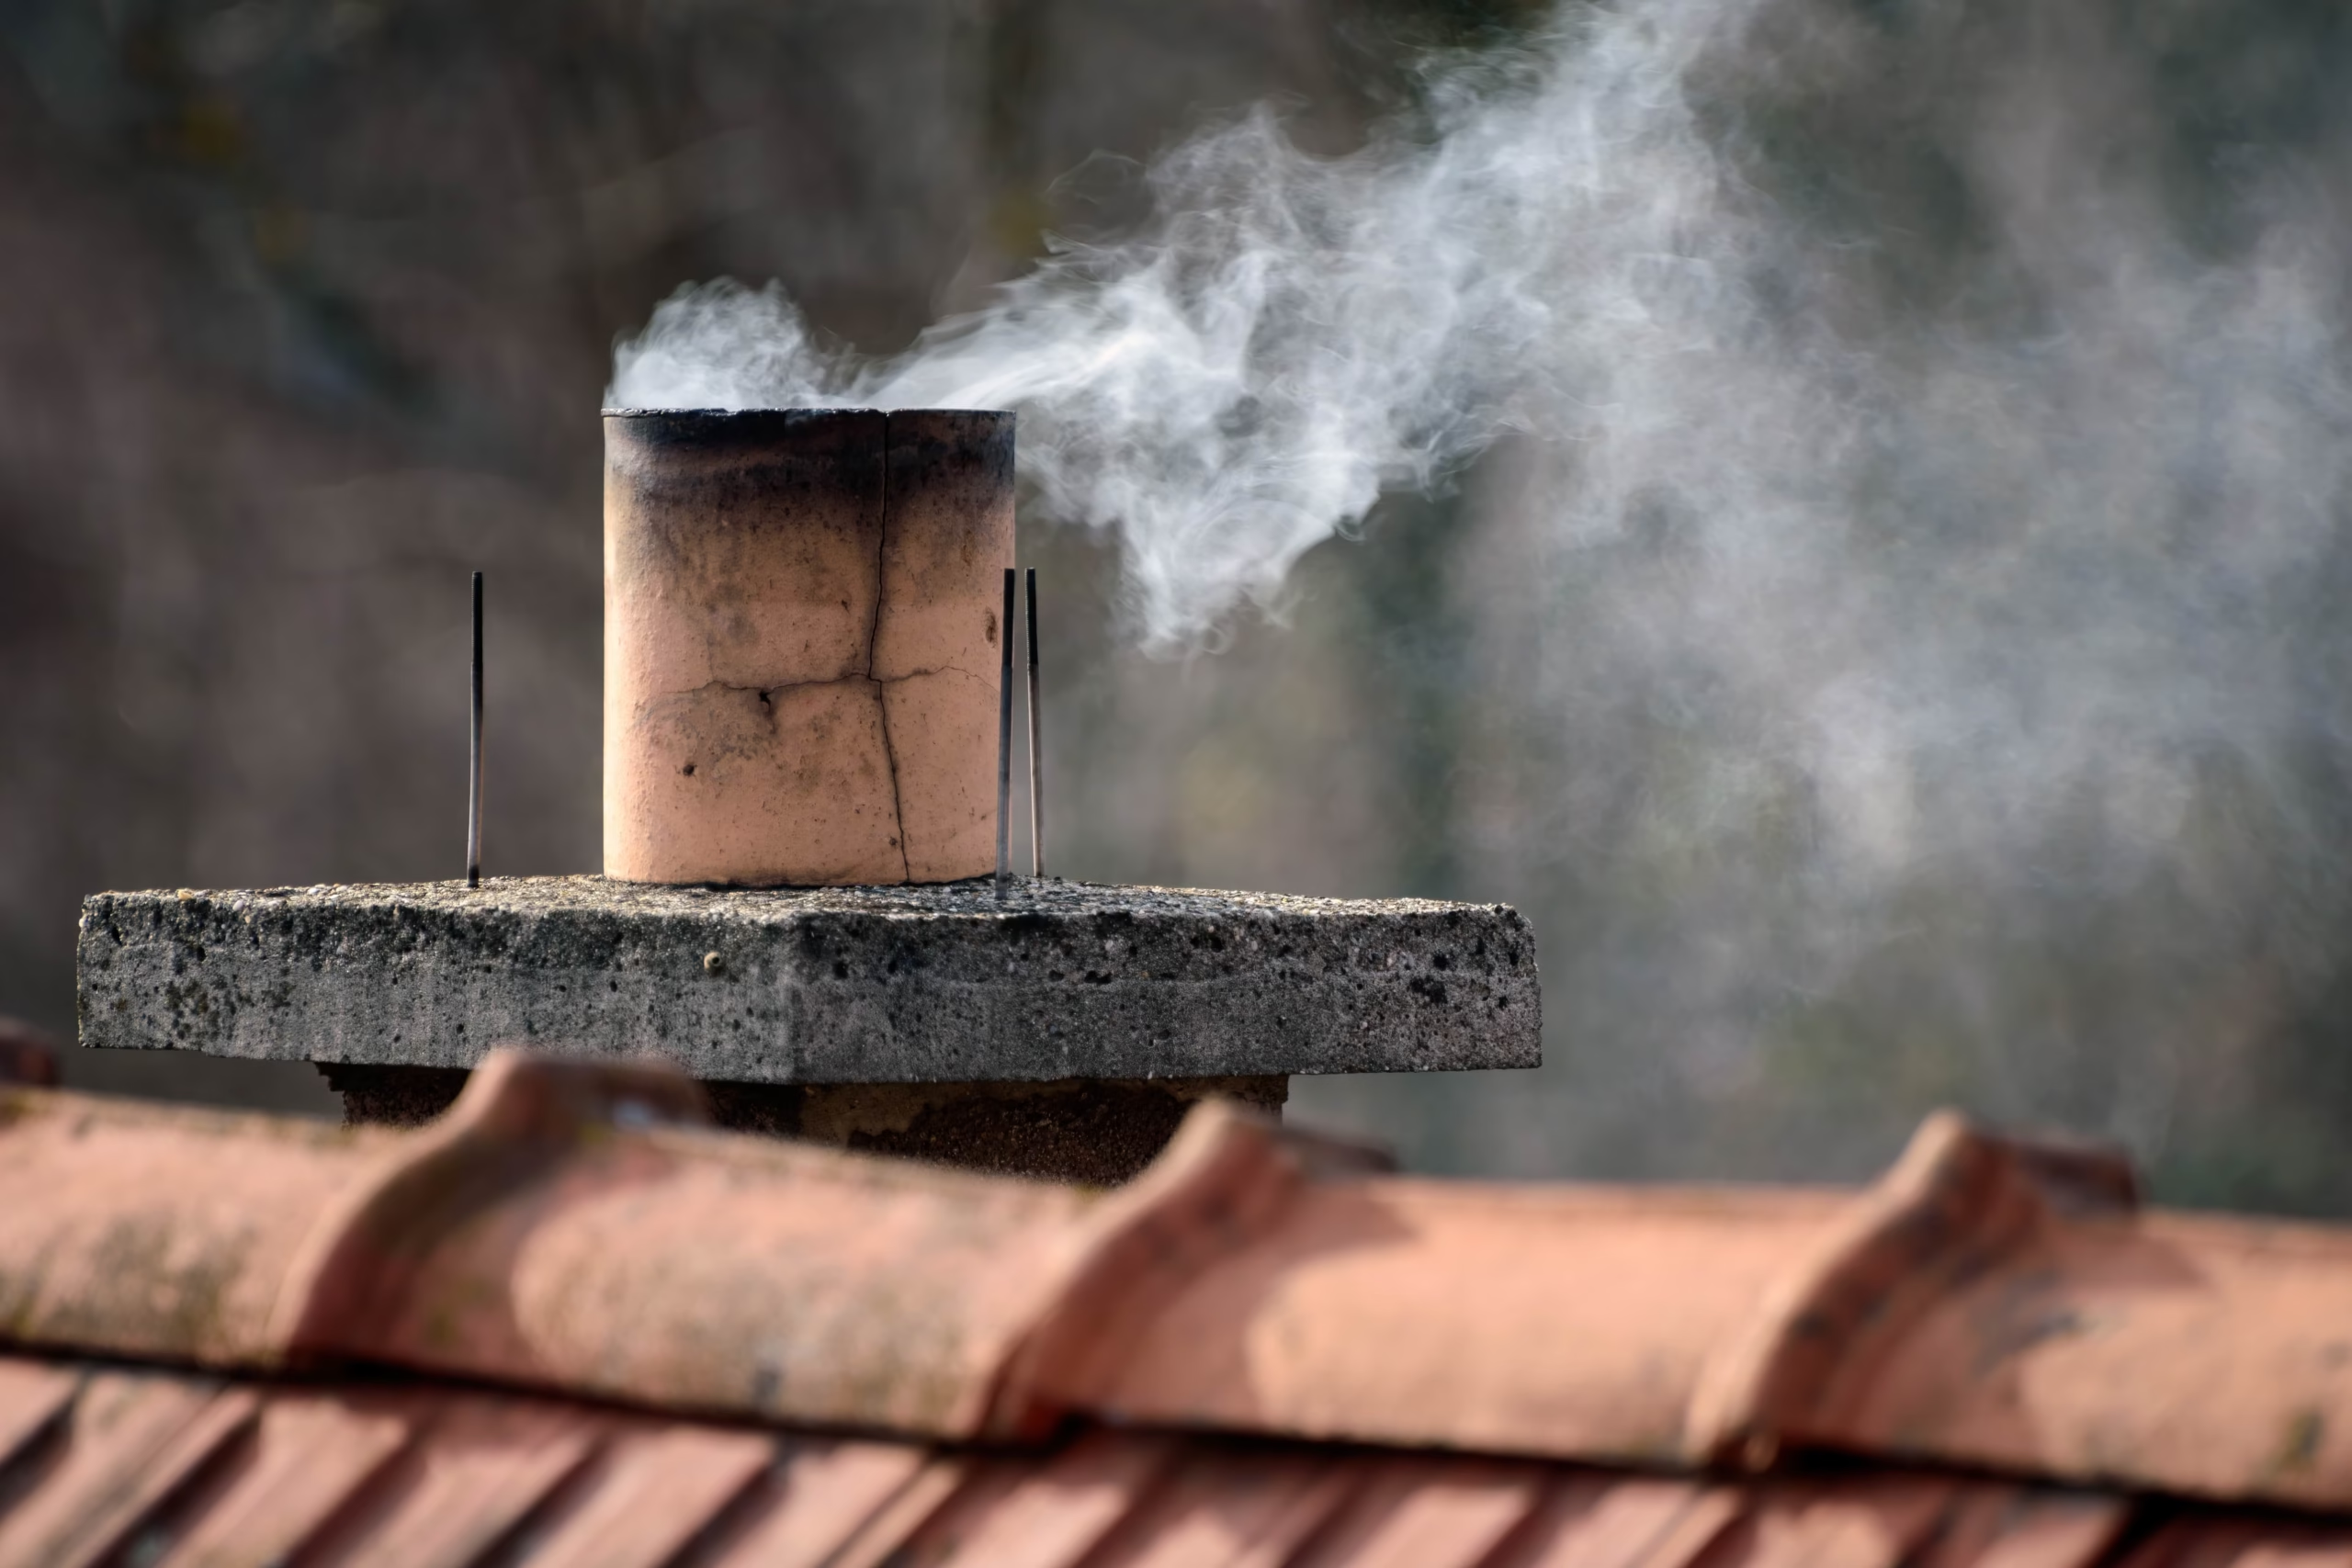
Buy EPA-certified: Modern units must meet strict EPA emission limits of 2.0 to 2.5 grams of smoke per hour to comply with 2026 clean air standards.
Table of Contents
-
Why Professional Installation Matters
-
Clearance, Weight, and Floor Requirements
-
Choosing the Right Stove Type
-
Navigating Local Building Codes
-
The Installation Process Explained
-
DIY vs. Professional Risks
-
Finding Certified Installers
-
Frequently Asked Questions
Quick Answer: Hiring a certified professional ensures your wood stove is vented perfectly, drastically reducing the risk of creosote accumulation and chimney fires. Furthermore, professional installation is usually required to keep your home insurance valid.
When homeowners search for a wood stove installation near me, they usually recognize the inherent risks of indoor fire. The “Do It Yourself” spirit is admirable for painting walls, but solid-fuel heating demands technical exactness.
Preventing Devastating Chimney Fires
A poorly calibrated stove leads to rapid, dangerous creosote accumulation. Our technicians ensure that clearances to combustible materials meet the rigorous standards established by the National Fire Protection Association.
💡 Expert Insight: “Every winter, our field crews inspect DIY setups that are dangerously close to structural drywall. Even if a wall doesn’t catch fire immediately, long-term exposure to intense heat causes ‘pyrolysis,’ which lowers the ignition temperature of the wood framing over time until it spontaneously combusts.” — Always Fire and Gas Master Technician
Efficiency and Warranty Protection
A stove without proper draft calibration burns through seasoned cordwood faster while providing less heat. Heating experts tune the venting system calibration to ensure your unit hits its peak BTU output.
Additionally, most premium manufacturers instantly void their warranty if the unit is not installed by a certified professional.
Quick Answer: Wood stoves require strict minimum distances from walls (up to 36 inches for unlisted models), sturdy subfloors to hold 500+ pounds of dead weight, and non-combustible hearth pads that extend 18 inches past the loading door.
Before buying an appliance, you must understand the physical constraints of your living room or basement.
Clearance to Combustibles
Clearance refers to the minimum safe distance between the stove and anything that can burn. According to NFPA 211 standards, unlisted wood stoves require 36 inches of clearance from combustible walls. However, listed models with properly installed heat shields can safely reduce this distance to as little as 6 inches.
Structural Weight Support
Cast iron and thick steel stoves weigh anywhere from 300 to 800 pounds. When you add the weight of a stone hearth pad, the total load is massive. Ground floors with concrete slabs require no extra reinforcement, but elevated wooden floor joists must be inspected carefully.
Non-Combustible Hearth Pads
A stove cannot sit on carpet, hardwood, or vinyl. It requires a non-combustible hearth pad for two reasons. First, it offers amber protection from stray sparks. Second, it provides thermal protection (R-value) to stop heat from baking the floor underneath. The pad must extend at least 18 inches in front of the door and 8 inches on all sides.
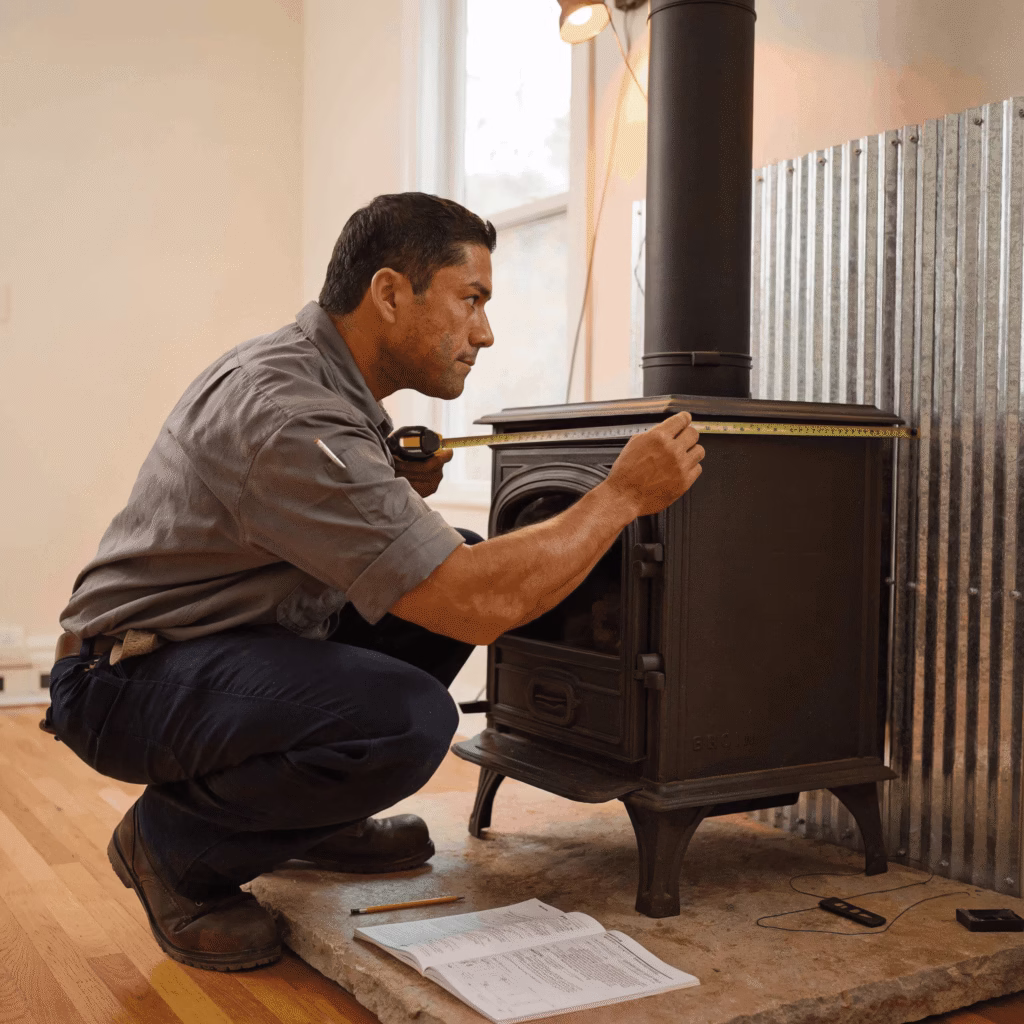
Thinking about adding a cozy wood-burning stove to your home? 🪵 Proper measurement and professional installation are key to safety and efficiency. Trust our experts in Denver, CO to handle your wood stove installation near me from start to finish. Click to learn more! #WoodStove #DenverHomes #HomeHeating #FireplaceInstallation #WoodBurningStove
Quick Answer: You can choose from heavy-duty cast iron stoves, modern high-efficiency steel models, automated pellet stoves, or fireplace inserts that transform open masonry hearths into powerful heaters.
Choosing the right equipment dictates how much you will spend on fuel and maintenance.
EPA-Certified Wood Stoves
Modern models are engineered for incredibly clean combustion. As of 2026, the Environmental Protection Agency (EPA) mandates that new wood heating appliances produce no more than 2.0 to 2.5 grams of particulate emissions per hour. Look for the white EPA tag on the back of the unit.
Fireplace Insert Stoves
If you already have a traditional open fireplace, an insert is brilliant. It slides directly into the fire box restoration space, converting a drafty, inefficient fireplace into a powerhouse heating system.
✅ Quick Tip: Always match the stove’s BTU rating to your home’s square footage. A stove that is too large will force you to run smoldering, low-temperature fires, which creates massive amounts of dangerous creosote in your chimney liner.
Quick Answer: You must pull municipal building permits before installing a wood stove. Post-installation, a city inspector will verify that the chimney height, floor protection, and emission standards match local zoning laws.
One of the most complex hurdles in a new installation is regulatory compliance. Unpermitted work can result in hefty fines.
| Requirement Category |
Standard Compliance Detail |
| Permit Requirements |
Municipal building permit must be approved before setup. |
| Clearances |
Must strictly meet manufacturer & NFPA 211 guidelines. |
| Safety Standards |
Appliance must pass UL-1482 or UL-127 safety testing. |
| Emissions Compliance |
Must meet the latest EPA clean air act limits. |
Professional installers handle this paperwork seamlessly, guaranteeing your setup complies with local laws.
Quick Answer: Installation involves an in-home assessment, placing the thermal hearth pad, routing the insulated chimney pipe through the ceiling or exterior wall, and conducting a “first burn” to test the draft seals.
When you hire Always Fire and Gas for a wood stove installation near me, our process is heavily structured.
-
Home Assessment: We evaluate your floor support, roof pitch, and room layout.
-
Hearth Preparation: We install a certified pad that matches your home’s aesthetic.
-
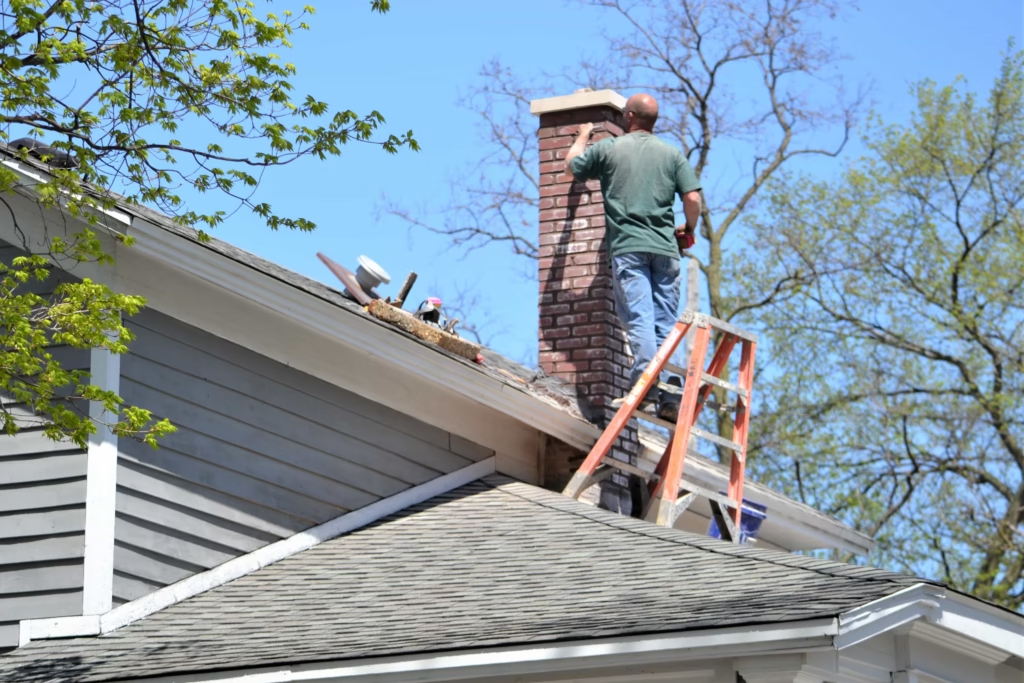
Chimney Routing: We run a “Class A” insulated stainless steel chimney pipe through the roof or wall.
-
The First Burn: We connect the stove, fire it up, and teach you proper damper management.
📊 Data Point: According to energy efficiency studies, upgrading from a traditional open masonry fireplace (which loses up to 90% of its heat up the chimney) to an EPA-certified wood stove installation near me insert can increase heating efficiency to over 75%.
Quick Answer: DIY installations carry severe risks, including deadly carbon monoxide backdrafting, voided home insurance policies, and structural house fires caused by ignoring wall clearance requirements.
Installing solid-fuel thermal systems is not a weekend hobby project. While doing it yourself saves labor costs upfront, minor errors create lethal environments.
Venting Failures and Legal Issues
Improper chimney routing causes carbon monoxide to backdraft directly into your living room. Furthermore, if a DIY installation causes a house fire, insurance adjusters will immediately deny the claim upon discovering unpermitted, uncertified work.
⚠️ Common Mistake: Never use single-wall galvanized steel stove pipe to pass through a ceiling or wall. You must use insulated double-wall or triple-wall Class A chimney pipe to prevent the surrounding wood framing from catching fire.
Quick Answer: Look for local companies with active certifications from the Chimney Safety Institute of America (CSIA) or the National Fireplace Institute (NFI). Read reviews verifying their expertise in complex structural venting.
Not all contractors understand thermal dynamics. When vetting companies for a wood stove installation near me, you must look for specific credentials.
Always ensure the technicians carry active CSIA credentials. Excellent installers also offer full lifecycle services, from the initial setup to your annual chimney sweep. A reputable provider will give you a fully itemized estimate before a single tool is lifted.
How long does a wood stove installation near me take to complete?
Most standard freestanding installations take about 4 to 8 hours (one business day). However, if we are relining a historic masonry chimney or modifying roof trusses for the vent pipe, it may take up to two days.
Can I install a wood stove directly on a hardwood floor?
No. You must place a non-combustible hearth pad underneath the appliance. This pad must offer a specific thermal R-value and extend at least 18 inches in front of the stove door to catch rolling embers.
How much does it cost to install a wood stove?
Depending on the unit and venting requirements, total costs range from $2,900 to $8,300+. This includes the appliance, the Class A stainless steel chimney piping, municipal permits, and professional labor.
Do I need a traditional brick chimney to get a wood stove?
No. You do not need a brick chimney. Certified installers can route a prefabricated, insulated stainless steel chimney pipe straight up through your ceiling and roof, or out horizontally through an exterior wall.
How often should a wood stove be inspected?
The NFPA mandates that solid-fuel heating systems and venting pipes be inspected at least once a year. Heavy winter usage may require two cleanings a year to remove hazardous creosote buildup.
Conclusion: The Always Fire and Gas Advantage
Upgrading to a high-efficiency wood heater is a brilliant way to lower utility bills and secure a reliable backup heat source for winter storms. However, safety must always come first. Strict adherence to clearance rules, floor support weight limits, and EPA emission standards is only guaranteed when you invest in a professional wood stove installation near me.
As we finalize our rebrand from Always A Sweep to Always Fire and Gas, our master-level team remains your trusted partner for total hearth safety.
Next Steps to Secure Your Installation:
-
Determine the square footage of the room you want to heat.
-
Check your preferred wall space to see if you have the required 36-inch clearance.
-
Schedule an in-home consultation with our CSIA-certified team.
Ready to transform your home with safe, reliable warmth? Browse our professional heating and gas installation services to book your consultation today!
by Always A Sweep Team | May 4, 2026 | Always Home Repair Services, inspections & sweeping, installation
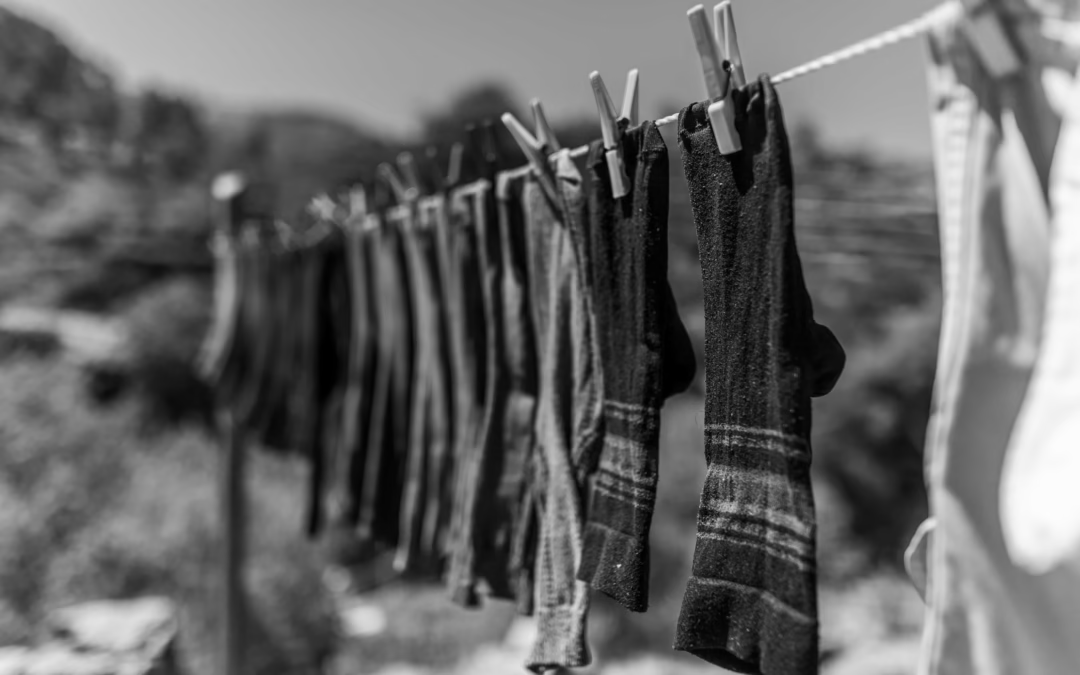
Why Your Clothes Are Taking Two Cycles to Dry (Hint: It’s Not Your Dryer)
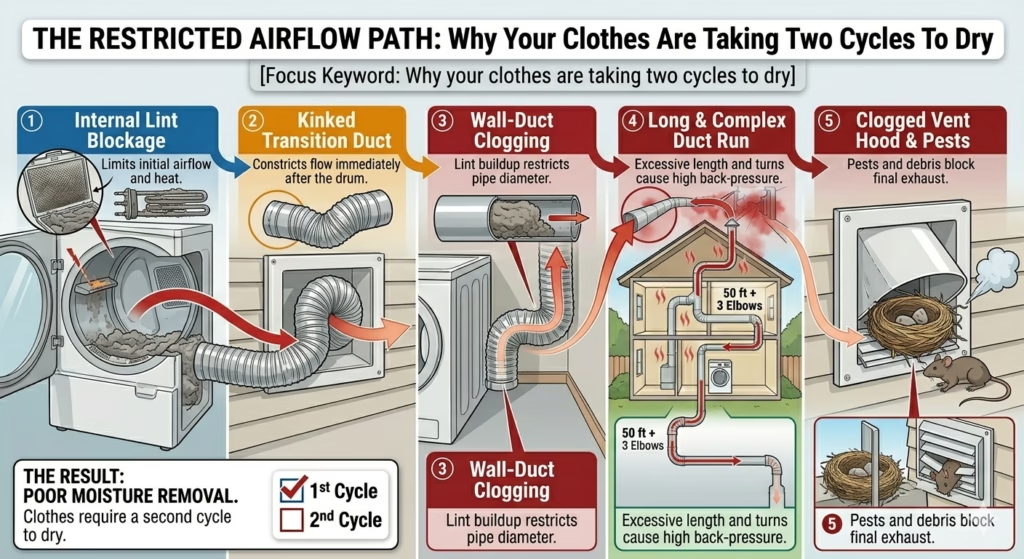
If your clothes are taking two cycles to dry, the culprit is almost always restricted airflow, not a mechanical failure of the dryer. When lint clogs your exhaust vent, moisture-laden air cannot escape, creating a “sauna effect” inside the drum that prevents evaporation. Cleaning your lint trap is not enough; a professional duct cleaning is usually required to restore efficiency and safety.
Does it feel like your laundry day has turned into a laundry weekend? You aren’t alone. One of the most common complaints homeowners have is why your clothes are taking two cycles to dry. It is a frustrating, expensive, and alarming problem that most people try to solve by prematurely buying a new appliance.
But here is the essential truth: Your dryer is likely screaming for help, not for retirement. At Always a Sweep, we specialize in the “lungs” of your home. In this 2026 update, we break down the science of airflow, the hidden dangers of lint, and why a performance restoration is the only way to save your home and your wallet.
Key Takeaways
-
Airflow is King: Heat without exhaust is just a sauna; your dryer needs to “breathe” to function.
-
Energy Drain: Running double cycles can cost the average household an extra $260 per year in utilities.
-
Fire Safety: Clogged vents are the #1 cause of over 15,000 annual home fires.
-
Professional Edge: DIY kits often cause duct damage or lint compaction; professional tools ensure a full clear.
Table of Contents
-
The Science of Airflow: Why Heat Isn’t Everything
-
The 5 Main Reasons for Double Dry Cycles
-
The Fire Risk & Mechanical Exhaustion
-
DIY vs. Professional Cleaning: A Comparison
-
Maintenance Tips for Longevity
-
Frequently Asked Questions
Quick Answer: For clothes to dry, moisture must be lifted from the fabric and physically transported out of the house. Without a clear path for exhaust, the air inside the dryer reaches 100% humidity, making further drying impossible regardless of the temperature.
To understand why your clothes are taking two cycles to dry, we need to look at the physics of moisture removal. Most people assume a dryer is essentially a large oven. While heat is necessary to pull moisture out of the fabric, that moisture-laden air has to go somewhere.
Expert Insight: In the industry, we measure this via CFM (Cubic Feet per Minute). A standard residential dryer needs roughly 100-150 CFM of unrestricted airflow to operate efficiently. When lint builds up, that number can drop below 50 CFM, doubling your drying time instantly.
Tired of running your dryer twice? Learn the science behind restricted airflow and why your clothes are taking two cycles to dry. From hidden lint clogs to pest infestations, this guide covers the 5 main culprits slowing down your laundry. Protect your home and save on energy bills with professional vent maintenance!
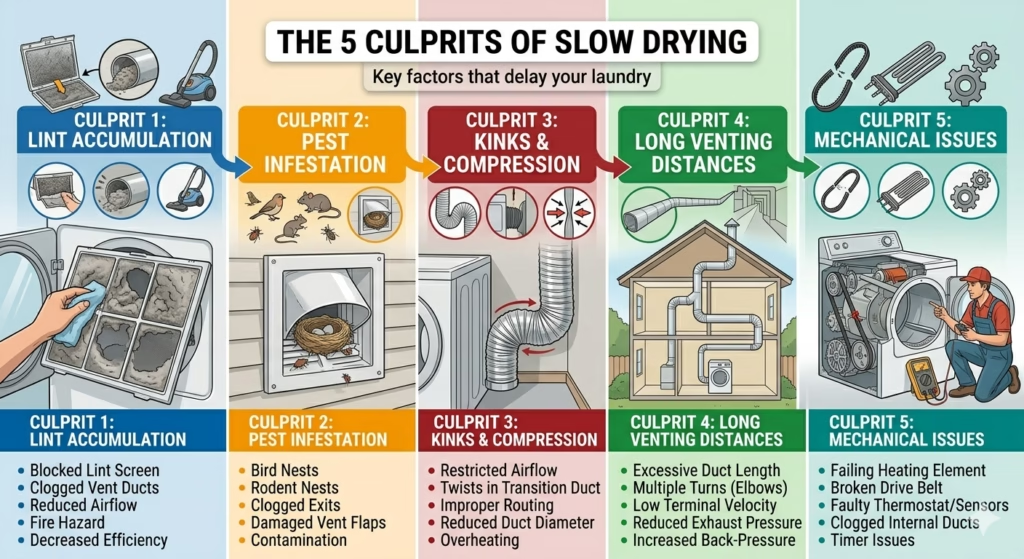
1. Massive Lint Accumulation in the Ductwork
Even if you clean your lint trap every time, about 25% of lint escapes into the internal ductwork. Over time, this builds a thick, carpet-like layer.
Quick Tip: If the top of your dryer feels hot to the touch during a cycle, it’s a sign the heat is trapped inside the cabinet instead of exiting the vent.
2. The “Hidden” External Clog
The exterior hood of your house is prime real estate for pests. Spiders, birds, and even wasps build nests in the louvers. When wet lint hits these obstructions, it creates a “paste” that seals the vent shut.
3. Crushed or Kinked Transition Hoses
Take a look behind your machine. If the dryer was pushed back too hard against the wall, the flexible foil hose is likely flattened. A crushed hose is a leading cause for why your clothes are taking two cycles to dry.
Data Point: A single 90-degree kink in a transition hose can reduce airflow by up to 30%, adding 15-20 minutes to every load.
4. Long Vent Runs and Too Many Elbows
If your laundry room is in the middle of the house, your vent might travel 30 feet to reach an outside wall. Every “elbow” (turn) in the pipe adds resistance. According to international residential codes, dryer vents should not exceed 35 feet in total length.
5. Mechanical Thermostat Failure (Rare)
While we emphasize airflow, a cycling thermostat can fail. However, a pro will always check the airflow first because 9 times out of 10, the vent is the culprit.
Is your dryer taking multiple cycles to get the job done? Don’t ignore the warning signs! This guide breaks down the 5 most common culprits behind slow drying times—from hidden lint clogs to improper venting distances. Keeping your vents clear doesn’t just save time; it prevents fire hazards and lowers energy bills. Save this checklist for your next home maintenance day!
As niche experts in home venting, Always a Sweep brings years of experience to your doorstep. We aren’t just cleaning pipes; we are performing fire prevention.
Many homeowners ignore the “burning smell” coming from their laundry room, assuming it’s just “hot dust.” This is often the smell of lint near the heating element reaching its ignition point.
According to the National Fire Protection Association (NFPA), nearly 16,000 home fires annually are caused by dryers. The #1 cause is the failure to clean the vents. Lint is one of the most flammable substances in your home. When your dryer runs for two cycles, it stays at peak operating temperature for twice as long, significantly increasing the chance of an ignition event.
We understand the appeal of a $20 “drill-powered” cleaning kit. However, as professionals, we’ve seen these lead to disaster.
| Feature |
DIY Drill Kit |
Always a Sweep Professional |
| Tool Quality |
Brittle plastic rods |
Industrial-grade flexible steel/nylon |
| Debris Removal |
Pushes lint into corners |
HEPA-filtered high-powered suction |
| Inspection |
Blind guessing |
HD Video Camera Inspection |
| Risk |
Rod snaps, duct punctures |
Zero-risk guarantee |
| Verification |
“Looks okay” |
Airflow velocity (Anemometer) test |
While you should leave the deep cleaning to the experts, these habits will keep your system running smoothly between professional visits:
-
Clean the lint screen after every single load. No exceptions.
-
Deep clean the screen: Every 6 months, wash the lint screen with soap and water to remove waxy buildup from dryer sheets.
-
Vacuum the cabinet: Once a year, use a crevice tool to vacuum the area inside the dryer where the lint screen sits.
“As of 2024, many new ‘Smart Dryers’ have sensors that trigger a ‘Check Vent’ light. Do not ignore this. If your machine is smart enough to tell you it’s choking, listen to it before the heating element snaps.”
Frequently Asked Questions
Q: My dryer is brand new and the clothes still take two cycles to dry. Why?
Answer: This is the ultimate proof that it isn’t the dryer! A new, powerful dryer trying to push air through an old, clogged pipe will actually fail faster than an old one. The vent must be cleared to match the power of the new machine.
Q: How often should I have my vents professionally cleaned?
Answer: For most families, once every 12 months is the standard. If you have a large family, pets that shed, or a long vent run (over 15 feet), you should consider a cleaning every 6-9 months.
Q: Can I just blow out the vent with a leaf blower?
Answer: We advise against this. A leaf blower lacks the concentrated agitation needed to remove “pasted” lint. Furthermore, it can blow the lint deeper into the wall cavities if there is a small break in the duct.
Final Thoughts and Stop Wasting Time
Why your clothes are taking two cycles to dry is a question with a simple, albeit vital, answer: Your home needs to breathe. Don’t settle for damp clothes and high energy bills. Trust the experts who bring professional restoration to every job.
Ready to get your laundry done in one cycle again?
-
Check your external vent for visible clogs.
-
Inspect the transition hose behind your dryer.
-
Schedule a Professional Performance Restoration with Always a Sweep to ensure your home is safe and efficient.

by Always A Sweep Team | Apr 6, 2026 | Always Home Repair Services, dryer vent repair, inspections & sweeping, installation
Dryer wall box installation for tight spaces is the proven secret to transforming a cramped, inefficient laundry room into a streamlined and safe workspace. In many North Central Florida homes, laundry closets are notoriously small, forcing homeowners to push their dryers right up against the wall. This often results in a crushed transition duct, which restricts airflow, increases energy bills, and—most dangerously—creates a significant fire hazard.
At Always A Sweep, we understand that every inch counts. By installing a recessed dryer wall box, we allow your dryer to sit flush against the wall without damaging the venting system. This simple upgrade not only saves space but also optimizes your machine’s performance.
Table of Contents
-
What is a Recessed Dryer Wall Box?
-
Why Tight Spaces Demand Better Venting
-
The Benefits of Professional Installation
-
Signs You Need a Dryer Wall Box
-
The Always A Sweep Installation Process
-
Service Areas: Expert Care in North Central Florida
-
Conclusion
What is a Recessed Dryer Wall Box?
A dryer wall box is a metal or high-impact plastic housing that is inset into the wall stud bay, directly behind the dryer. Think of it like a recessed outlet for your dryer vent. Instead of the heavy-duty flex hose protruding 4 to 6 inches from the wall, the connection happens inside the wall cavity.
When performing a dryer wall box installation for tight spaces, the goal is to provide a dedicated “home” for the transition duct. This prevents the hose from being kinked or smashed when the dryer is pushed back into its permanent position. It is a sleek, architectural solution to a common mechanical problem.
Why Tight Spaces Demand Better Venting
In tight laundry quarters, the standard “out-of-the-wall” pipe is an enemy to efficiency. When space is limited, the tendency is to shove the appliance as far back as possible.
The Danger of the “Crushed Duct”
When a dryer vent hose is crushed, the lint has nowhere to go. It begins to accumulate in the bends of the pipe and inside the dryer cabinet itself. According to the National Fire Protection Association (NFPA), nearly 16,000 home fires are caused by clothes dryers every year, with “failure to clean” being the leading cause.
Reduced Airflow and Energy Waste
A restricted vent makes your dryer work twice as hard. If you find yourself running the same load of towels for two cycles, it likely isn’t a mechanical failure of the heating element—it is a lack of airflow. A dryer wall box installation for tight spaces ensures the air moves freely, reducing wear and tear on your appliance and lowering your monthly utility costs.
The Benefits of Professional Installation
Choosing a professional for your dryer wall box installation for tight spaces ensures that the structural integrity of your wall and the safety of your gas or electric lines remain intact.
-
Fire Safety: We ensure the box is made of non-combustible materials that act as a fire block.
-
Aesthetic Appeal: No more messy hoses peeking out from behind the machine. Your laundry room looks finished and professional.
-
Easier Maintenance: Because the hose is protected, it is much easier to detach and reattach during your annual Dryer Vent Cleaning & Inspections.
-
Protection for the Wall: A recessed box protects the drywall from the heat and vibration of the dryer vent.
Signs You Need a Dryer Wall Box
How do you know if your home is a candidate for a dryer wall box installation for tight spaces? Look for these common red flags in your laundry area:
-
The “Gap” Problem: Your dryer sticks out so far that you can’t close the laundry closet doors.
-
Visible Kinks: You can see the silver flex hose flattened against the wall.
-
Long Drying Times: Your clothes take more than 45 minutes to dry a standard load.
-
Excessive Heat: The top of your dryer feels hot to the touch during operation, or the laundry room feels like a sauna.
-
Dryer Movement: If your dryer “walks” or vibrates excessively, it may be struggling against a restricted vent.
If you notice these issues, it may also be time for a Replacement / Repair / Reconnection of Dryer Vent to ensure the entire line is clear and up to code.
The Always A Sweep Installation Process
At Always A Sweep, we don’t believe in “one size fits all” solutions. Every home in North Central Florida is different, and we tailor our approach to your specific wall construction.
Step 1: Inspection
We locate the wall studs and identify any potential obstructions, such as electrical wires or water lines for the washing machine.
Step 2: Precision Cutting
We carefully remove a section of the drywall to fit the recessed box perfectly between the studs.
Step 3: Vent Connection
We secure the Dryer Wall Exhaust Termination and ensure the internal piping is sealed airtight to prevent lint leaks behind your walls.
Step 4: Final Fitting
We install the dryer wall box installation for tight spaces and connect a high-quality Dryer Flex Hose Replacement / Upgrade. We then test the airflow to ensure your dryer is breathing better than ever.
Service Areas: Expert Care in North Central Florida
Always A Sweep is proud to serve the diverse communities of North Central Florida. From historic homes with shallow walls to modern builds with tight laundry closets, we have seen it all. Our expertise extends beyond dryer vents to full-scale chimney and gas system safety.
-
Ocala & Gainesville: We provide rapid response for dryer vent emergencies and routine safety upgrades.
-
The Villages & Nearby: We help homeowners maximize their utility spaces and ensure all gas connections are up to modern safety standards.
-
Comprehensive Safety: While we are there for your dryer, we can also perform Gas System Inspections or a Fireplace Sweep to keep your entire home protected.
For residents interested in broader household safety and energy standards, the U.S. Department of Energy provides excellent resources on appliance efficiency and ventilation.
Beyond the Box: Total Laundry Safety
A dryer wall box installation for tight spaces is a foundational step, but maintenance is what keeps your home safe long-term.
-
Clean the Lint Screen: Every single load, without exception.
-
Annual Professional Cleaning: Even with a wall box, lint can accumulate in the vertical sections of your vent or at the Roof Termination Replacement point.
-
Check the Outside Vent: Ensure the exterior flap opens freely and isn’t blocked by bird nests or debris.
Conclusion: Reclaim Your Space Today
Don’t let a small laundry room compromise your home’s safety or your machine’s efficiency. A dryer wall box installation for tight spaces is a low-cost, high-impact investment that pays for itself in lower energy bills and peace of mind.
At Always A Sweep, we are committed to the safety of our North Central Florida neighbors. From chimney relining to dryer vent upgrades, our team brings precision and expertise to every job. Stop fighting with your dryer hose and start enjoying a more organized, safer home.
Contact Always A Sweep today to schedule your dryer wall box installation and optimize your laundry room!
by Always A Sweep Team | Mar 23, 2026 | Always Home Repair Services, Gas leakage, inspections & sweeping, installation
Is Your Gas Fireplace Leaking? 5 Emergency Signs & What to Do Next
If you suspect a gas leak in your home, time is your most valuable asset. While gas fireplaces offer warmth and ambiance, a malfunction can lead to carbon monoxide poisoning or fire hazards. Knowing when to call for emergency gas leak detection services near me can protect your family and your property from a preventable disaster.
At Always A Sweep, we prioritize your home’s safety. From chimney inspections to gas line integrity, our mission is to ensure your heating systems are a source of comfort, not a source of danger.
Table of Contents
-
The “Rotten Egg” Myth: How Gas Leaks Actually Smell
-
5 Emergency Signs of a Gas Fireplace Leak
-
Immediate Steps: What to Do Before Help Arrives
-
Why Professional Detection Beats DIY Methods
-
The Role of Carbon Monoxide Detectors
-
EEAT: Why Local Expertise Matters in a Crisis
-
Conclusion: Prevention is the Best Medicine
The “Rotten Egg” Myth: How Gas Leaks Actually Smell
Natural gas is inherently odorless and colorless. To make it detectable to the human nose, utility companies add a chemical called mercaptan. This creates the distinct “rotten egg” or sulfurous odor most people associate with a leak.
However, “odor fade” can occur if the gas travels through soil or if the leak is very small. This is why searching for emergency gas leak detection services near me is vital if you have any physical symptoms, even if you don’t smell a thing.
5 Emergency Signs of a Gas Fireplace Leak
If you notice any of the following, do not wait. These are the red flags that require immediate professional intervention:
-
The Hissing Sound: A distinct whistling or hissing noise near the gas valve or fireplace connection indicates gas escaping under pressure.
-
Dying Houseplants: Natural gas displaces oxygen. If your indoor plants are suddenly wilting or turning yellow despite proper care, there may be a slow leak in the vicinity.
-
Physical Symptoms: Residents may experience unexplained headaches, dizziness, nausea, or fatigue.
-
White Mist or Bubbles: If the leak is near an exterior line, you might see a “cloud” of mist. If you suspect a leak in a pipe, the soap bubble test (applying soapy water to the pipe) will show growing bubbles at the leak site.
-
Soot or Scorching: Excessive soot buildup or scorching on the outside of the fireplace can indicate improper combustion and potential gas venting issues.
Immediate Steps: What to Do Before Help Arrives
If you are currently searching for emergency gas leak detection services near me because you smell gas, follow these steps immediately:
-
Evacuate: Get all people and pets out of the house.
-
Don’t Touch Electronics: Do not flip light switches, use the phone inside, or open the garage door. A single spark can ignite the gas.
-
Open Windows: If it is safe to do so on your way out, crack the windows to allow ventilation.
-
Shut Off the Main Valve: If you know where your gas meter is and have a wrench, turn the valve to the “off” position (perpendicular to the pipe).
-
Call from Outside: Dial 911 or your local gas utility once you are at a safe distance.
Why Professional Detection Beats DIY Methods
While “bubble tests” are okay for minor checks, true emergency gas leak detection services near me use calibrated equipment. Professionals at Always A Sweep and certified gas technicians use:
-
Electronic Combustible Gas Detectors: These can find leaks as small as 50 parts per million (ppm).
-
Ultrasonic Leak Detectors: These “listen” for the sound frequency of escaping gas that the human ear cannot detect.
The Role of Carbon Monoxide Detectors
A gas leak isn’t the only danger; improper burning leads to Carbon Monoxide (CO). According to the Consumer Product Safety Commission (CPSC), CO is the “silent killer.” Ensure your home has CO detectors on every level and near sleeping areas. If your CO alarm sounds, it is an automatic emergency.
Why Local Expertise Matters
When it involves gas, “Experience” isn’t just a buzzword—it’s a requirement. Finding emergency gas leak detection services near me ensures that the technician understands local building codes and the specific climate-related wear and tear common in your area.
At Always A Sweep, our years of experience in fireplace safety mean we don’t just find the leak; we understand the structural “why” behind it. We provide trustworthy advice because your family’s safety is our primary metric of success.
Conclusion: Prevention is the Best Medicine
The best way to avoid a crisis is through annual maintenance. A routine inspection of your gas fireplace, lines, and venting systems can catch micro-leaks before they become life-threatening.
Is your fireplace overdue for a check-up? Don’t wait for an emergency. Schedule a professional safety inspection with Always A Sweep today to ensure your home remains a safe haven.
by Always A Sweep Team | Mar 5, 2026 | chimney repair, dryer vent repair, installation
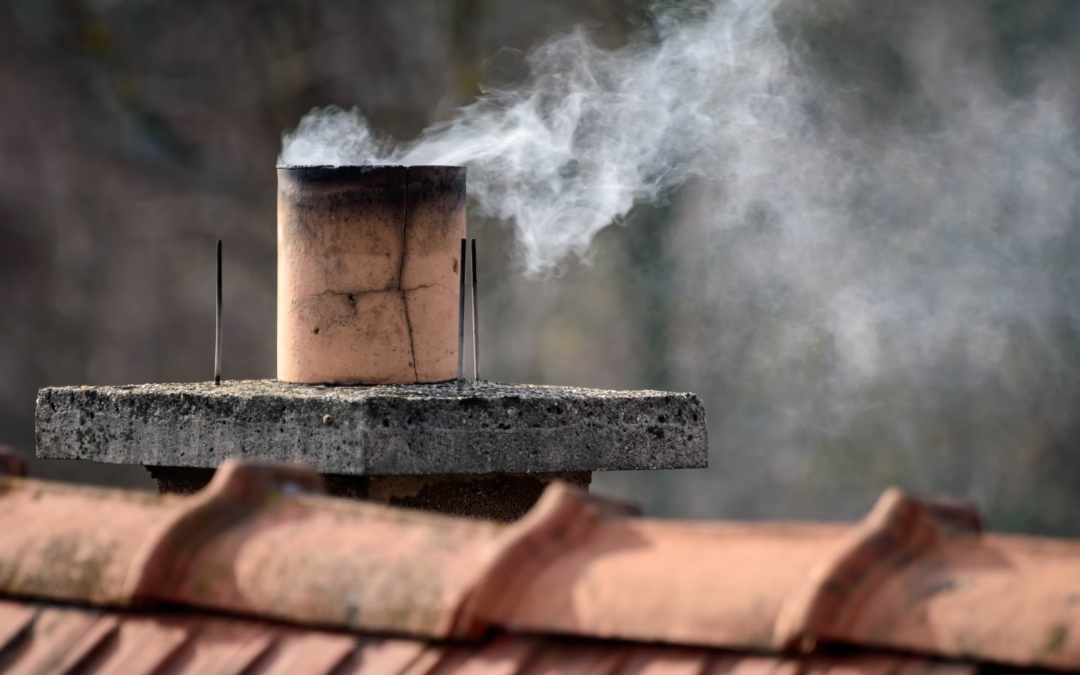
Why Your Florida Home Has a Stinky Chimney This Summer
If you’ve lived in Florida for even one summer, you know that the air doesn’t just get hot, it gets heavy. For many homeowners, this seasonal shift brings an unwelcome guest into the living room: the unmistakable aroma of an old campfire, wet asphalt, or even rotting organic matter.
A stinky chimney is a common but frustrating phenomenon. While you aren’t lighting fires in July, your chimney is still “breathing”. Because of the unique climate in the Sunshine State, your fireplace can effectively become a giant straw, sucking humid air and foul odors into your home.
In this guide, we will break down the complex physics of chimney downdrafts, the chemistry of creosote, and why professional intervention is the only way to safeguard your home’s air quality and structural integrity.
To understand the stinky chimney effect, we must look at “The Stack Effect“. In the winter, hot air in the chimney rises because it is more buoyant than the cold outside air. This creates a vacuum that pulls smoke up and out.
In a Florida summer, this process reverses. Your home is air-conditioned (cool, dense air), while the outside air is scorching (hot, light air). This creates a pressure imbalance.
The Downdraft Phenomenon
When your A/C runs, or when you use exhaust fans in the kitchen or bathroom, your home becomes a “negative pressure zone”. It desperately needs to pull air from somewhere to equalize. The easiest path? The chimney. As hot air is pushed down the flue by the outside atmosphere and pulled in by your A/C, it picks up every odor molecule inside the chimney and deposits them in your living room.
The Florida Factor: Humidity and the Stinky Chimney
Florida is notorious for its 80%+ humidity levels. Moisture is the “fuel” for a stinky chimney.
Masonry chimneys are constructed of porous materials like brick, mortar, and stone. These materials act like a sponge, absorbing water vapor from the air. When this moisture meets the carbon deposits (soot and creosote) inside your flue, it creates a chemical reaction. This “stew” of damp carbon is what produces that pungent, acrid smell.
Furthermore, Florida’s frequent summer thunderstorms can introduce actual liquid water into the flue if your chimney cap is damaged, drastically accelerating the odor production.
Creosote Chemistry: What You Are Actually Smelling
The primary source of a stinky chimney is creosote. This is a byproduct of wood combustion that condenses on the cool walls of your flue.
The Three Stages of Creosote:
- Stage 1 (Soot): A dusty, black powder that is easily removed.
- Stage 2 (Crunchy): Flaked carbon that resembles burnt popcorn.
- Stage 3 (Glazed): A thick, shiny, tar-like substance that is highly flammable and extremely odorous.
During the summer, Stage 3 creosote begins to “off-gas.” The heat causes the oils in the tar to vaporize. This isn’t just a smell issue; it’s a safety issue. Creosote is the leading cause of chimney fires in the United States, as noted by the NFPA.
The Hidden Dangers of Animal Debris
Sometimes, a stinky chimney isn’t caused by fire byproducts at all. In Florida, many critters, including Chimney Swifts, raccoons, and squirrels, view your chimney as a perfect summer rental.
- Nesting Material: Dried leaves, twigs, and straw are highly absorbent and will smell like rotting vegetation when damp.
- Biological Waste: Animal droppings inside a warm, humid flue create a significant health hazard (such as Histoplasmosis) and a foul, ammonia-like odor.
- Decomposition: If an animal becomes trapped and dies in the flue, the smell can become unbearable within 48 hours.
While “Do It Yourself” projects are popular, chimney maintenance is not a DIY task. Attempting to clean a stinky chimney on your own can lead to disastrous results.
1. Ineffective Cleaning
Consumer brushes available at hardware stores are often too soft to remove Stage 2 or Stage 3 creosote. If you only remove the surface dust, the source of the smell remains.
2. Health Risks
Without professional-grade HEPA vacuums, a DIY attempt will likely blow fine soot particles into your home. These particles can stain furniture and, more importantly, enter your lungs. Creosote contains carcinogens that should never be handled without proper PPE.
3. Structural Blind Spots
A professional sweep doesn’t just clean; they inspect. A DIYer will likely miss a cracked flue liner or a rusted damper. Ignoring these issues can lead to carbon monoxide leaks or house fires when you finally light a fire in the winter.
Professional Solutions: Beyond the Basic Sweep
At Always a Sweep, we utilize advanced technology to address a stinky chimney at its source. Our process adheres to the highest EEAT principles to ensure your home is safe.
Video Camera Inspections
We use specialized, high-definition cameras that travel the length of your flue. This allows us to see “invisible” cracks or blockages that a standard flashlight inspection would miss.
Chemical Descaling
For heavy creosote odors, we apply industrial-strength chemical agents. these break down the molecular bond of glazed creosote, allowing it to be safely swept away. This is a task that requires professional certification to perform safely.
Mechanical Cleaning
Using heavy-duty, rotary power-sweeping tools, we can restore your flue to its original diameter, significantly reducing the surface area where odors can cling.
Long-Term Prevention: The Top-Sealing Damper
If your home suffers from chronic negative pressure, a standard throat damper (the metal plate just above the firebox) is rarely enough to stop a stinky chimney.
We recommend the installation of a Top-Sealing Damper.
- How it Works: This device is installed at the very top of the chimney flue. It features a rubber gasket that creates an airtight seal.
- The Benefit: It keeps the cool air in and the humid Florida air out. By sealing the chimney at the top, you prevent the “straw effect” entirely.
Conclusion: Restoring Your Home’s Freshness
A stinky chimney is a signal that your home’s ventilation system is out of balance. Between Florida’s oppressive humidity and the chemical nature of creosote, these odors will not simply “go away” on their own.
By choosing a professional service like Always a Sweep, you are investing in the longevity of your home and the health of your family. Our expert team provides the deep cleaning and structural repairs necessary to eliminate odors and ensure your fireplace is ready for the first cold snap of the year.
Don’t let a stinky chimney ruin your summer. Trust the experts who understand Florida’s unique environmental challenges.
by Always A Sweep Team | Feb 16, 2026 | Gas leakage, inspections & sweeping, installation
Installing a gas range line connection in Ocala is more than just a kitchen upgrade; it’s a transformation of your culinary lifestyle. Whether you are a gourmet chef or a busy parent, there is a reason professional kitchens across Florida rely on gas. It offers precision, instant heat, and a level of control that electric coils simply cannot match.
However, transitioning from electric to gas isn’t as simple as “plug and play.” It involves complex infrastructure, local Marion County building codes, and, most importantly, the high stakes of gas safety. This comprehensive guide explores everything you need to know about the installation process, the costs involved, and why a professional touch is non-negotiable for this high-powered upgrade.
The Allure of the Gas Range: Why Ocala Homeowners are Making the Switch
In the heart of Florida, homeowners are increasingly looking for ways to modernize their historic homes or customize new builds. A gas range line connection in Ocala is becoming a top priority for those who want better heat control, faster cooking times, and lower long‑term energy costs.
When you invest in a professional installation, you are gaining:
- Precision Temperature Control: Gas burners heat instantly. This means your water boils faster, and you can simmer low and slow without guessing—ideal for delicate sauces.
- Reliability During Storm Season: In the event of a Florida power outage, you can still cook for your family. Most gas ranges allow for manual lighting when the electricity is out.
- Energy Efficiency: Natural gas and propane are often more cost-effective than electricity for high-heat cooking in the Southeast.
Technical Breakdown of a Gas Range Line Connection in Ocala
A gas range line connection in Ocala involves tapping into your home’s existing gas main or propane tank and running a dedicated line to the kitchen. This isn’t just a hose; it’s a pressurized system that must be airtight and properly sized.
Sizing the Pipe for Performance
Gas pressure drops over distance. If your line is too small or the run is too long, your oven might not reach the correct temperature, or your burners may flicker. Professionals use the International Fuel Gas Code (IFGC) formulas to determine the correct pipe diameter for your specific home layout.
Materials Used: Black Iron vs. CSST
In Ocala, black iron is the standard for interior lines due to its durability. Some modern installations use CSST (Corrugated Stainless Steel Tubing). However, if CSST is used, it must be properly grounded to prevent damage from Florida’s frequent lightning strikes.
Expert Note: While flexible gas connectors are used for the final attachment to the appliance, long runs must always use rigid piping or approved CSST to meet safety standards.
Most Ocala residents use either municipal natural gas or onsite propane. Each requires specific orifice sizes on your range. A professional technician ensures that your gas range line connection in Ocala is calibrated for the specific fuel type entering your home.
If you are located in a rural part of Marion County, you likely use a propane tank. Propane burns hotter than natural gas, meaning the “conversion kit” included with your stove must be installed correctly by a licensed gas professional.
The Dangers of DIY: Why “Handyman” Hacks Are a Risk
It is tempting to look up a tutorial and think you can just tighten a few pipes. Stop right there. A DIY gas range line connection in Ocala is not just discouraged, it is dangerous.
- Carbon Monoxide Poisoning: An improper connection can lead to incomplete combustion, releasing CO. CO is an odorless, colorless, and deadly gas.
- Fire and Explosion Hazards: Gas leaks are volatile. A single spark from a light switch can ignite a room.
- Insurance Voidance: If you install your own gas line and a fire occurs, your homeowner’s insurance provider may deny your claim.
- How to Detect a Gas Leak: Utility companies add mercaptan to give gas a “rotten egg” smell. If you smell this, evacuate immediately.
Ocala has specific geological factors that influence building codes. For example, the proximity to the limestone shelf can affect how exterior lines are buried.
A gas range line connection in Ocala must adhere to the Florida Building Code. Ocala and Marion County require permits for gas line work to ensure the installation meets local safety regulations. A professional installer like Always A Sweep typically handles these permits on your behalf, ensuring your home remains compliant with local law.
Step-by-Step: The Professional Installation Process
When you hire a pro for your gas range line connection in Ocala, you are paying for a rigorous safety protocol.
- Site Assessment: Identifying the closest gas manifold.
- Permit Acquisition: Registering the project with Marion County Building Safety.
- Tapping the Main: Shutting off gas and installing a “T” joint.
- Running the Line: Routing through walls or attics.
- Pressure and Leak Testing: Using manometers and electronic gas detectors to ensure 0% leakage.
- The Final Hookup: Attaching the flexible connector and shut-off valve.
What should you expect to pay for a gas range line connection in Ocala? Prices vary based on distance and accessibility.
| Service Level |
Estimated Cost |
Impact Factors |
| Simple Connection |
$300 – $600 |
Short pipe run, easy access. |
| Moderate Installation |
$600 – $1,200 |
Average distance, standard routing. |
| Complex Installation |
$1,200+ |
Long runs, through slabs, or multiple turns. |
Note: These are estimates; a licensed installer can provide exact pricing after an inspection.
On average, a professional installation provides a massive return on investment. Potential buyers in the Ocala real estate market prioritize homes with gas cooking capabilities.
Beyond the kitchen, a gas range line connection in Ocala is often the first step in a larger gas-powered lifestyle. Once you have a gas line, you can easily extend it to:
- Gas Fireplaces for chilly Florida winters.
- Outdoor Kitchens and BBQ Grills.
- Tankless Water Heaters.
Choosing a Trusted Professional in Ocala
When selecting a licensed gas line installer, look for the following:
- Valid License and Insurance: Always ask to see a contractor license.
- Local Experience: A company familiar with Ocala understands local code nuances.
- Positive Reputation: Check Google reviews and testimonials from neighbors.
- Written Estimates: A reliable contractor provides clear pricing.
Frequently Asked Questions
How long does a gas range line connection in Ocala take?
Typically, 3 to 6 hours, depending on the complexity of the pipe run.
Can I use my old electric outlet?
Gas ranges require a standard 110v outlet for the clock and igniter. You will likely no longer need the heavy-duty 220v outlet.
Is maintenance required?
Yes. You should clean burner ports and check for a crisp blue flame. A yellow flame indicates incomplete combustion.
Why Always A Sweep is the Smart Choice for Ocala Homeowners
At Always A Sweep, we specialize in gas range line connection in Ocala, maintenance, and appliance connections. We understand the synergy between your kitchen’s exhaust system and your gas appliances. Our team ensures your ventilation system is properly rated for the BTUs of your new range.
Don’t gamble with your family’s safety. Let our certified professionals handle the heavy lifting, ensuring your new kitchen is as safe as it is beautiful.
Ready to upgrade your kitchen? Contact Always A Sweep today to schedule an inspection and get a quote for your professional gas line installation.