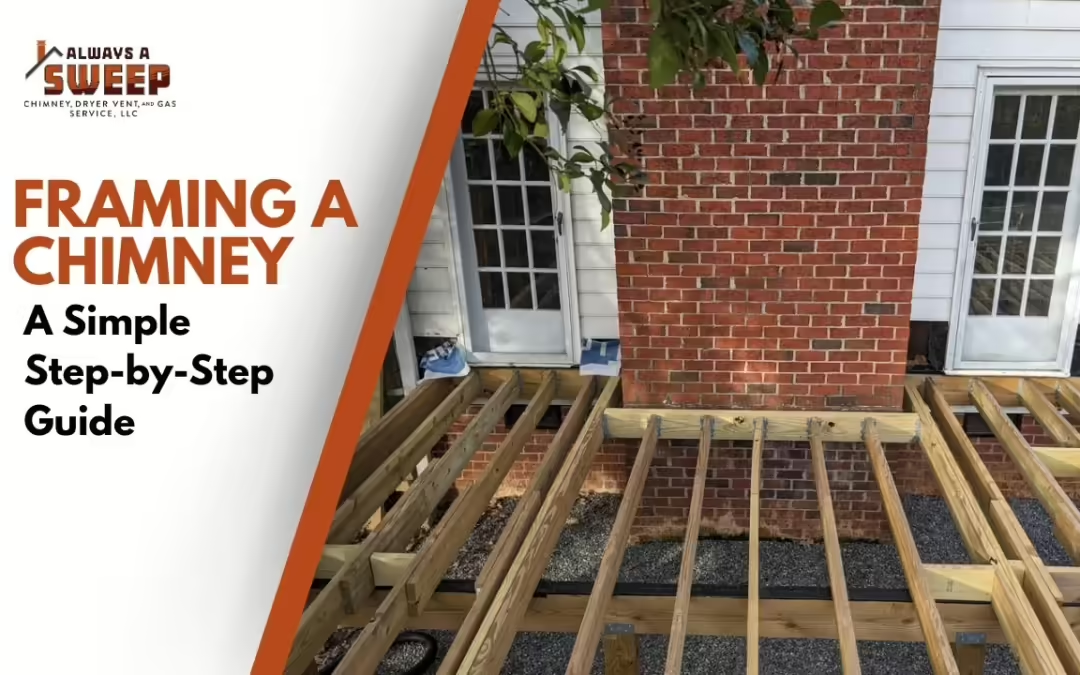
Framing a Chimney: A Simple Step-by-Step Guide

Framing a Chimney: A Simple Step-by-Step Guide

When it comes to home construction or renovation, ensuring the structural safety of your chimney is essential. Framing a chimney correctly not only supports the overall structure but also protects your home from potential fire hazards. Whether you’re building from scratch or upgrading an existing chimney, understanding the right techniques and following clear steps will make a huge difference.
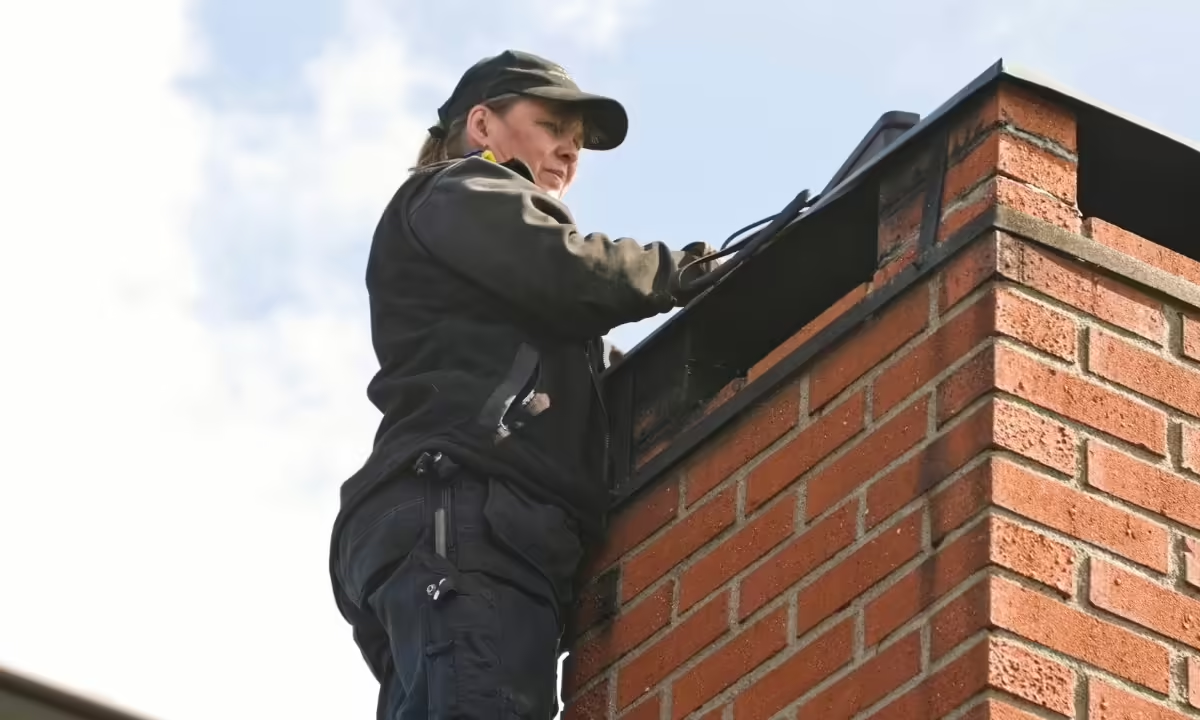
Why Framing a Chimney Matters

The chimney plays a critical role in maintaining proper ventilation and fire safety in your home. Poorly framed chimneys can lead to leaks, structural issues, and even fire risks. Framing a chimney might seem like a complex task, but with proper guidance and simple instructions, it becomes more manageable.

In this blog, we’ll break down the process of framing a chimney step-by-step, ensuring your structure is safe and built to last.

Step 1: Understand the Basics

Before starting the project, gather essential materials. Framing a chimney involves wood, metal flashing, and fire-resistant insulation. These materials help build a solid frame that can withstand extreme temperatures and maintain structural integrity.

A well-built chimney frame ensures that smoke and gases are properly vented out of your home. When framing a chimney, make sure the foundation is strong enough to support the weight of the structure.

Quick Tip: Always double-check local building codes to ensure your chimney frame meets safety regulations.

Step 2: Measure and Prepare

Accurate measurements are crucial for framing a chimney. Begin by determining the size of the chimney you need based on your fireplace or stove. Once the dimensions are clear, mark the area where the chimney will be framed. Use these markings to lay the foundation.

  • Ensure Proper Alignment: When framing a chimney, it’s essential to keep the structure aligned with the walls and roof. Misaligned framing can lead to cracks and instability over time.
  • Check the Height: The height of your chimney plays a key role in ventilation. Typically, chimneys need to extend at least two feet above the roofline.

Step 3: Build the Frame

With the area prepped and measurements in place, it’s time to start building the frame. Use high-quality lumber to ensure stability. Secure the wood framing around the base and build upwards.

  • Spacing Matters: Proper spacing between the wood beams is necessary to ensure the chimney can withstand both the weight and heat.
  • Install Metal Flashing: Flashing is an important material in chimney construction. It’s used to seal the joints where the chimney meets the roof, preventing leaks and water damage.

Quick Tip: Make sure the framing includes space for insulation to prevent heat from transferring to other parts of the home.

Step 4: Add Insulation

Insulating your chimney frame is crucial for maintaining heat efficiency and safety. Fire-resistant insulation is recommended, as it helps block heat from escaping and keeps the framing cool. When framing a chimney, insulation should be placed between the framing and the outer chimney walls.

  • Choose Fireproof Insulation: Not all insulation materials are created equal. Use fireproof insulation designed for high-heat areas, ensuring safety and longevity.

Step 5: Secure the Chimney Cap

Once the frame is complete and insulation is in place, the next step is installing the chimney cap. The chimney cap prevents debris, animals, and moisture from entering the chimney. It also keeps sparks from escaping.

  • Select a Durable Cap: Chimney caps come in various materials, such as stainless steel or copper. Choose one that matches the aesthetics of your home while providing maximum protection.

Quick Fact: A chimney cap can prevent up to 60% of downdrafts, improving the efficiency of your fireplace or stove.

Step 6: Inspect and Maintain

Framing a chimney is not a set-it-and-forget-it task. Regular inspection and maintenance are key to ensuring the frame and overall structure remain in good condition. Look for any signs of wear, such as cracks in the framing or gaps in the insulation.

  • Inspect Flashing: Check the flashing regularly for rust or damage, as this can lead to water leaks and weaken the framing.

Quick Fact: Annual chimney inspections can catch small issues before they turn into costly repairs.

Common Mistakes to Avoid When Framing a Chimney

When framing a chimney, even small errors can lead to long-term damage. Here are some common mistakes to avoid:

  • Incorrect Measurements: If the chimney frame is not properly measured, it can lead to misalignment and weaken the overall structure.
  • Neglecting Insulation: Skipping insulation or using low-quality materials can cause heat to transfer to the framing, increasing fire risk.
  • Skipping Regular Inspections: Failing to inspect your chimney can result in damage going unnoticed until it becomes a bigger, more expensive issue.

Pro Tip: Always consult with a professional if you are unsure about any step in framing a chimney.

Conclusion

Framing a chimney might seem like a challenging task, but with the right approach, materials, and attention to detail, you can ensure your chimney is built to last. Following the steps outlined in this guide will not only improve the structural integrity of your chimney but also enhance the safety of your home.

Regular inspection and maintenance play a key role in keeping your chimney frame in top condition. Whether you’re a DIY enthusiast or hiring a contractor, knowing the basics of framing a chimney will help ensure the job is done right.

Call to Action:
Ready to frame a chimney for your home? Contact Always A Sweep today for professional guidance and chimney services. Let’s ensure your chimney is safe, efficient, and built to last!

Keep Your Home Safe and Efficient with a Dryer Vent Repair Kit

Keep Your Home Safe and Efficient with a Dryer Vent Repair Kit

Keep Your Home Safe and Efficient with a Dryer Vent Repair Kit

A well-functioning dryer is essential in every home, but did you know that one of the leading causes of dryer malfunctions is a faulty vent? Over time, lint, debris, and other blockages can clog your dryer vent, leading to inefficiency, longer drying times, and even potential fire hazards. The good news is that with the right dryer vent repair kit, you can easily maintain your dryer’s performance, improve energy efficiency, and most importantly, ensure the safety of your home. In this blog, we’ll explore the importance of maintaining your dryer vent, how a repair kit works, and the best tips for keeping your dryer vent in top condition.

Why Is a Dryer Vent Repair Kit Essential?

Dryer vents play a critical role in removing the hot, moist air from your dryer to the outside. Over time, lint and debris can build up inside the vent, causing a range of issues. A dryer vent repair kit offers a simple, effective solution for maintaining your dryer’s performance and avoiding potential dangers.

Fact 1:

Clogged dryer vents are one of the leading causes of home fires, with thousands reported every year.

Fact 2:

Cleaning and maintaining your dryer vent can improve your dryer’s efficiency by up to 30%.

Fact 3:

Regular dryer vent maintenance can extend the lifespan of your dryer by preventing wear and tear.

How Does a Dryer Vent Repair Kit Work?

A dryer vent repair kit is designed to clean out blockages, repair any damage, and ensure your vent is working properly. Most kits include specialized brushes, flexible rods, and other tools that help you reach deep into the vent system to remove any built-up lint or debris.

Components of a Dryer Vent Repair Kit

  • Flexible rods: These rods allow you to extend deep into the vent, even around bends and corners.
  • Specialized brushes: Brushes are used to scrub away lint and other debris without damaging the vent walls.
  • Vacuum attachments: Some kits come with vacuum attachments to help suck out the loosened lint and dust more efficiently.

Using the tools provided, homeowners can safely clean their dryer vent, improving airflow and reducing the risk of a fire.

Signs You Need a Dryer Vent Repair Kit

It’s important to recognize the signs that your dryer vent may need repair or cleaning. Here are a few common indicators that it’s time to use a dryer vent repair kit:

Longer Drying Times

If your clothes take much longer to dry than they used to, it’s often due to poor ventilation. A clogged vent restricts airflow, which forces your dryer to work harder.

Burning Smell

A burning smell coming from your dryer is a red flag. This is usually caused by lint trapped in the vent overheating. If you notice this odor, it’s essential to clean your vent immediately to avoid a potential fire.

Excessive Lint

If you find an unusual amount of lint in your dryer or on your clothes after drying, it may be a sign that your dryer vent is blocked. Lint should be properly expelled through the vent, but a blockage can cause it to back up.

Benefits of Using a Dryer Vent Repair Kit

Regular maintenance with a dryer vent repair kit offers several benefits, both for your safety and your appliance’s performance.

Improved Efficiency

A clear vent allows your dryer to work more efficiently. By removing blockages, you improve airflow, which reduces drying times and lowers energy consumption. This can lead to significant energy savings over time.

Reduced Fire Risk

The leading cause of dryer-related fires is lint buildup in the vent. Using a dryer vent repair kit regularly ensures that lint doesn’t accumulate to dangerous levels, significantly reducing the risk of a fire in your home.

Extended Dryer Lifespan

A well-maintained dryer vent helps prevent wear and tear on your appliance. When the vent is clear, your dryer doesn’t have to work as hard to dry your clothes, which helps extend its lifespan.

DIY Dryer Vent Maintenance vs. Professional Service

When it comes to maintaining your dryer vent, you have two options: using a dryer vent repair kit yourself or hiring a professional service. Both have their advantages, depending on your comfort level and the condition of your vent.

DIY Dryer Vent Maintenance

With a dryer vent repair kit, most homeowners can clean and maintain their vent without professional help. Kits are affordable, easy to use, and can save you the cost of hiring a technician.


Pros of DIY Maintenance:

  • Cost-effective
  • Convenient, as you can do it at your own pace
  • Gives you control over your home’s safety

Cons of DIY Maintenance:

  • Requires time and effort
  • Some areas of the vent may be difficult to reach

Professional Dryer Vent Cleaning

For those who prefer not to do it themselves or have particularly long or complex vent systems, hiring a professional service is a great option. Professionals use specialized equipment and have the experience needed to clean and repair the vent thoroughly.

Pros of Professional Cleaning:

  • Expertise ensures a thorough job
  • Can handle complex or hard-to-reach vent systems
  • Saves time and effort

Cons of Professional Cleaning:

  • More expensive than a DIY kit
  • Requires scheduling and coordinating with a service

How to Use a Dryer Vent Repair Kit

Using a dryer vent repair kit is straightforward. Here’s a step-by-step guide to help you get started:

Step 1: Unplug the Dryer

Before you begin, unplug your dryer from the wall to avoid any electrical hazards. If you have a gas dryer, make sure to turn off the gas supply as well.

Step 2: Detach the Dryer Vent

Locate the dryer vent at the back of your appliance. Carefully detach the vent from both the dryer and the wall.

Step 3: Clean the Vent

Using the brushes and flexible rods provided in your dryer vent repair kit, insert the tools into the vent and scrub away the lint and debris. Start from the inside of the vent and work your way out to ensure thorough cleaning.

Step 4: Reattach the Vent

Once you’ve cleaned the vent, reattach it to both the dryer and the wall. Make sure everything is securely fastened.

Step 5: Test the Dryer

Plug your dryer back in, and test it to ensure everything is working properly. If the airflow is strong, you’ve successfully cleared the vent.

How Often Should You Use a Dryer Vent Repair Kit?

The frequency with which you should clean your dryer vent depends on how often you use your dryer. However, most experts recommend cleaning the vent every 6 months. If you notice any signs of poor ventilation, such as longer drying times or unusual odors, it’s a good idea to clean the vent sooner.

Tips for Preventing Dryer Vent Problems

To keep your dryer functioning at its best and avoid vent problems, follow these simple maintenance tips:

  1. Clean the Lint Trap After Every Use: Always clean the lint trap after each load. This simple step helps reduce the amount of lint that enters the vent system.
  2. Inspect the Vent Regularly: Check the dryer vent for any signs of wear or damage. If you notice any holes or tears, repair them immediately to prevent air leaks.
  3. Don’t Overload the Dryer: Overloading the dryer can cause it to work harder and increase the amount of lint generated. Stick to manufacturer recommendations for load sizes.
  4. Use the Right Settings: Using the correct dryer settings can help reduce strain on your appliance. Avoid using high heat settings unnecessarily, as this can increase the risk of overheating.


Conclusion

Maintaining your dryer vent with a dryer vent repair kit is essential for both safety and efficiency. A clear vent reduces drying times, improves your dryer’s performance, and significantly lowers the risk of a fire in your home. By taking a few simple steps to clean and maintain your vent, you can protect your home, save energy, and extend the life of your dryer.

Call to Action
Is your dryer vent overdue for maintenance? Explore our high-quality dryer vent repair kits at Alwaysweep to keep your home safe and your dryer running efficiently!

Electric Fireplaces for Apartments: Safe, Easy Installation

Electric Fireplaces for Apartments: Safe, Easy Installation

Why Electric Fireplaces Are the Best Option for Apartments and Small Spaces

As more people embrace apartment living and smaller homes, finding ways to maximize space and comfort has become essential. One key feature that homeowners and renters alike often desire is the warmth and aesthetic appeal of a fireplace. However, traditional wood or gas fireplaces can be impractical for small spaces, especially apartments, due to safety concerns, maintenance requirements, and installation restrictions.

Electric fireplaces offer an ideal solution, providing both the ambiance and warmth of a traditional fireplace without the complications. In this blog, we will explore why electric fireplaces are the best option for small spaces and how Always A Sweep can help you with a seamless installation.

The Limitations of Traditional Fireplaces

For those living in apartments or homes with limited space, installing a traditional fireplace can present numerous challenges. These include:

  • Space Restrictions: Wood-burning or gas fireplaces require considerable room for installation, including chimney systems or ventilation pipes. Small spaces simply cannot accommodate the necessary infrastructure.
  • Complex Installations: Installing a traditional fireplace often requires major structural modifications, which are typically not allowed in rental units.
  • Safety Concerns: Traditional fireplaces pose risks such as fire hazards and carbon monoxide emissions, especially in tightly enclosed spaces.

These limitations can make it difficult for apartment dwellers and those with small homes to enjoy the cozy ambiance of a fireplace.

The Desire for Comfort Without Compromise

While traditional fireplaces may not be feasible in small spaces, that does not mean you have to sacrifice comfort and style. Many people dream of having a cozy focal point in their living room, where they can relax with the glow of a fire. However, without the proper space or safety precautions, this dream can seem unattainable.

Here are a few common frustrations:

  • Inconvenience: The need for frequent chimney cleaning and fuel storage makes traditional fireplaces a hassle, especially in smaller homes.
  • Limited Space: People often feel like they are sacrificing valuable square footage for bulky fireplaces that dominate the room.
  • Lack of Options: Many apartment dwellers think they cannot enjoy a fireplace due to rental restrictions or concerns over installation complexity.

At Always A Sweep, we understand the desire for an easy-to-maintain, stylish fireplace that works in any space.

Why Electric Fireplaces Are the Best Choice

Electric fireplaces offer an elegant and practical solution for apartments and small spaces. Unlike traditional fireplaces, they are safe, easy to install, and space-efficient. Here’s why they are the best option:

1. No Need for Ventilation

One of the biggest advantages of electric fireplaces is that they do not require ventilation. There is no need for a chimney, flue, or gas line, which makes them ideal for:

  • Apartments: Electric fireplaces can be placed in any room without the need for extensive renovations.
  • Small Homes: In homes with limited space, electric units eliminate the need for additional infrastructure, saving room and reducing installation costs.

This simplicity makes electric fireplaces a more flexible and convenient option.

2. Space-Saving Design

Electric fireplaces are available in a wide range of compact designs, making them perfect for small spaces.

  • Wall-Mounted Units: These models take up zero floor space and can be mounted on any wall, creating a sleek, modern look.
  • Compact Freestanding Models: Freestanding electric fireplaces come in small sizes that can fit into corners or under shelves without dominating the room.

This versatility ensures that you can find a model that suits your space, whether you are looking for something minimalist or more traditional.

3. Energy Efficiency

Electric fireplaces are highly energy-efficient compared to wood-burning or gas options.

  • No Heat Loss: Because there is no need for a chimney, all the heat generated stays within the room, making electric fireplaces 100% efficient.
  • Zone Heating: You can use electric fireplaces to heat specific areas of your home, reducing the need to heat unused rooms and helping to save on energy bills.

This efficiency makes them an eco-friendly choice, contributing to both comfort and energy savings.

4. Easy and Affordable Installation

Installing an electric fireplace is a simple process that does not require the major renovations necessary for traditional fireplaces.

  • Plug and Play: Many electric fireplaces only require a standard electrical outlet for installation, allowing you to enjoy your new fireplace within minutes.
  • Affordable Installation: With no need for gas lines or ventilation systems, electric fireplaces can be installed quickly and affordably.

Always A Sweep specializes in electric fireplace installations, ensuring a seamless and professional setup that fits your space and budget.

5. Safe for All Living Environments

Electric fireplaces are the safest option for small spaces, especially in homes with children or pets.

  • No Flames or Emissions: Electric fireplaces generate heat without open flames or dangerous fumes, making them safe for enclosed spaces.
  • Cool to the Touch: Many electric models feature cool-to-the-touch exteriors, reducing the risk of burns.

This makes electric fireplaces the safest option for apartment dwellers and families alike.

6. Customizable Features and Aesthetics

Electric fireplaces offer a variety of customizable features, allowing you to create the perfect ambiance in your home.

  • Adjustable Flame Settings: Many models let you adjust the flame’s brightness and color, so you can set the mood to your liking.
  • Realistic Designs: High-quality electric fireplaces mimic the look of traditional fireplaces with realistic flame effects, logs, and embers.

Always A Sweep can help you select the best electric fireplace to match your style and needs, ensuring that your space looks just the way you envision.

7. Low Maintenance

Electric fireplaces require far less maintenance than traditional wood or gas fireplaces.

  • No Cleaning: Without the need for logs, ash, or chimneys, electric fireplaces are virtually maintenance-free.
  • Long-Lasting: These units are designed for durability and require minimal upkeep.

By choosing an electric fireplace, you can enjoy warmth and ambiance without the hassle of regular cleaning and maintenance.

Transform Your Space with Always A Sweep

If you are ready to enhance your apartment or small home with an electric fireplace, Always A Sweep is here to help. We specialize in electric fireplace installations that suit your space, style, and budget.

By working with Always A Sweep, you will benefit from:

  • Professional and affordable installation services
  • A wide selection of electric fireplace models to fit any space
  • Expert advice on choosing the best unit for your needs

Do not let limited space stop you from enjoying the comfort of a fireplace. Visit Always A Sweep today to schedule your installation and bring warmth and style to your home.

Why Electric Fireplaces Are Perfect for Small Spaces

Electric fireplaces offer the perfect blend of convenience, safety, and style, making them an excellent choice for apartments and small homes. With no need for ventilation, easy installation, and energy-efficient operation, these fireplaces provide warmth and ambiance without the drawbacks of traditional models.

By choosing Always A Sweep for your electric fireplace installation, you can enjoy a hassle-free experience and the peace of mind that comes from working with experts.

Recent Blogs

The Villages Dryer Vent Cleaning & Fire Safety

The Villages Dryer Vent Cleaning & Fire Safety

The Technician's Log - More Than Just Lint The day begins like many others in Central Florida: the sun is already promising a warm, humid afternoon. As a technician with Always A Sweep, my schedule is filled with appointments across Ocala, Gainesville, and the...

Ocala Chimney Maintenance: Storm-Proof Your Home

Ocala Chimney Maintenance: Storm-Proof Your Home

Why Ocala Homeowners Must Prepare Chimneys Before Hurricane Season Every summer and fall, residents across Ocala and Marion County brace themselves for hurricane season. Homeowners know the drill: board up the windows, reinforce the roof, trim trees, and stock up on...

How Size and Condition Affect the Cost of Chimney Cleaning

How Size and Condition Affect the Cost of Chimney Cleaning

How Size and Condition Affect the Cost of Chimney Cleaning

When it comes to maintaining a safe and efficient chimney, cleaning is a crucial task. However, the cost of chimney cleaning can vary significantly based on several factors, with size and condition being the primary determinants. Understanding how these factors influence pricing can help you budget for this essential service more effectively.

Understanding the Basics of Chimney Cleaning Costs

Chimney cleaning is an important maintenance task that ensures your chimney functions correctly and safely. The cost of chimney cleaning can be influenced by various factors, including the size and condition of the chimney. By understanding these factors, homeowners can make informed decisions and plan their budget accordingly.

How Chimney Size Impacts Cleaning Costs

How Chimney Size Impacts Cleaning Costs

The size of your chimney plays a significant role in determining the cost of cleaning. Larger chimneys require more time and effort to clean thoroughly, which can increase the overall cost. Here are some key points to consider:

Factors Related to Chimney Size:

  • Height: Taller chimneys may require additional equipment and time to access, leading to higher costs.
  • Width: A wider chimney may have more complex cleaning requirements, increasing the labor involved.
  • Flue Count: Multiple flues or larger flue sizes can also affect the cost, as each requires individual attention.

A larger chimney generally involves more work, which can result in higher cleaning costs.

How Chimney Condition Affects Cleaning Costs

How Chimney Condition Affects Cleaning Costs

The condition of your chimney is another critical factor influencing the cost of cleaning. A chimney in poor condition requires more extensive cleaning and inspection, which can increase the overall cost. Consider the following aspects:

Factors Related to Chimney Condition:

  • Creosote Build-Up: Excessive creosote build-up requires specialized cleaning techniques, which can raise the price.
  • Blockages: Obstructions such as nests or debris can complicate the cleaning process and result in additional charges.
  • Structural Issues: Damaged or deteriorated chimneys may need extra work to ensure proper cleaning and safety.

A chimney in poor condition can lead to increased labor and materials, affecting the overall cost of cleaning.

The Importance of Regular Maintenance

Regular maintenance is essential for keeping your chimney in good condition and minimizing cleaning costs. Regular inspections and cleanings can prevent significant build-ups and blockages, which can reduce the frequency and cost of professional services. Here are some benefits of regular maintenance:

  • Prevention of Major Issues: Regular cleanings help prevent serious problems such as dangerous blockages or chimney fires.
  • Cost Savings: Addressing minor issues before they escalate can save you money in the long run.
  • Improved Efficiency: A well-maintained chimney operates more efficiently, contributing to better performance of your heating system.

By investing in regular maintenance, you can ensure your chimney remains in optimal condition and potentially lower cleaning costs.

Choosing the Right Chimney Cleaning Service

Selecting a reputable chimney cleaning service is crucial for ensuring quality work and fair pricing. Look for a company with experience and positive reviews to ensure you receive reliable and effective service. Consider these factors when choosing a provider:

Key Considerations:

  • Experience: Choose a company with a proven track record in chimney cleaning.
  • Certifications: Ensure the company is certified and follows industry standards.
  • Pricing Transparency: Look for clear and transparent pricing to avoid unexpected costs.

Always A Sweep offers professional chimney cleaning services with a focus on quality and customer satisfaction. We provide detailed assessments and transparent pricing to ensure you receive the best value for your investment.

How Always A Sweep Can Help

At Always A Sweep, we understand the factors that influence chimney cleaning costs and strive to provide affordable and high-quality services. Our team is equipped to handle chimneys of all sizes and conditions, ensuring thorough and efficient cleaning.

Why Choose Always A Sweep:

  • Expert Technicians: Our skilled technicians are experienced in cleaning chimneys of all sizes and conditions.
  • Comprehensive Service: We offer a complete range of chimney cleaning services, including inspection and maintenance.
  • Competitive Pricing: We provide clear and fair pricing with no hidden fees. 

For reliable and cost-effective chimney cleaning, contact Always A Sweep. Visit Always A Sweep to schedule your appointment and learn more about our services.

Recent Blogs

The Villages Dryer Vent Cleaning & Fire Safety

The Villages Dryer Vent Cleaning & Fire Safety

The Technician's Log - More Than Just Lint The day begins like many others in Central Florida: the sun is already promising a warm, humid afternoon. As a technician with Always A Sweep, my schedule is filled with appointments across Ocala, Gainesville, and the...

Ocala Chimney Maintenance: Storm-Proof Your Home

Ocala Chimney Maintenance: Storm-Proof Your Home

Why Ocala Homeowners Must Prepare Chimneys Before Hurricane Season Every summer and fall, residents across Ocala and Marion County brace themselves for hurricane season. Homeowners know the drill: board up the windows, reinforce the roof, trim trees, and stock up on...

How Does a Ventless Gas Fireplace Installation Differ from a Traditional Vented Fireplace?

How Does a Ventless Gas Fireplace Installation Differ from a Traditional Vented Fireplace?

image2

How Does a Ventless Gas Fireplace Installation Differ from a Traditional Vented Fireplace?

The Growing Popularity of Gas Fireplaces

Gas fireplaces are increasingly popular in modern homes, offering warmth and ambiance without the hassle of wood-burning models. Homeowners often find themselves deciding between two main options: ventless gas fireplaces and traditional vented fireplaces. Each type has its own set of advantages and considerations, and understanding the key differences is crucial when planning an installation. At Always A Sweep, we specialize in both types, ensuring that your choice aligns perfectly with your home’s needs.

What Is a Ventless Gas Fireplace?

A ventless gas fireplace, as the name suggests, does not require a vent to expel combustion gases outside the home. Instead, it is designed to burn gas efficiently enough to minimize the production of harmful byproducts, such as carbon monoxide. These fireplaces are often easier to install and can be placed in virtually any room.

  • Efficiency: Ventless gas fireplaces are designed to operate at nearly 99% efficiency.
  • Flexibility: They can be installed in places where vented options are not feasible.

What Is a Traditional Vented Fireplace?

In contrast, a traditional vented gas fireplace relies on a chimney or vent to expel combustion byproducts outside the home. These fireplaces typically use a direct vent system, which pulls in outside air for combustion and exhausts it back outside through a vent pipe.

  • Natural Ventilation: The chimney or vent naturally removes harmful gases, making this option safer in some cases.
  • Realistic Flames: Traditional vented fireplaces often produce more authentic-looking flames, enhancing the aesthetic appeal.

Installation Process for Ventless Gas Fireplaces

One of the major advantages of ventless gas fireplace installation is the simplicity of the process. Since there is no need for a chimney or vent, installation can be completed quickly and with minimal disruption to your home. Always A Sweep offers professional installation services that ensure your ventless fireplace is safely integrated into your space.

  • No Structural Changes: Installation does not require modifications to your home’s structure, making it ideal for retrofitting.
  • Cost-Effective: The absence of a vent system significantly reduces installation costs.

Installation Process for Traditional Vented Fireplaces

Installing a traditional vented gas fireplace is a more involved process. It requires careful planning and construction to ensure proper ventilation. This type of installation is best suited for new constructions or major renovations where integrating a chimney or venting system is feasible.

  • Structural Requirements: May require the addition of a chimney or vent pipes, which can increase costs and time.
  • Professional Expertise Needed: Proper installation is crucial to ensure safety and efficiency, making it essential to hire experienced professionals like Always A Sweep.

Safety Considerations for Ventless Gas Fireplaces

Safety is a significant concern when it comes to ventless gas fireplaces. Since they vent combustion gases directly into the room, it is crucial to ensure that the fireplace is properly maintained and operated. Always A Sweep emphasizes the importance of regular inspections and the use of carbon monoxide detectors in homes with ventless fireplaces.

  • Air Quality: Ventless fireplaces can affect indoor air quality, so it is essential to ensure proper ventilation in the room.
  • Regulations: Some areas have restrictions or bans on ventless gas fireplaces due to safety concerns.

Safety Considerations for Traditional Vented Fireplaces

Traditional vented gas fireplaces are generally considered safer because they expel combustion gases outside the home. However, the installation must be correctly executed to prevent leaks and other issues. Always A Sweep’s experienced team ensures that your vented fireplace is installed according to the highest safety standards.

  • External Venting: Directly vents harmful gases outside, reducing the risk of indoor air pollution.
  • Maintenance: Regular maintenance, including chimney inspections, is necessary to prevent blockages and ensure safe operation.

Efficiency and Heating Capabilities

When it comes to heating efficiency, ventless gas fireplaces have the upper hand. Since they do not lose heat through a vent, nearly all the heat generated stays inside the room. However, traditional vented fireplaces, while slightly less efficient, provide a more authentic fireplace experience with a focus on aesthetics and ambiance.

  • Ventless Fireplaces: Offer higher efficiency with up to 99% of heat retained within the room.
  • Vented Fireplaces: Provide a balance between efficiency and realism, with a portion of heat lost through venting.

Cost and Maintenance Considerations

Cost is always a factor when deciding on a fireplace installation. Ventless gas fireplaces are generally more affordable upfront due to the simpler installation process. However, they may require more frequent maintenance to ensure air quality and safety. Traditional vented fireplaces may have higher initial costs due to the complexity of installation, but they typically require less ongoing maintenance.

  • Ventless Fireplaces: Lower installation costs but may require more frequent air quality checks.
  • Vented Fireplaces: Higher installation costs but reduced need for frequent maintenance.

Which Option Is Right for You?

Choosing between a ventless gas fireplace and a traditional vented fireplace depends on your specific needs, preferences, and the layout of your home. Ventless fireplaces offer convenience and efficiency, making them ideal for retrofitting into existing spaces. Traditional vented fireplaces, on the other hand, provide a classic look and feel, along with enhanced safety. Always A Sweep is here to help you make the best choice for your home, ensuring a professional installation that meets all safety standards.

Ready to enhance your home with a new gas fireplace? Contact Always A Sweep today at https://alwaysasweep.com/ for expert advice and installation services.

Recent Blogs

The Villages Dryer Vent Cleaning & Fire Safety

The Villages Dryer Vent Cleaning & Fire Safety

The Technician's Log - More Than Just Lint The day begins like many others in Central Florida: the sun is already promising a warm, humid afternoon. As a technician with Always A Sweep, my schedule is filled with appointments across Ocala, Gainesville, and the...

Ocala Chimney Maintenance: Storm-Proof Your Home

Ocala Chimney Maintenance: Storm-Proof Your Home

Why Ocala Homeowners Must Prepare Chimneys Before Hurricane Season Every summer and fall, residents across Ocala and Marion County brace themselves for hurricane season. Homeowners know the drill: board up the windows, reinforce the roof, trim trees, and stock up on...

How Much Does It Cost to Install a Gas Fireplace in Your Home?

How Much Does It Cost to Install a Gas Fireplace in Your Home?

image2

How Much Does It Cost to Install a Gas Fireplace in Your Home?

Installing a gas fireplace in your home is a fantastic way to add warmth and ambiance without the hassle of chopping wood or cleaning ashes. But before you cozy up next to those inviting flames, it’s important to understand the costs involved. In this comprehensive guide, we’ll break down the gas fireplace install cost, factors affecting it, and tips to ensure you get the best value for your money.

Why Choose a Gas Fireplace?

A gas fireplace offers several advantages over traditional wood-burning fireplaces. They’re cleaner, easier to operate, and often more efficient. Plus, with modern technology, you can control the flames with just the push of a button or a simple remote. But how much will it cost you to enjoy these benefits?

image1

Understanding Gas Fireplace Install Cost

The gas fireplace install cost can vary widely based on several factors, including the type of fireplace, the complexity of the installation, and your location. On average, you can expect to spend anywhere from $2,000 to $5,000. Let’s break down the main components of this cost:

1. Type of Gas Fireplace

There are three main types of gas fireplaces: inserts, built-ins, and log sets. Each type comes with its own price range and installation requirements.

  • Gas Fireplace Inserts: If you already have a wood-burning fireplace, a gas insert is a great option. These inserts fit into your existing fireplace and can range from $2,000 to $4,000, including installation.
  • Built-in Gas Fireplaces: For homes without an existing fireplace, a built-in unit might be the way to go. These typically cost between $3,000 and $5,000, as they require more extensive installation work.
  • Gas Log Sets: These are the most affordable option, usually costing between $1,500 and $3,000. They consist of gas logs that you place in an existing fireplace, but they don’t provide as much heat as inserts or built-ins.

2. Installation Complexity

The complexity of the installation plays a significant role in the overall gas fireplace install cost. Simple installations where a gas line is already in place will be less expensive than those requiring extensive modifications or new gas lines. Here’s a breakdown of potential costs:

  • Existing Gas Line: If your home already has a gas line, the installation might cost between $500 and $1,000.
  • New Gas Line Installation: If a new gas line is needed, expect to add another $500 to $2,000 to the total cost.
  • Ventilation: Proper ventilation is crucial for safety. Direct vent fireplaces, which vent directly outside, are typically more expensive to install than ventless models. Venting can add $500 to $2,500 to the cost.

3. Location and Customization

Where you decide to install your gas fireplace also affects the cost. Wall-mounted units are generally cheaper to install than those requiring custom cabinetry or mantel work. Customizations like stone surrounds, mantels, or built-in shelves can add $500 to $2,000 or more to the gas fireplace install cost.

Additional Costs to Consider

While the primary components make up the bulk of the gas fireplace install cost, there are a few additional expenses to keep in mind:

  • Permit Fees: Depending on local regulations, you may need a permit to install a gas fireplace. Permit fees can range from $50 to $500.
  • Operating Costs: Gas fireplaces are generally efficient, but you’ll need to factor in the cost of natural gas or propane to operate the fireplace. On average, running a gas fireplace costs about $0.20 to $0.50 per hour.
  • Maintenance: Regular maintenance is essential to ensure your gas fireplace operates safely and efficiently. Annual maintenance costs typically range from $100 to $200.

Tips for Reducing Gas Fireplace Install Cost

Here are some tips to help you manage and possibly reduce the gas fireplace install cost:

  • Get Multiple Quotes: Always get at least three quotes from different contractors to compare prices and services.
  • Plan Ahead: If you’re remodeling your home, plan the installation of your gas fireplace at the same time to save on labor costs.
  • DIY Preparations: While the actual installation should be done by a professional, you can save money by doing some of the prep work yourself, like removing old fixtures or clearing the installation area.

    Is a Gas Fireplace Worth the Investment?

    Considering the gas fireplace install cost, you might wonder if it’s worth the investment. The answer largely depends on your needs and preferences. Gas fireplaces can add value to your home, increase energy efficiency, and provide a convenient and attractive source of heat. If you enjoy the cozy ambiance of a fireplace without the maintenance of a wood-burning unit, a gas fireplace is an excellent choice.

    Conclusion

    Installing a gas fireplace in your home can be a significant investment, but it offers numerous benefits in terms of convenience, efficiency, and aesthetics. By understanding the factors that influence the gas fireplace install cost and following the tips provided, you can make an informed decision that suits your budget and heating needs. Whether you choose a gas insert, built-in unit, or log set, you’ll be enjoying the warm, inviting glow of your new fireplace in no time.

    Recent Blogs

    Ocala Chimney Damage Inspection After Storms

    Ocala Chimney Damage Inspection After Storms

    Why Post-Storm Chimney Inspections Matter for Ocala Homeowners In Ocala, Florida, hurricane season leaves homeowners dealing with more than just fallen branches or roof leaks. Chimneys and fireplaces often sustain hidden damage that goes unnoticed until it becomes a...

    Ocala Chimney Prep Guide: Hurricane Season Safety

    Ocala Chimney Prep Guide: Hurricane Season Safety

    Why Ocala Homeowners Should Add Chimney Cleaning to Their Hurricane Prep Checklist In Ocala, Florida, hurricane season brings high winds, heavy rains, and long power outages that can turn everyday comforts into survival necessities. While most residents focus on storm...

    Fireplace Maintenance Myths: What Homeowners Should Stop Believing

    Fireplace Maintenance Myths: What Homeowners Should Stop Believing

    Fireplaces are a beloved feature in many homes across Ocala, Florida. As winter approaches, the warmth of a crackling fire becomes more than just comforting—it becomes part of daily living. However, many homeowners still rely on outdated or incorrect information when...