by Always A Sweep Team | Jul 20, 2026 | Always Home Repair Services, chimney repair, dryer vent repair, inspections & sweeping
How to Stop a Potent Dormant Chimney Smell Caused by Florida Humidity
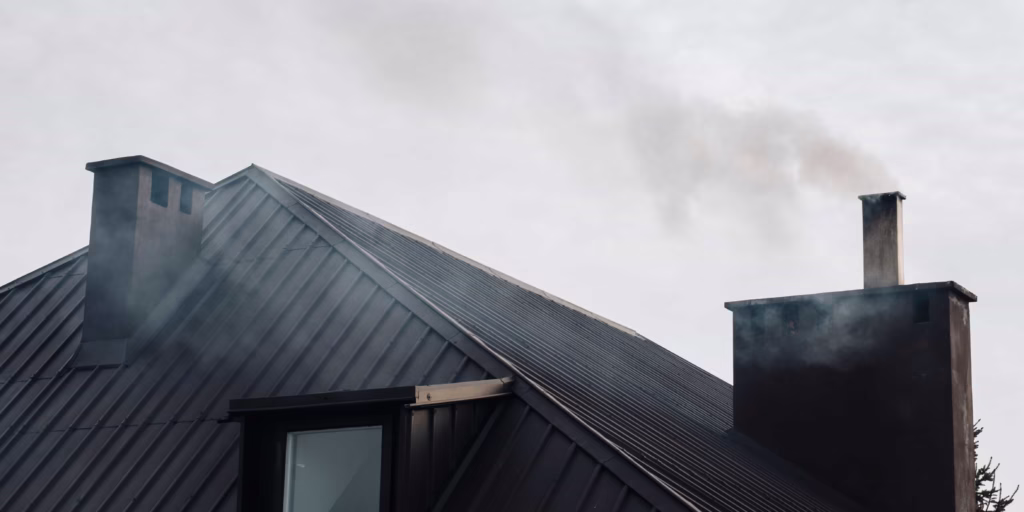
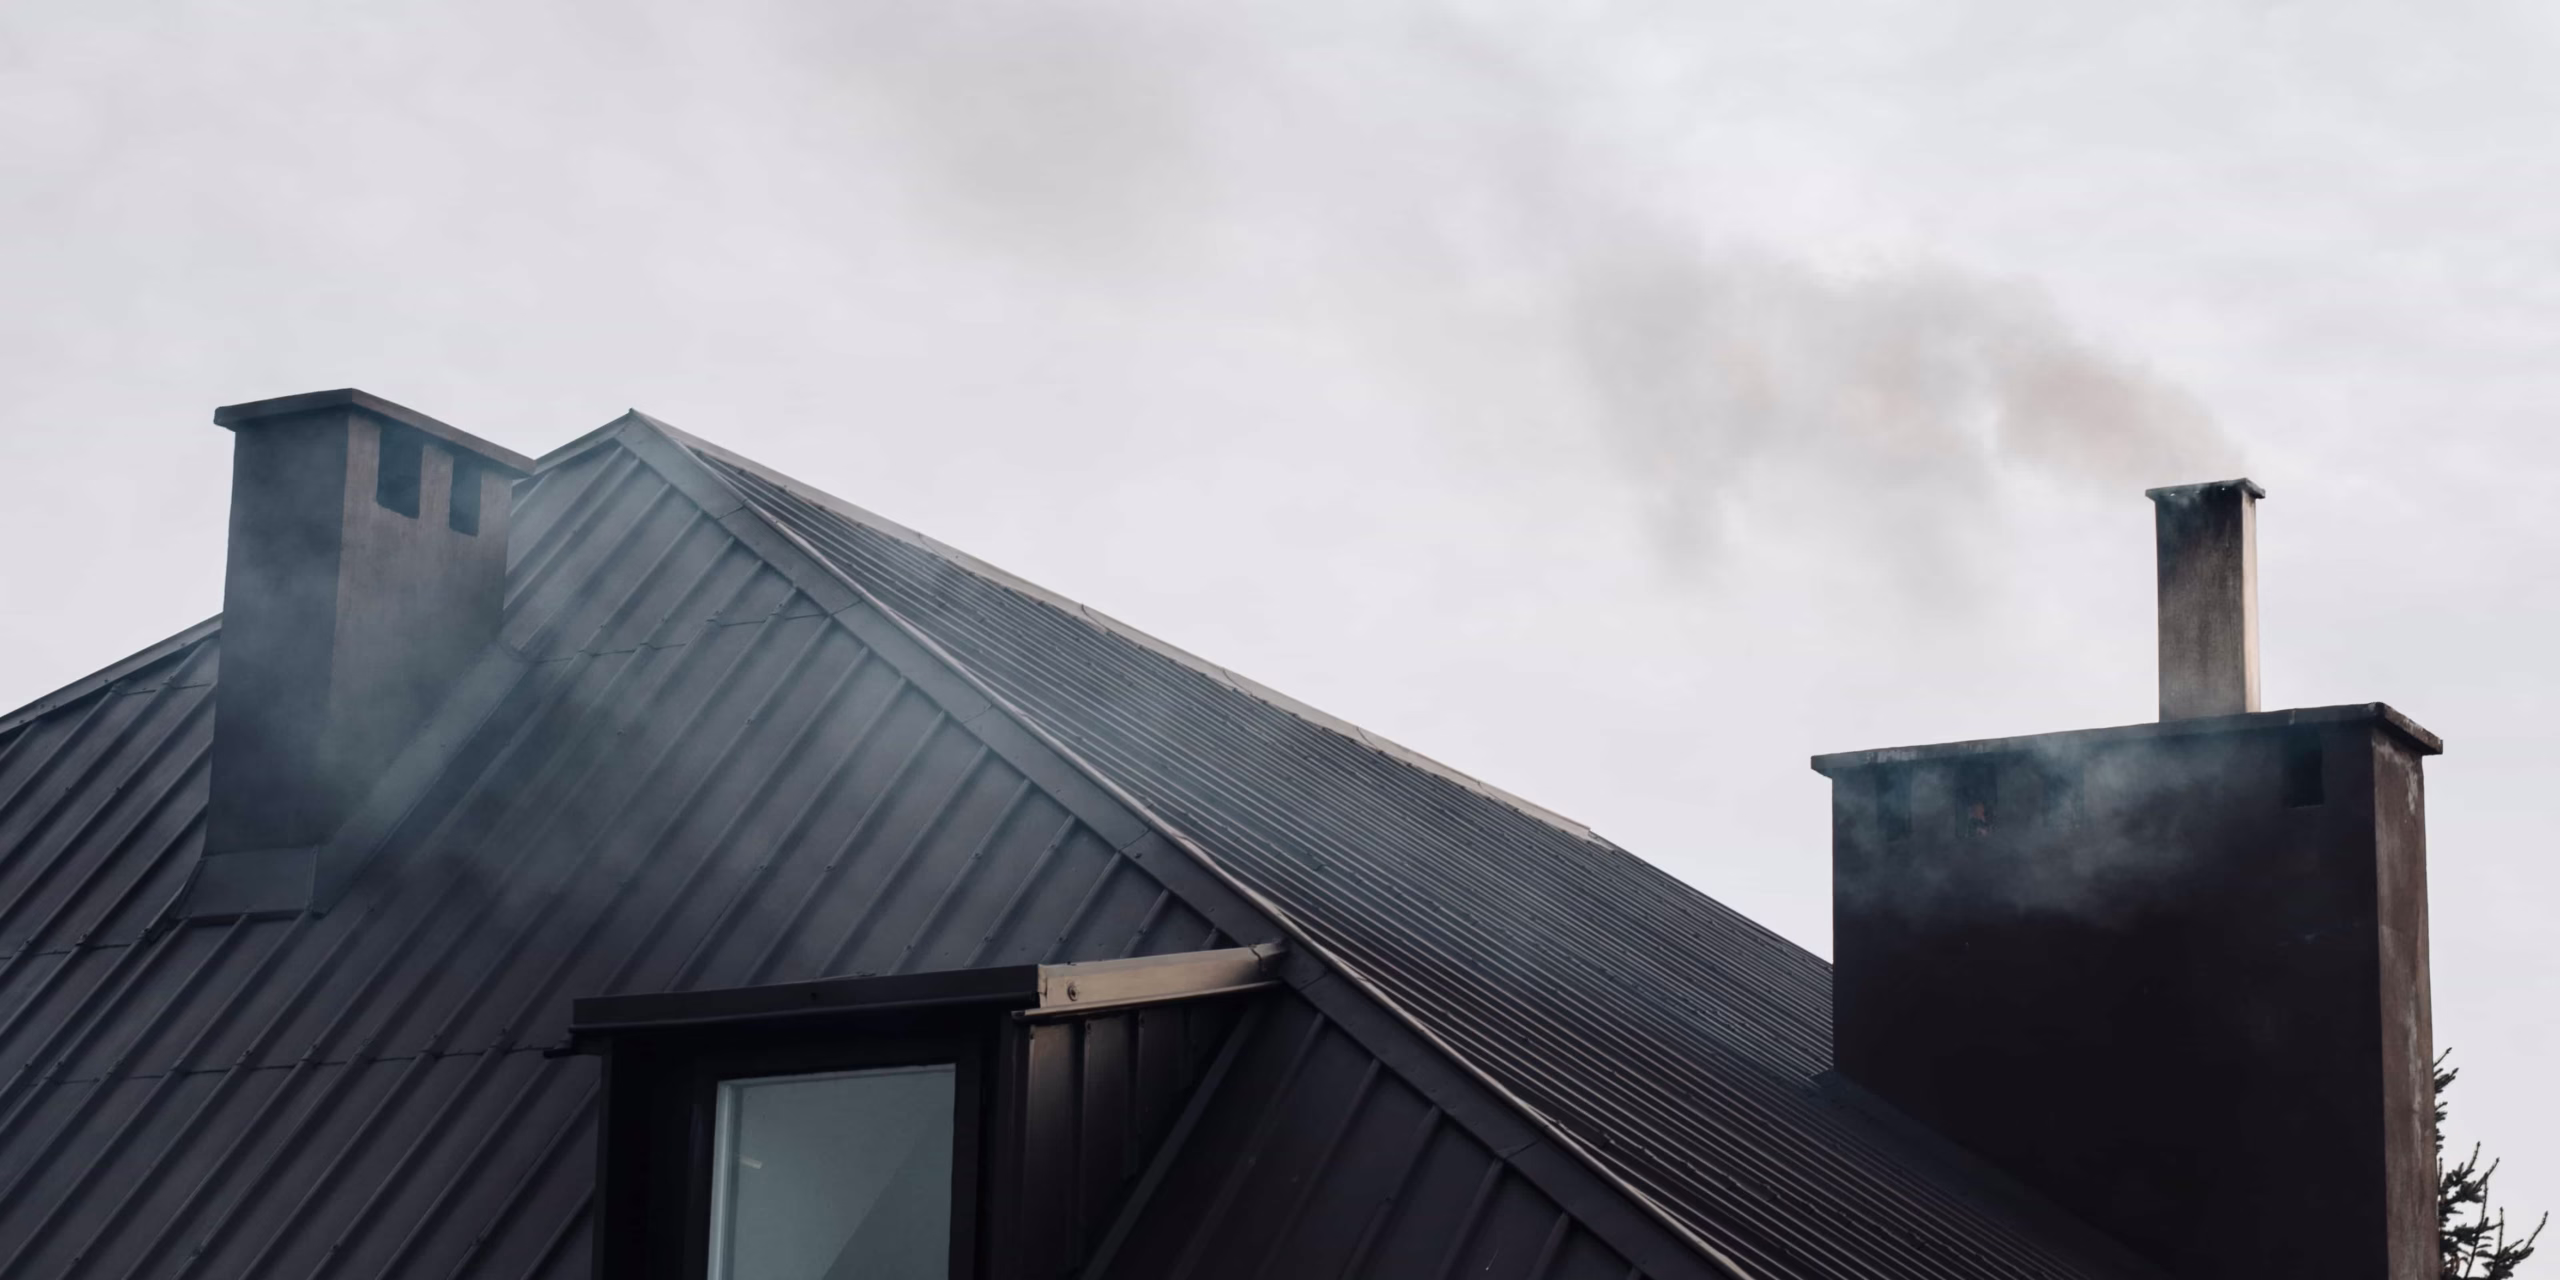
A foul dormant chimney smell inside your Florida home during the summer is primarily caused by extreme outdoor humidity mixing with leftover creosote, mold, or organic debris inside an unsealed flue. When your air conditioning runs, it creates a negative pressure system that pulls these heavy, moisture-activated odors down into your living spaces. You can eliminate this problem entirely by scheduling a professional spring chimney sweep and installing a top-sealing damper to seal out external air.
When the sweltering tropical summer hits, your fireplace is probably the absolute last thing on your mind. You turn down the air conditioning and seal up your home to survive the heat. Yet, a strange, sour aroma often begins to waft into your clean living room. It smells like a stale campfire, a dirty barbecue pit, or a damp basement. Reclaiming your indoor air quality requires a clear understanding of why this happens.
📌 Key Takeaways
-
Humidity Triggers Smells: High moisture re-activates carbon-based creosote deposits stuck inside the brickwork.
-
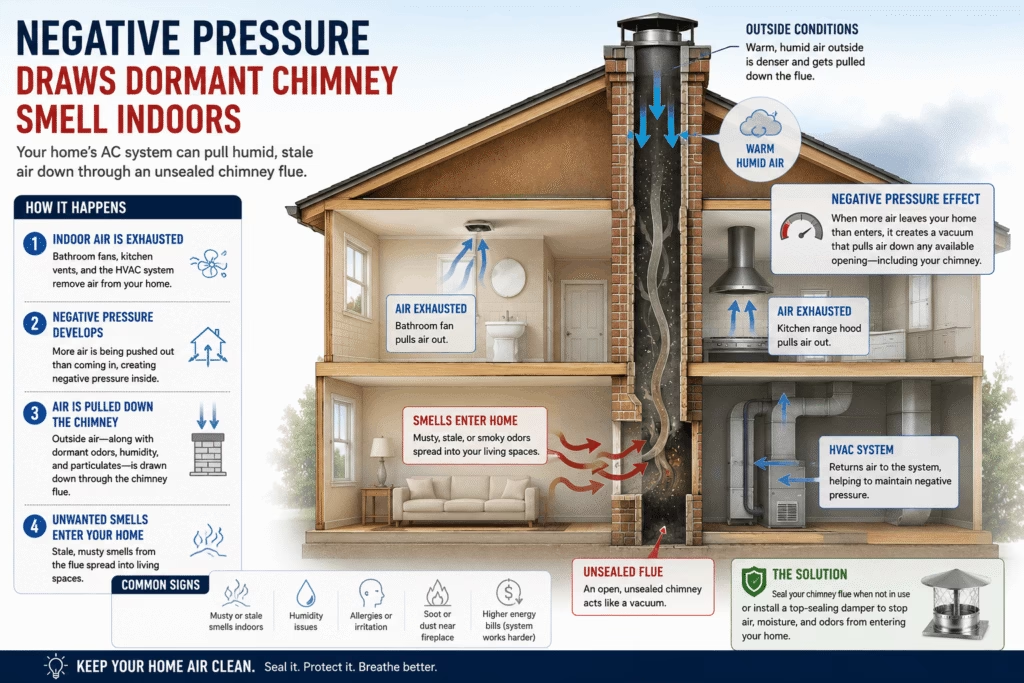
Negative Pressure Effect: Indoor air conditioning draws outdoor air down through open vents.
-
Biological Hazards: Dark, damp flues become major breeding grounds for toxic mold and hidden mildew.
-
Professional Fixes Work: Top-sealing dampers and rotary sweeps stop draft odors permanently.
-
DIY Risks Are High: Amateurs risk inhaling carcinogens or cracking delicate clay liner tiles.
Table of Contents
-
The Science of Summer Venting Odors
-
5 Reasons Florida Humidity Triggers a Dormant Chimney Smell
-
The Dangers of a DIY Approach to Fireplace Odors
-
How Professionals Eliminate Chimney Draft Odors
-
Preventative Maintenance Tips for Florida Homeowners
-
Frequently Asked Questions About Fireplace Odors
The Science of Summer Venting Odors
🎯 Quick Answer: Chimneys vent air based on pressure and temperature differences. In summer, cool indoor AC air creates a low-pressure draft that pulls heavy, humid, odor-filled outdoor air down into the home.
To understand why your fireplace smells bad in July, it helps to look at structural airflow. Your flue is essentially a massive pipe designed to vent combustion gases safely away. Air does not just move upward automatically. It travels based on precise atmospheric pressure changes.
During the winter, hot fireplace gases rise naturally because they are lighter than cold outdoor air. In the summer, this entire environmental process reverses completely. The heavy, moisture-laden air outside presses down into the masonry stack. Meanwhile, your home’s air conditioner creates a lower pressure system indoors. This draws the air downward, pulling all the foul odors trapped inside the masonry straight into your home.
📊 Data Point: According to regional residential airflow studies, a standard kitchen range hood or bathroom exhaust fan can increase indoor negative pressure by up to 15 Pascals, accelerating downward fireplace backdrafts.
5 Reasons Florida Humidity Triggers a Dormant Chimney Smell
🎯 Quick Answer: Subtropical humidity re-activates old creosote, feeds mold spores, decomposes animal nests, and mixes with rainwater leaks. These elements combine to produce a highly concentrated dormant chimney smell.
Florida has a unique subtropical climate that is notoriously tough on home masonry. The local environment accelerates wear and tear on venting systems. Here are the five primary reasons your home is currently suffering from a severe dormant chimney smell.
1. Creosote and Humidity Re-Activation
Every single time you burn wood, combustion byproducts travel up your flue. Over time, these byproducts condense into a dark, oily, carbon-dense substance known as creosote. During dry winter months, creosote remains solid and low-odor.
However, Florida summers bring extreme relative humidity. According to climate data tracked by the National Weather Service, Florida regularly sees summer humidity levels exceeding 80%. This heavy airborne moisture enters your open flue and gets absorbed by porous creosote deposits. The water molecules dissolve and re-activate the soot odors, releasing a potent, concentrated smokey stench.
2. The Negative Pressure Air Effect
Modern homes are built to be highly energy-efficient, well-insulated, and completely airtight. While this keeps your electric bill manageable, it creates an atmospheric phenomenon known as negative pressure.
As your HVAC system circulates air, your house looks for ways to pull replacement air from the outside. Your fireplace flue is the easiest path of least resistance. The heavy, humid outdoor air forces its way down your chimney, picking up smells along the way. It deposits that foul air directly into your active living spaces.
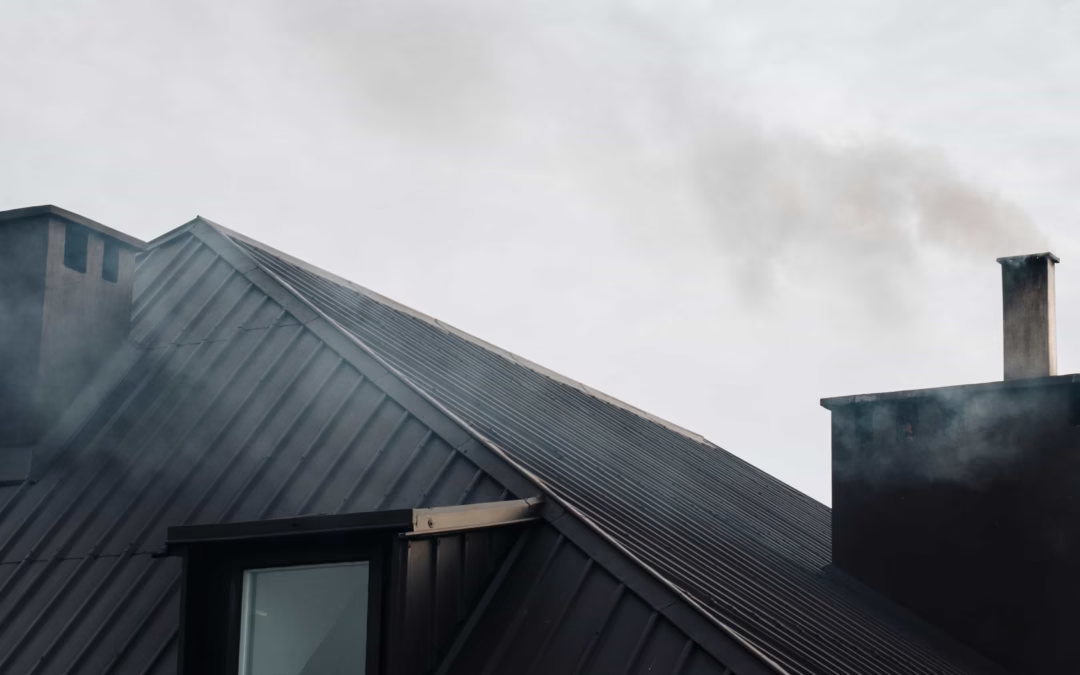
Does your living room smell like a campfire or stale soot whenever the AC kicks on? 🏡🔥 Negative air pressure can turn your unsealed fireplace flue into a vacuum, pulling hot, humid outside air and musty odors directly into your home. Discover how a professional chimney sweep atlanta ga can fix this issue with proper cleaning and a top-sealing damper. Save this pin and schedule your chimney service today to breathe easier! #ChimneySweep #AtlantaGA #FireplaceRepair #HomeMaintenance #IndoorAirQuality
3. Hidden Mold and Mildew Growth
Because chimney bricks and mortar are highly porous materials, they easily absorb water from the surrounding atmosphere. When you combine constant humidity with dark, unventilated spaces, you create a breeding ground for biological growth.
Mold and mildew love to grow inside a dark chimney liner. The spores feed on dust, organic debris, and carbon deposits inside the stack. This creates a distinctive, pungent, earthy stench that smells entirely different from campfire smoke. If you notice a damp odor, mold growth driven by regional humidity is almost always the root cause.
4. Animal Infiltration and Trapped Debris
During spring and early summer, many native Florida birds, raccoons, bats, and squirrels look for safe spaces to nest. An unprotected chimney flue looks exactly like a hollow, secure tree trunk to them.
Animals frequently build nests directly inside the flue or become trapped and perish inside the structure. Combined with leaves, twigs, and intense summer heat, the resulting decomposition produces a terrible odor. This debris also restricts natural airflow, packing the foul smells tightly into the bottom of the stack until they spill out.
5. Structural Water Leaks from Summer Storms
Florida summers are famous for intense, daily afternoon thunderstorms and tropical depressions. These severe downpours throw hundreds of gallons of water directly against your home’s exterior masonry.
If your chimney is missing a proper cap, has cracked mortar joints, or features a damaged flashing seal, rainwater pours inside. This internal water saturation damages your fireplace walls and mixes with baseline soot to form a foul-smelling sludge. This moisture causes permanent structural decay if it is not resolved by an expert team.
💡 Expert Insight: “As of 2026, over 40% of the chimney odor calls we handle in coastal Florida stem directly from failing flashing membranes that let rainwater turn baseline soot into a rotting sludge.”
The Dangers of a DIY Approach to Fireplace Odors
🎯 Quick Answer: DIY chimney cleaning risks exposing your family to toxic carcinogens and causing hidden structural damage. Consumer tools cannot reach deep creosote deposits or fix pressure imbalances safely.
When faced with an offensive odor, it is completely natural to want to fix it yourself immediately. Homeowners frequently browse internet forums and attempt to scrub their own fireplaces using retail chemical cleaners. However, attempting a DIY cleanup to fix a dormant chimney smell is highly discouraged for several critical safety and structural reasons.
Chemical and Health Exposures
Creosote contains concentrated polycyclic aromatic hydrocarbons (PAHs). According to environmental safety data published by the Centers for Disease Control and Prevention, these compounds are classified as known human carcinogens. Inhaling or touching these particles without industrial-grade particulate respirators poses severe health risks.
Hidden Structural Risks
Scrubbing blindly with consumer-grade wire brushes can easily score, scratch, or break delicate clay flue tiles or liner seams. These hidden structural cracks allow deadly carbon monoxide to seep into your home the next time you light a fire.
Furthermore, consumer tools simply cannot reach the deep geometry, smoke shelves, and high bends of a standard system. Spraying consumer liquid deodorizers down a dirty stack actually introduces more moisture into the creosote. This frequently makes the odor twice as intense as it was before you started.
⚠️ Common Mistake: Spraying liquid household perfume or water-based deodorizers inside a smelly fireplace firebox. This increases humidity levels and amplifies the chemical re-activation of deep creosote.
How Professionals Eliminate Chimney Draft Odors
🎯 Quick Answer: Certified professionals use closed-circuit cameras, heavy-duty rotary loops, targeted non-toxic biocides, and mechanical top-sealing dampers to safely eliminate odors at their source.
Resolving a persistent summer odor requires a systematic, professional evaluation. A certified sweeping service does not just mask the odor; they eliminate the root environmental causes.
| Professional Step |
What it Accomplishes |
Why DIY Cannot Replicate It |
| Video Camera Inspection |
Runs specialized closed-circuit cameras down the flue to spot hidden liner cracks, nests, or water entry points. |
Requires thousands of dollars in specialized diagnostic imaging equipment. |
| Industrial Creosote Removal |
Utilizes mechanical rotary loops and specialized chemical solvents to safely strip hardened creosote down to bare masonry. |
Retail brushes cannot clear hardened, glazed tar creosote layers. |
| Biological Sanitization |
Applies targeted, non-toxic biocides formulated specifically to neutralize mold spores without degrading old brickwork. |
Standard household bleach destroys delicate mortar joints over time. |
| Damp Rejection & Sealing |
Installs custom industrial top-sealing dampers and stainless steel caps to completely shut out exterior air and rain. |
Requires dangerous high-altitude roof work and precise physical sizing measurements. |
By hiring an experienced, licensed team, you guarantee that the structural integrity of your home is protected while completely removing the source of the foul odor. Our team follows strict safety protocols outlined by national chimney safety networks like the Chimney Safety Institute of America (CSIA) to ensure your system meets baseline safety codes and stops the dormant chimney smell permanently.
Preventative Maintenance Tips for Florida Homeowners
🎯 Quick Answer: Prevent summer odors by installing a rubber-gasketed top-sealing damper and scheduling your professional chimney sweeps in the spring before seasonal humidity spikes.
The best way to handle a foul fireplace smell is to stop it from developing in the first place. By taking proactive measures during the spring, you can enjoy a fresh, odorless home all summer long.
Install a Top-Sealing Damper
Traditional throat dampers are notoriously inefficient. They feature a loose metal-on-metal design that allows humid air to leak past easily. A professional can install a top-sealing damper at the very top of your chimney. This features a tight rubber gasket seal that acts exactly like a weather-stripped door, locking humid air out completely.
Schedule Your Sweeps in Spring
Don’t wait until late fall to call for service. Scheduling your annual maintenance in the spring ensures that all the leftover winter soot and creosote are completely stripped away before the intense summer humidity has a chance to mix with them. Explore our expert chimney repair solutions to see how we maintain systems cleanly and efficiently.
✅ Quick Tip: Keep your fireplace glass doors tightly shut when the system is dormant. This adds an extra physical barrier against negative pressure drafts pulling down stale air.
Frequently Asked Questions About Fireplace Odors
Why does my fireplace give off a terrible dormant chimney smell only in summer?
A dormant chimney smell peaks in summer due to the combination of extreme Florida humidity and indoor air conditioning. High outdoor humidity re-activates old creosote and mold deposits inside your flue, while indoor AC creates negative pressure that sucks those foul odors down into your living spaces.
Can I use regular household bleach to clean mold out of my fireplace?
No, you should never use standard household bleach to clear chimney mold. Bleach contains corrosive properties that eat away at porous mortar joints over time, causing structural weakness and dangerous cracks inside your ventilation path.
How does a top-sealing damper help stop fireplace odors?
Unlike traditional loose metal throat dampers, a top-sealing damper is installed at the top of your chimney stack and features a tight rubber gasket. This creates an airtight seal that completely blocks heavy, humid outdoor air from entering your flue system.
Is inhaling creosote odor dangerous to my family’s health?
Yes, breathing in concentrated creosote fumes poses distinct health risks. Creosote contains dangerous chemical compounds like polycyclic aromatic hydrocarbons (PAHs), which are classified as known human carcinogens by global health networks.
How often should a chimney in Florida be swept if it is rarely used?
Even if you only use your fireplace a few times during winter cold snaps, the National Fire Protection Association recommends an annual inspection. Humidity, mold growth, animal nesting, and severe weather damage happen year-round regardless of how often you burn wood.
Final Verdict: July Wins for Your Wallet and Peace of Mind
Addressing your chimney maintenance needs during the warm summer months is a vital step toward protecting your home’s air quality. By removing creosote deposits early, you prevent high humidity from generating a persistent dormant chimney smell. Do not let hidden mold or negative air pressure ruin your indoor comfort this season. Contact our certified team at Always A Sweep today to schedule an expert evaluation and ensure your home stays fresh and safe all summer long.
by Always A Sweep Team | Jul 13, 2026 | Always Home Repair Services, chimney repair, dryer vent repair, inspections & sweeping
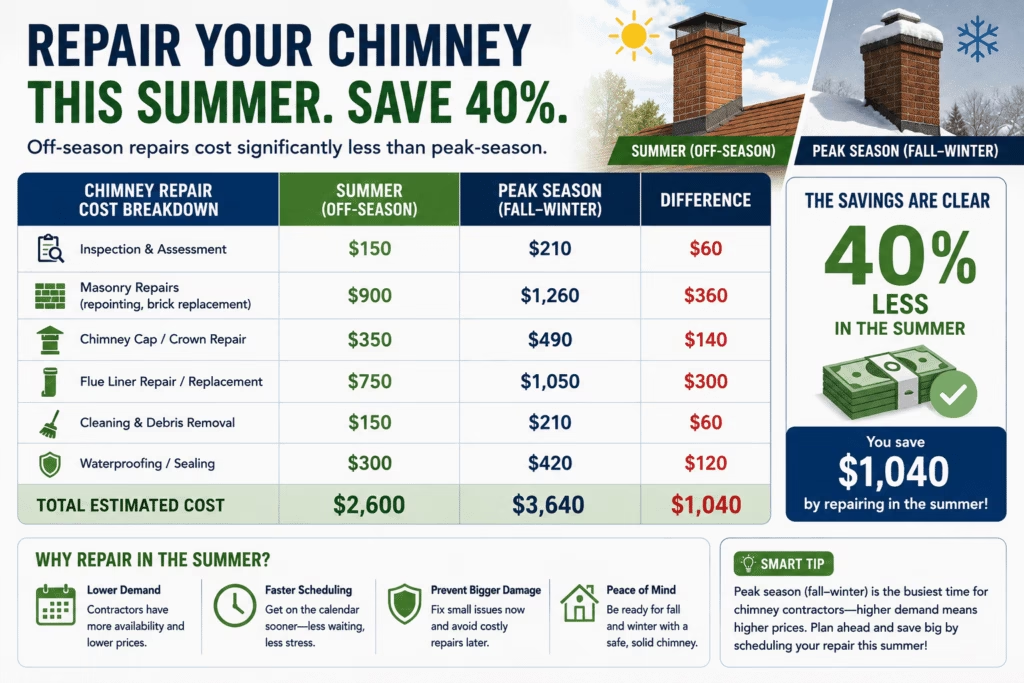
Why Repairing Your Chimney in the Summer Saves You Thousands
Repairing your chimney during the warm summer months of July is the single most cost-effective decision you can make for your home’s structural maintenance. Many homeowners mistakenly delay critical masonry service until the cold weather sets in, which turns routine maintenance into an expensive, stressful late-autumn emergency. According to national industry benchmarks updated for 2026, scheduling this essential upkeep during off-peak months guarantees structural longevity and slashes seasonal premium charges. In this comprehensive guide, we will break down the economic, structural, and safety realities of scheduling your masonry work in mid-summer versus delaying it until late autumn.
📌 Key Takeaways
-
Save 20% to 40%: Off-season summer scheduling bypasses the expensive labor premiums of the autumn rush.
-
Perfect Structural Curing: Warm July ambient temperatures provide the ideal environment for chemical mortar hydration.
-
Arrest Active Moisture Damage: Fixing cracks in July blocks heavy late-summer rain from destroying internal flue tiles.
-
Avoid Fire Hazard Condemnations: Early inspections ensure your heating appliances remain fully operational by winter.
-
Ensure Crew Safety: Summer weather provides secure, dry rooftop working environments for specialist technicians.
Table of Contents
-
The Financial Benefits of Repairing Your Chimney in July
-
Weather Mechanics: Why Mortar Cures Better in July
-
The Danger of Delay: How Summer Rain Ruins Damaged Brickwork
-
The Fall Rush: Navigating November Scheduling Nightmares
-
The Structural and Safety Hazards of DIY Chimney Repairs
-
Frequently Asked Questions About Chimney Maintenance
The Financial Benefits of Repairing Your Chimney in July
🎯 Quick Answer: Repairing your chimney in July is significantly cheaper because service demand drops off-season. Reputable firms provide promotions, open scheduling, and baseline labor rates, saving you 20% to 40% over emergency autumn invoices.
The financial difference between fixing a masonry or venting issue in July versus November can be staggering. Like most home improvement service industries, professional venting and structural repair companies experience intense, highly predictable seasonal demand. During the quiet summer months, consumer service requests drop significantly across the country.
To keep their highly trained crews employed year-round, reputable local teams offer competitive baseline pricing and flexible scheduling options. Our data shows that homeowners who book structural interventions during these slower periods secure the best local rates.
| Cost & Scheduling Factors |
Mid-Summer (July) |
Late Autumn (November) |
| Average Labor & Material Pricing |
Standard baseline rates (No markup) |
20% to 40% peak-season premium |
| Booking Wait Times |
2 to 5 business days |
3 to 6 weeks |
| Emergency Diagnostic Fees |
Infrequent / Waived during promos |
Standard charge due to high call volumes |
| Weather Work Disruption |
Extremely low risk |
High risk of delays from snow or ice |
When November arrives, the first hard freeze forces thousands of homeowners to turn on their heating appliances simultaneously. This sudden spike in consumer demand instantly shifts the heating market dynamics. Emergency diagnostic fees, higher labor rates due to overtime, and a scarcity of specific materials drive up invoices. You will pay far more for the exact same physical repair work if you wait until winter.
📊 Data Point: Industry data collected across regional markets indicates that peak emergency call volumes between October and January account for over 65% of a service company’s annual revenue, directly driving up labor premiums.
Don’t wait until winter freezing temperatures hit Minnesota to fix your masonry! 💸 Booking off-season chimney repair minneapolis mn can save you 40% on critical maintenance like brick repointing, flue liner replacement, and chimney cap installation. Secure faster scheduling and lower rates today. Pin this to your home improvement board and schedule your inspection before the peak-season rush! #ChimneyRepair #MinneapolisMN #HomeMaintenance #MasonryRepair #SaveMoney
Weather Mechanics: Why Mortar Cures Better in July
🎯 Quick Answer: Traditional masonry mortar requires consistent temperatures between 40°F and 90°F to dry and hydrate properly. July provides the perfect ambient warmth needed to guarantee a permanent structural bond that resists cracking.
Beyond the sheer financial figures on a contractor’s invoice, local weather patterns dictate the long-term durability of masonry work. Masonry materials, specifically traditional sand-and-cement mortar mixes, rely on a precise chemical hydration process to cure correctly over time.
Temperature Limits for Structural Masonry Joints
According to the strict technical standards set by the Masonry Institute of America, the ideal temperature range for laying brick and applying mortar is between 40°F and 90°F. When you tackle projects in late autumn, outdoor temperatures frequently plunge well below freezing overnight.
If the water inside a fresh mortar joint freezes before the compound reaches full design strength, the structural integrity of your build is permanently compromised. The mixture becomes brittle, powdery, and will fail completely within a few seasons.
Optimizing Moisture Management for Longevity
July provides the consistent ambient warmth required for optimal curing. While extreme heat must be carefully monitored, experienced technicians easily control moisture retention in summer by dampening the bricks prior to application.
Preventing a mixture from freezing in late autumn is vastly more complex and risky. Ensuring the safety and chemical integrity of the structure requires complex, expensive external heating enclosures that drive up costs.
💡 Expert Insight: “In my twenty years of structural masonry consulting, I have seen hundreds of late-fall mortar repairs crumble after just one winter cycle. If you want structural work to last a lifetime, lay your mortar when the nights stay above freezing”.
The Danger of Delay: How Summer Rain Ruins Damaged Brickwork
🎯 Quick Answer: A damaged chimney degrades rapidly when exposed to severe summer downpours. Unsealed cracks allow water to penetrate deep into the brickwork, causing severe structural spalling, ruined liners, and internal toxic mold.
A common misconception among property owners is that a damaged chimney simply sits there unchanged if it is not actively being used. In reality, a structure with compromised flashing, a cracked concrete crown, or missing mortar joints decays every single day it rains.
The Structural Risks of Winter Delay
Summer thunderstorms drop inches of water in a matter of minutes. Without a watertight seal, this intense moisture penetrates deep into the porous interior of your brickwork.
-
Spalling Destruction: Trapped water expands and contracts under thermal shifts, causing the face of the brick to pop off and crumble.
-
Internal Flue Liner Damage: Water entering a clay tile liner causes the tiles to crack, creating dangerous hidden gaps.
-
Mold and Structural Rot: Moisture dripping down your walls compromises the surrounding wooden framing, drywall, and insulation.
By scheduling these repairs early in the summer, you seal the external envelope of your home securely. This proactive step ensures heavy late-summer rains and autumn downpours cannot cause thousands of dollars in secondary interior property damage.
⚠️ Common Mistake: Ignoring a cracked chimney crown in July because you do not plan to light a fire until December. Water ruins masonry year-round, regardless of appliance use.
The Fall Rush: Navigating November Scheduling Nightmares
🎯 Quick Answer: November is the absolute busiest month for venting contractors, leading to wait times of up to six weeks. If a technician discovers a code violation or a structural hazard during this rush, they will condemn your system, leaving you without heat.
In the chimney service industry, the period between late September and early January is universally known by contractors as “The Fall Rush”. During these hectic months, dispatch centers are completely inundated with hundreds of emergency calls a day from anxious homeowners.
Extended Wait Times and Reduced Availability
If you attempt to book a certified technician in November, you are highly likely to encounter extended lead times. You will often wait three to six weeks just to get a basic diagnostic inspection cleared on the company calendar. This leaves your home exposed to the element for longer.
System Condemnations and Cold Firesides
If an autumn inspection reveals a dangerous structural defect or a severe fire hazard, the technician is legally and ethically obligated to condemn the system. This means your fireplace stays completely cold during the coldest weeks of the year until a crew becomes available.
Furthermore, working on an icy, windswept roof in low winter daylight limits the operational window each day. This safety hazard regularly extends a simple multi-day repair into a week-long ordeal.
The Structural and Safety Hazards of DIY Chimney Repairs
🎯 Quick Answer: DIY chimney repair carries severe risks of catastrophic roof falls, incomplete interior flue inspections, and total structural failure from using incorrect hardware-store mortar mixes. Always hire a certified professional.
With the rise of online video tutorials, many homeowners consider taking a do-it-yourself approach to tuckpointing brickwork or replacing a damaged stainless steel cap. However, industry safety groups strongly discourage uncertified DIY repairs due to the extreme risks involved.
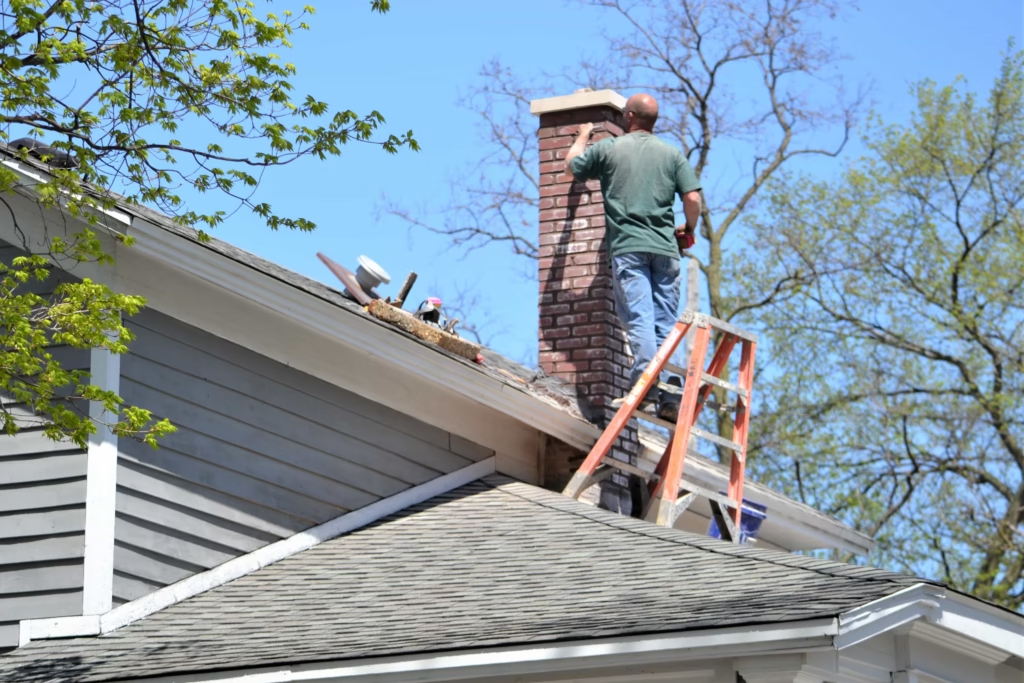
Fall Hazards and Roof Dynamics
Working safely on a roof requires highly specialized safety equipment, including dedicated roof hooks, industrial harnesses, and dynamic rigging lines. A standard household extension ladder is completely insufficient for safely navigating steep pitches and high structural elevations. One loose brick or unexpected slip can lead to catastrophic physical injury.
Misdiagnosing Hidden Structural Failure
A chimney may look fine on the outside while its interior flue lining is completely deteriorated. A DIYer cannot see or evaluate hidden structural damage inside the dark, tight confines of a venting flue. Professionals use specialized closed-circuit camera systems to inspect every single inch of the interior lining. This advanced process catches micro-cracks that could easily cause a house fire.
Material Selection Failures
Using standard off-the-shelf mortar from a local big-box hardware store can destroy an antique or historic chimney. Older bricks require high-lime, low-cement mortars that flex with the natural shifting of the building. Applying a modern, ultra-hard Portland cement mortar to historic brick causes the brick itself to crack and shatter when seasonal shifts occur.
Professionals match the specific compressive strength and composition of your existing masonry to ensure long-term stability.
Frequently Asked Questions About Chimney Maintenance
What is the best month for repairing your chimney?
July is the absolute best month for repairing your chimney due to lower labor rates, flexible scheduling availability, and ideal weather conditions for mortar curing. Booking during the mid-summer off-season saves you money and ensures your system is perfectly ready for winter.
Can masonry mortar be applied safely in freezing winter weather?
Research shows that applying traditional mortar in temperatures below 40°F compromises the mixture’s chemical bond. If water inside the mortar freezes before it sets, the joint becomes brittle, cracks easily, and fails within a few seasons.
Why do chimney contractors charge more in November?
Contractors charge peak-season premiums in November due to a massive spike in emergency service demand. Higher operating costs, employee overtime, and material scarcity cause invoices to jump by 20% to 40% compared to summer rates.
How do I know if my chimney flue has internal structural damage?
Internal structural damage can only be reliably detected using a professional closed-circuit video camera inspection. While the exterior brickwork may look completely safe, internal clay liner tiles can crack and leak toxic carbon monoxide into your living spaces.
What happens if a contractor finds a defect in my chimney in November?
If a certified technician uncovers a dangerous code violation or fire hazard in November, they are required to condemn the appliance. Because schedules are packed during the fall rush, your fireplace may remain unusable for several weeks during the winter.
Final Verdict: July Wins for Your Wallet and Peace of Mind
Ultimately, the choice between July and November comes down to a proactive maintenance approach versus a reactive emergency scramble. By prioritizing your home maintenance during the warm summer months, you secure lower operational rates, optimal structural curing conditions, and immediate scheduling flexibility.
According to the Consumer Product Safety Commission guidelines, routine annual venting system checks are vital for preventing residential carbon monoxide poisonings and fires. Most importantly, scheduling early guarantees that when the first cold night of late autumn arrives, your fireplace will be completely safe, warm, and ready to enjoy. Do not wait for the autumn rush to catch you off guard.
Contact our certified team at Always a Sweep today to schedule an evaluation and keep your home secure all year long.

by Always A Sweep Team | Jul 6, 2026 | Always Home Repair Services, chimney repair, dryer vent repair
How to Safely Identify an Urgent Chimney Leak in Your Ocala Home After July Storms
To quickly identify a chimney leak in your Ocala home after a heavy July storm, inspect your property for yellow-brown ceiling stains around the hearth, active water pooling in the firebox, rusted dampers, or a strong, musty creosote odor. Florida’s severe summer downpours regularly exploit minor masonry gaps, forcing water past vulnerable flashing lines. Addressing these structural indicators immediately avoids expensive structural rot and hazardous toxic mold growth within your living spaces.
According to regional property damage audits compiled as of 2026, over 35% of hidden water intrusion issues in Marion County homes stem directly from neglected roofline and masonry intersections. Florida’s summer climate is famously beautiful, but it presents a distinct set of structural challenges for local homeowners. When the peak of the rainy season arrives, tropical depressions, afternoon convective cloudbursts, and volatile lightning strikes put local properties to the ultimate test. If you are starting to notice damp spots or odd smells near your hearth, determining whether seasonal downpours caused a chimney leak in your Ocala home is critical to preserving your property’s foundational integrity.
Water damage inside a chimney system is notoriously deceptive. It rarely starts as a major flood; instead, it begins as a silent, slow intrusion that steadily undermines structural materials behind your walls. By understanding the intersection of Ocala’s local weather patterns and chimney architecture, you can identify a leak early. This protects your home before minor moisture turns into a high-cost restoration project.
📌 Key Takeaways
-
Immediate Detection: Check for interior drywall discoloration and water puddles inside the firebox immediately following afternoon convective downpours.
-
Sensory Indicators: Musty, campfire-like smells during humid days point directly to a compromised, moisture-saturated flue system.
-
Thermal Shock Danger: Rapid morning heating of saturated bricks causes micro-cracks to expand into deep-seated structural gaps.
-
Professional Standards: Always utilize vapor-permeable, hydrophobic sealants rather than standard consumer silicone coatings to prevent trapping moisture inside masonry walls.
Table of Contents
-
The Local Climate Reality: Why July Storms Put Ocala Chimneys at Extreme Risk
-
Interior Warning Signs: Spotting Problems From the Couch
-
Hidden and Sensory Symptoms: Smell, Texture, and Chemical Changes
-
Anatomy of a Failure: Where Structural Gaps Allow Water to Win
-
The Heavy Cost of Delay: Structural Rot and Central Florida Mold Hazards
-
The Pitfalls of DIY Fixes: Why Patchwork Masonry Repairs Backfire
-
The Professional Standard: Advanced Diagnostics and Waterproofing
The Local Climate Reality: Why July Storms Put Ocala Chimneys at Extreme Risk
Quick Answer: Intense convective thunderstorms drop massive water volumes that exert extreme hydrostatic pressure on residential rooflines. When combined with sudden morning heat, this moisture triggers thermal shock, splitting porous bricks open.
The geographic positioning of Marion County creates a unique microclimate. This environment is characterized by high ambient humidity and intense, concentrated convective thunderstorms during the peak summer months. Unlike a steady, gentle northern rain, a typical afternoon storm in Ocala drops large volumes of water accompanied by severe wind gusts and frequent lightning strikes.
The Threat of Convective Thunderstorms
This intense combination places extreme hydrostatic pressure on your roofline and chimney masonry. When heavy winds drive sheets of water sideways, your chimney acts like a visual lightning rod and a literal catchment funnel. If there is even a microscopic flaw in your brickwork, wind forces water directly into the building structure.
Understanding Masonry Thermal Shock
Furthermore, Ocala’s summer temperatures regularly sit above 90°C. When water penetrates a porous brick chimney during a storm and is immediately baked by intense hot sun the following morning, it triggers a destructive physical reaction known as thermal shock. The water trapped inside the brick expands rapidly as vapor, stretching tiny structural flaws into visible, deep-seated cracks. Over time, these thermal cycles break down the core stability of the system.
📊 Data Point
According to meteorological data tracking building stress factors, a building material saturated by a midday downpour can experience internal surface temperatures shifting by over 40°F in less than two hours when direct sunlight breaks through Florida’s cloud cover.
Interior Warning Signs: Spotting Problems From the Couch
Quick Answer: Homeowners can identify structural damage from the ground floor by looking for ringed drywall discoloration, physical deterioration of firebox bricks, and active puddles behind fireplace doors.
You don’t need to climb up a ladder onto a steep roofline to suspect storm damage. In fact, safety standards dictate that you start your investigation from the safety of your living room floor. When dealing with a suspected chimney leak in your Ocala home, the interior architecture of your house will naturally tell a story if you know exactly what to look for.
Discolored Drywall and Ceiling Rings
Water travels along the path of least resistance. When a storm breaches your chimney’s exterior envelope, the water frequently flows down the outside face of the flue liner. It then pools onto nearby horizontal ceiling joists or behind the vertical drywall surrounding your fireplace mantle. This manifests as ringed, yellowish-brown tea stains on your ceiling plaster or peeling paint on the walls adjacent to the fireplace.
Dampness and Pooling Water Inside the Firebox
Open your fireplace door and look closely at the floor of your firebox. If you see active puddles of water, damp ash residue, or water track marks running down the interior back wall of the brickwork after a heavy downpour, water is entering directly from the top vertical opening of the system. This indicates a complete failure of the overhead protection layers.
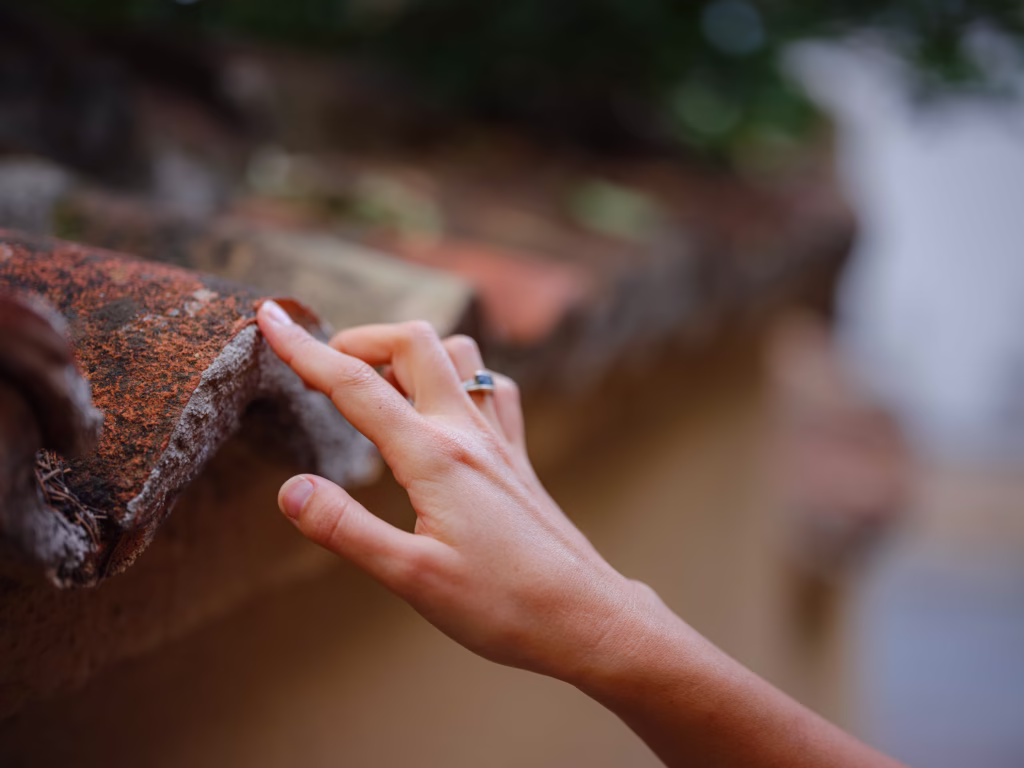
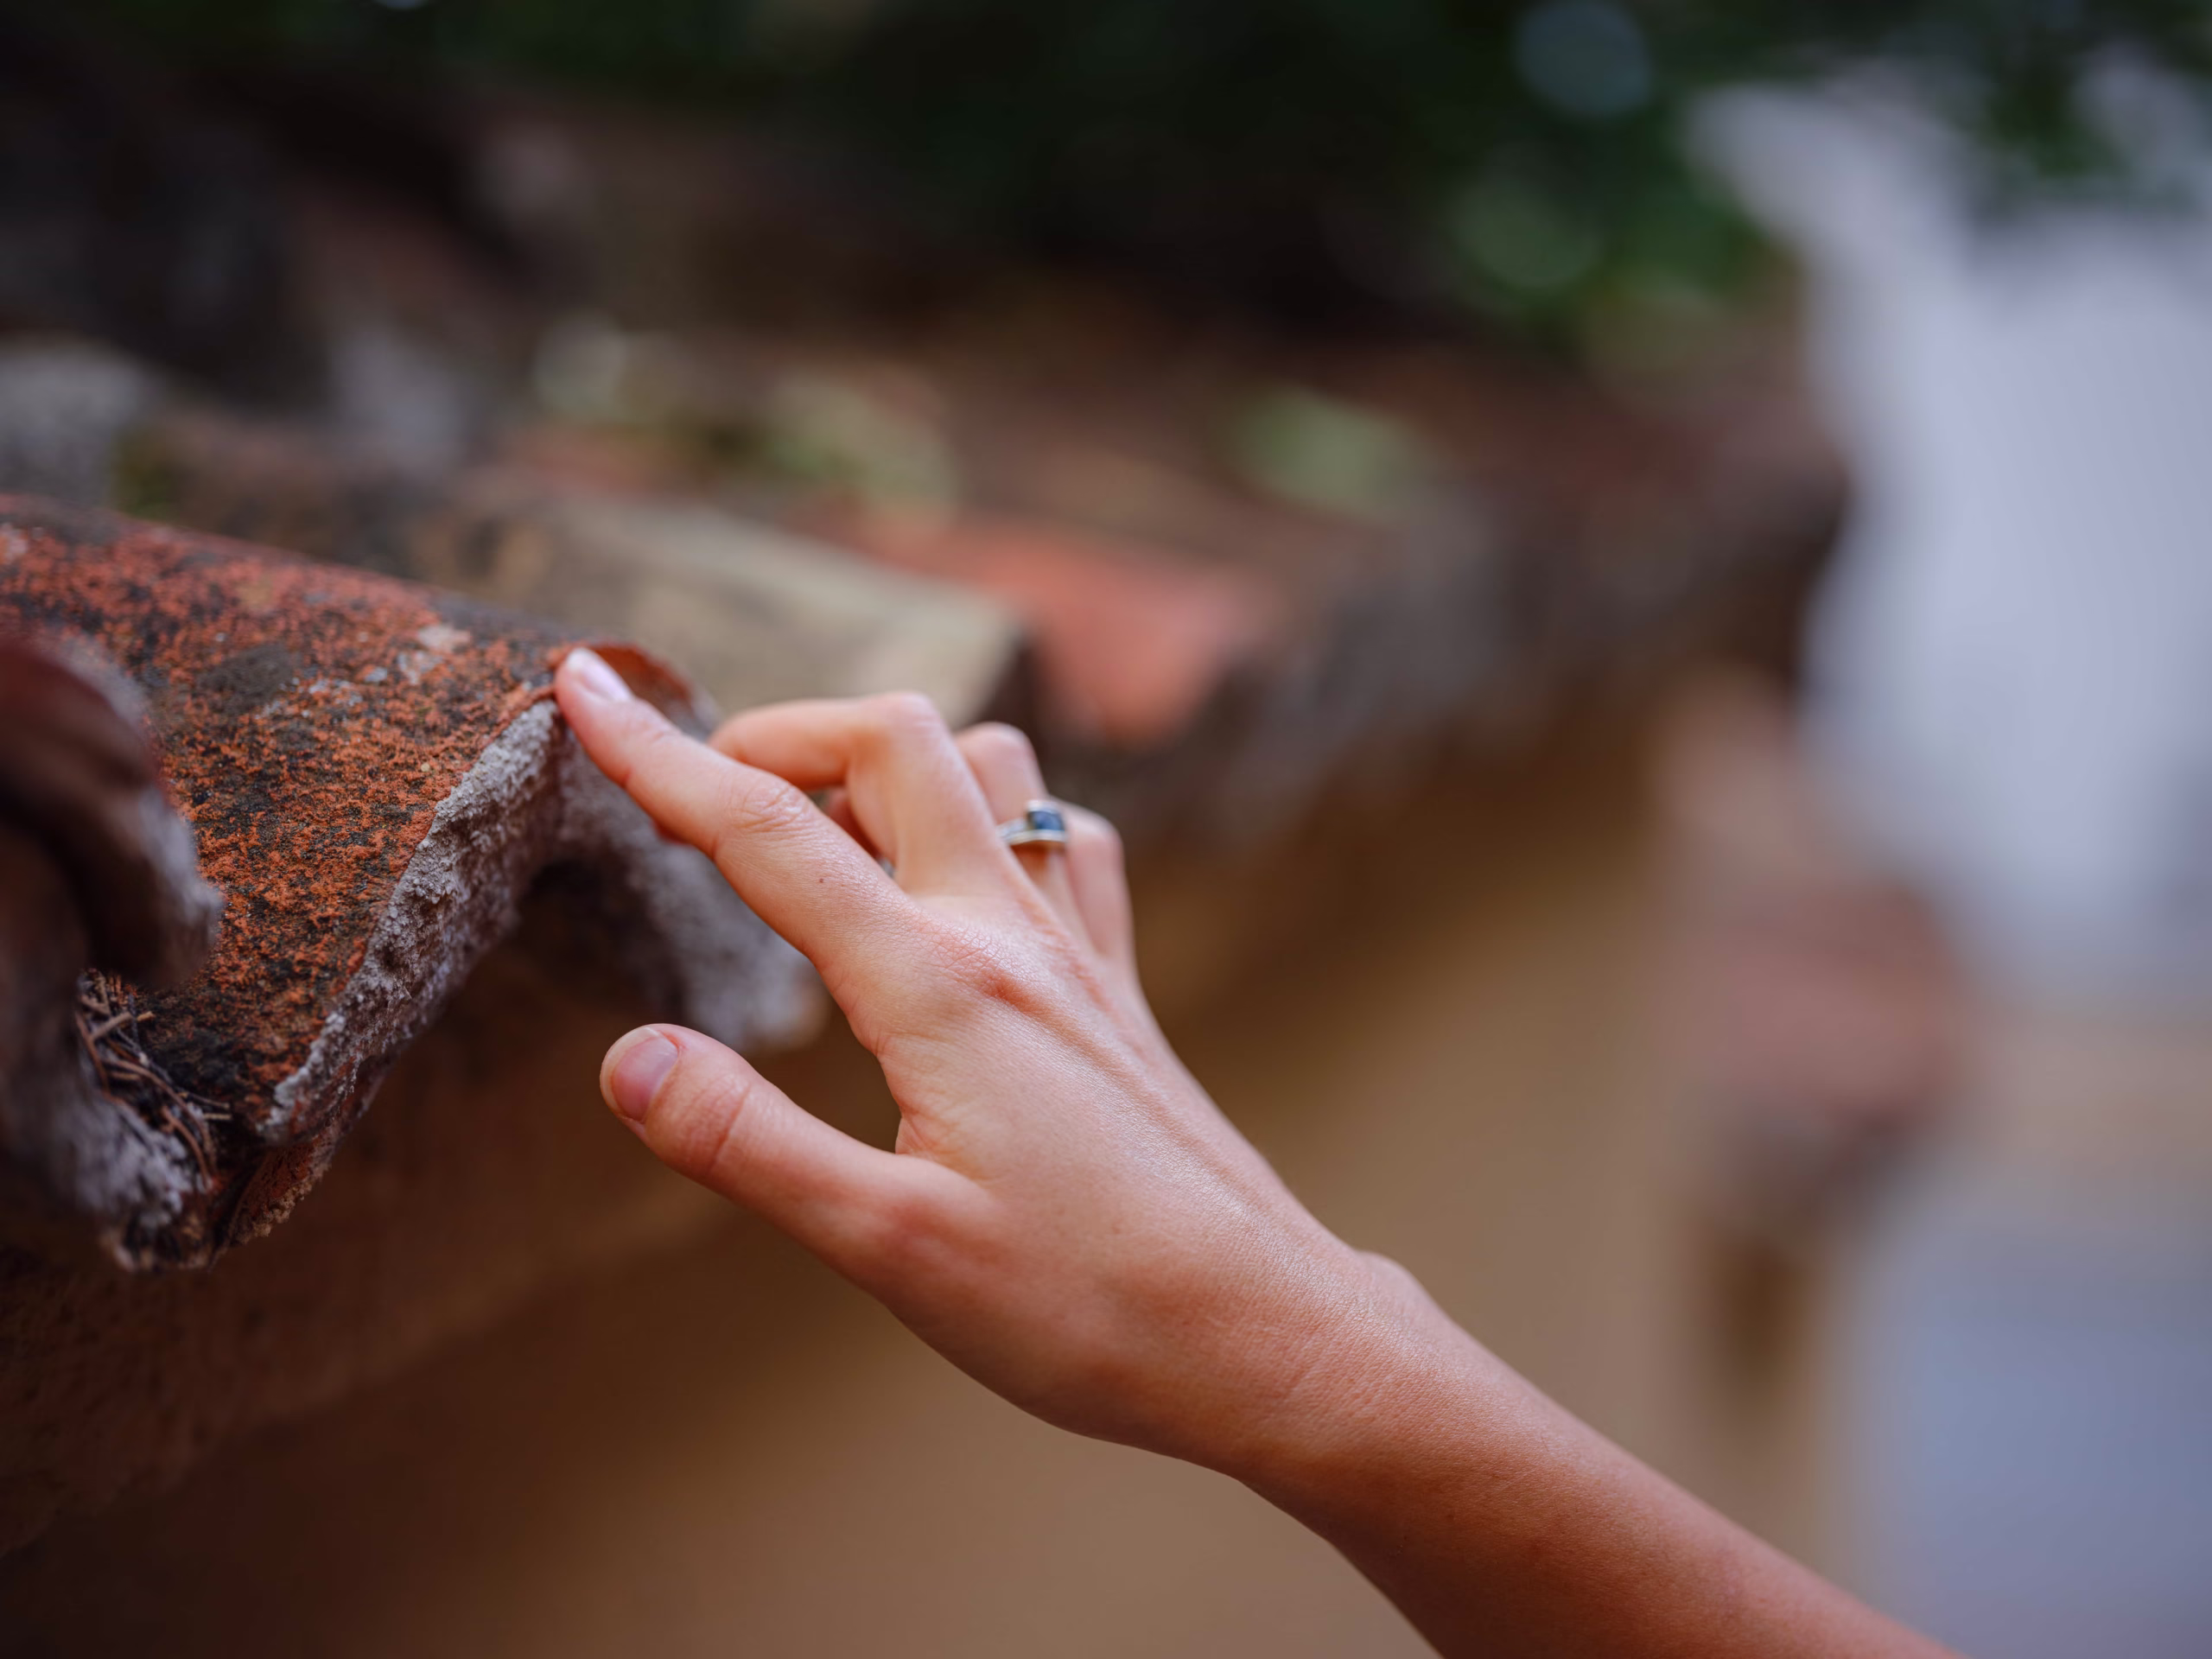
Physical Spalling of Interior Masonry
Take a bright flashlight and closely examine the brickwork inside your hearth. Do you see small flakes of brick, fragments of clay, or masonry dust piling up on the floor of your firebox? This structural peeling is called spalling. It occurs when masonry becomes fully saturated with water. The structural bonds within the brick break down entirely, causing the material to flake, crack, and crumble under its own weight.
⚠️ Common Mistake
Wiping away masonry dust or painting over stained drywall without addressing the external entry source. This cosmetic fix leaves the underlying structural damage to worsen out of sight.
Hidden and Sensory Symptoms: Smell, Texture, and Chemical Changes
Quick Answer: Moisture mixed with internal soot creates acrid, campfire-like smells that are drawn indoors by air conditioning systems. White, powdery mineral deposits on outer bricks also confirm water movement through masonry.
Some of the most dangerous leaks do not show up as clear water puddles right away. Instead, they register through your senses or create distinct chemical changes across the surface of your brickwork.
The Problem of “Summer Fireplace Odors”
If your living room suddenly begins to smell like a damp campfire, a dirty barbecue pit, or an old basement during a hot July afternoon, you are likely dealing with a hidden water entry issue. Your chimney flue naturally accumulates creosote, a dark, carbon byproduct of burning wood. When rain saturates this internal creosote buildup, it liquefies the soot and amplifies its smell.
The high air-conditioning demands of a modern Florida home create a negative pressure environment inside. This suction draws those humid, foul, acrid odors down the flue and straight into your clean indoor living spaces.
Efflorescence: The White Powder Trail
Have you noticed a strange, white, powdery, or crystalline substance spreading across the face of your fireplace bricks? This material is known as efflorescence. While the powder itself is non-toxic, it serves as a critical warning sign that water is moving completely through your masonry system. It is a material footprint proving that your outer chimney envelope has been fully breached by recent storm activity.
💡 Expert Insight
Efflorescence is not mold; it is salt. When water travels through cement and brick, it dissolves natural minerals. As the sun draws that water outward, the moisture evaporates, leaving salt crystals behind.
Anatomy of a Failure: Where Structural Gaps Allow Water to Win
Quick Answer: Chimneys rely on multiple defensive parts like caps, crowns, flashing, and mortar. Heavy winds and intense heat degrade these components, allowing water to bypass protection barriers.
To successfully evaluate a chimney leak in your Ocala home, it helps to look at the anatomy of a chimney as a series of defensive barriers. When a violent summer storm hits, a breakdown in any single barrier allows water to bypass the system completely.
| Chimney Component |
Primary Structural Function |
Common Storm Failure Mode |
| Chimney Cap |
Metal shield keeping rain out of the open flue |
High winds can dislodge unanchored caps; sideways rain blows directly underneath flat designs. |
| Chimney Crown |
Mortar or concrete slab sealing the top brick perimeter |
Develops deep shrinkage cracks over years of exposure that fill with water during a storm. |
| Roof Flashing |
Interlocking metal sheets bridging the roof-to-masonry joint |
Extreme heat dries out caulking sealants; wind lifts individual metal steps away from the roofline. |
| Mortar Joints |
Portland cement binding individual structural bricks together |
Porous mortar blends degrade over time, absorbing water like a hard sponge during prolonged downpours. |
The Heavy Cost of Delay: Structural Rot and Central Florida Mold Hazards
Quick Answer: Leaving a chimney leak unaddressed rots nearby structural wood support trusses and breeds toxic black mold inside wall cavities within 48 hours of a storm.
Ignoring a suspected chimney leak in your Ocala home is a high-risk gamble. Because chimneys are directly tied to the primary structural framework of your house, water that enters through the masonry will quickly spread to adjacent building materials.
Wood Rot in Roof Decking and Support Trusses
When rainwater leaks past defective metal flashing, it runs directly into the raw plywood decking of your roof and the heavy structural wood trusses that keep your ceiling standing. Wood that remains constantly damp loses its structural load-bearing capacity. Over several weeks, this moisture leads to wood rot, causing your roofline to sag and requiring thousands of dollars in deep structural carpentry repairs.
Toxic Mold Infestations
The combination of high humidity, dark building spaces, and wet building materials creates an ideal environment for mold growth. Species like Stachybotrys chartarum (black mold) can take root on damp drywall backing or insulation within 48 hours of a storm. Once mold becomes established inside your chimney chase or wall cavities, it releases airborne spores into your indoor HVAC ventilation system, creating health risks for family members with asthma or respiratory sensitivities.
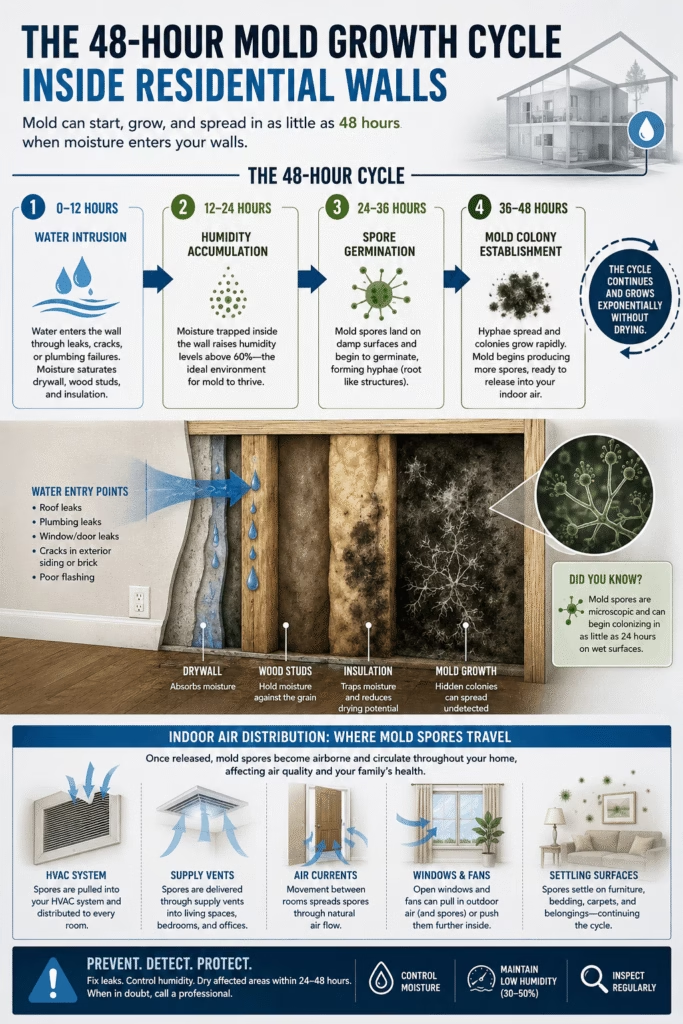
Did you know mold can start growing inside your walls in just 48 hours after water damage? 🌧️ High humidity and hidden leaks can quickly lead to toxic spore colonies that ruin your indoor air quality. Protect your property and your family’s health with professional mold remediation Houston TX. Save this pin for emergency reference or click through to schedule a professional home mold inspection today! #MoldRemediation #HoustonTX #WaterDamageRestoration #HealthyHome #MoldRemoval
The Pitfalls of DIY Fixes: Why Patchwork Masonry Repairs Backfire
Quick Answer: DIY patchwork traps water inside the chimney core. When heated by the sun, this trapped water vaporizes, building internal pressure that cracks masonry from the inside out.
When discovering a chimney leak in your Ocala home, many well-meaning homeowners attempt a do-it-yourself repair strategy. They might purchase a tube of standard silicone caulk or a bucket of generic hardware-store waterproofing sealant, pull out a ladder, and attempt to patch the chimney crown or flashing over the weekend. This approach is highly discouraged by structural engineers and safety experts.
Fall Risks and Physical Safety Hazards
Climbing onto a residential roof is inherently dangerous. Staging ladders on uneven Florida turf, navigating steep pitches, and working around high rooflines require professional-grade safety harnesses, specialized footwear, and fall-protection anchors. The extreme heat of an Ocala afternoon can cause dizziness or heat exhaustion quickly, making roof work an unnecessary risk to your life and safety.
The Trapped Moisture Trap
The biggest problem with DIY repairs is that they often hide the underlying issue rather than solving it. If you apply a cheap, non-breathable silicone coat over damp bricks, you trap existing water inside the chimney core. When the next hot sun hits the chimney, that trapped water turns into expanding steam. Because it cannot escape, it exerts massive internal pressure, cracking the brickwork from the inside out and accelerating structural failure.
Chemical Incompatibility
Consumer caulks and standard exterior paints are not designed to handle the intense thermal cycles of an active fireplace. Chimneys expand and contract significantly when heated by fires or extreme ambient weather. Cheap store-bought sealants lack elasticity; they quickly become brittle, crack, and peel within a few months, leaving your home completely vulnerable to the very next rainstorm.
✅ Quick Tip
Avoid applying standard elastomeric exterior paints to brick surfaces. Bricks must “breathe” to release natural groundwater vapor safely.
The Professional Standard: Advanced Diagnostics and Breathable Waterproofing
Quick Answer: Certified technicians use internal flue cameras and moisture meters to pinpoint leaks precisely. They resolve issues using vapor-permeable sealants that block rain while letting internal vapor escape.
Effectively resolving a chimney leak in your Ocala home requires an advanced level of precision and diagnostic technology that only certified industry professionals possess. Professional chimney technicians don’t use guesswork; they use field-tested science to discover exactly where water is entering your home.
HD Internal Flue Cameras
Professional sweeps use specialized, remote-controlled camera systems designed to drop down the entire vertical length of your chimney flue. This allows technicians to inspect every single joint in your clay or stainless-steel chimney liner, finding hidden vertical cracks, shifted liner segments, or deep internal moisture paths that are completely invisible from the outside.
Pinless Moisture Mapping
Using industrial-grade, non-destructive moisture meters, experts can scan your home’s interior walls and ceilings to trace the precise, hidden path of water migration. This allows them to verify exactly where water is moving behind your drywall without tearing your living room apart unnecessarily.
Pro-Grade Vapor-Permeable Hydrophobic Coatings
When a professional waterproofs your chimney, they use specialized commercial formulas like silane-siloxane water repellents. These advanced formulas do not create a shiny plastic film that traps water. Instead, they bond chemically with the brick at a molecular level, creating a hydrophobic layer that stops external liquid rainwater from entering while allowing internal moisture vapor to pass through safely.
To guarantee absolute safety, structural security, and long-term performance, look to certified organizations like the Chimney Safety Institute of America (CSIA) to guide all diagnostic, sweep, and restoration work. Trusting your home to an experienced professional gives you peace of mind that your home’s structure, safety codes, and fire-prevention layers are completely protected.
Your Next Critical Step for Home Protection
Don’t wait for a small leak to become a major structural emergency. Taking a proactive approach to your home’s chimney care is the most effective way to safeguard your property from Florida’s unpredictable summer weather.
Frequently Asked Questions
How do I know if a chimney leak in your Ocala home is coming from the roof or the flashing?
Distinguishing between these entry points requires analyzing water paths. Roof leaks generally show up as broad, scattered damp patches across ceiling drywall panels further away from the hearth structure. Flashing failures show up as tight, concentrated, vertical water track lines running directly down the brick face or drywall adjacent to your fireplace mantle.
Can a damaged chimney crown cause a chimney leak in your Ocala home?
Yes, a cracked chimney crown is a primary driver of water damage. The crown acts as the top roof for your masonry system. When it cracks due to sun exposure, heavy rain drops fall into those open fractures, moving downward into the interior brick skeleton and bypassing your structural flashing layouts entirely.
How much does it cost to fix a residential chimney leak?
Repair costs depend on the source of the failure. Simple flashing resealing or minor mortar touch-ups might run between $300 and $600. However, extensive crown reconstruction, full chimney repointing, or replacing rotted structural roof trusses damaged by prolonged water leaks can reach $2,000 to $5,000.
Does homeowners insurance cover storm-related chimney leaks in Florida?
If the chimney leak is triggered by a sudden, verifiable storm event, such as a falling tree branch tearing the flashing away or a lightning strike cracking the masonry structure, homeowners insurance often covers the repair. However, if the leak stems from years of delayed maintenance, worn caulking, or slow degradation, claims are typically denied.
How long does a professional chimney waterproofing treatment last?
A professional-grade application of a vapor-permeable, silane-siloxane hydrophobic coating typically lasts between 5 and 10 years. Consumer-grade retail sealants generally break down within 12 to 18 months due to intense UV rays and high thermal changes.
by Always A Sweep Team | Jun 15, 2026 | Always Home Repair Services, chimney repair, inspections & sweeping
The Ultimate Guide to Wood Burning Stoves Near Me: 2026 Trends & Expert Installation
If you are searching for the best wood burning stoves near me, the direct answer is to look for a CSIA-certified local installer who supplies EPA-approved, high-efficiency models. Upgrading to a modern wood stove transforms your home into a cozy, energy-efficient sanctuary. Whether you want to slash monthly utility bills or enjoy the timeless aesthetic of a crackling fire, investing in a solid fuel heating appliance is a brilliant move for 2026.
At Always a Sweep, our legacy is expanding. For decades, locals trusted us to keep their chimneys immaculate. Today, we have evolved into a comprehensive heating solutions provider. We no longer just clean flues; we supply, install, and service the most advanced, eco-compliant wood heating systems on the market.
📌 Key Takeaways
-
Prioritize EPA compliance: 2026 regulations require new stoves to emit less than 2.0 grams of particulate matter per hour.
-
Look beyond the stove cost: Installation requires insulated twin-wall flue pipes and custom hearths, making up half the budget.
-
Verify installer credentials: Never use a general handyman; demand CSIA or NFI certifications to prevent house fires.
-
Size matters: A stove that is too large will overheat your room, while a small unit will burn out prematurely.
Table of Contents
-
Why Wood Stoves Are Surging in Popularity
-
What to Know Before You Shop Locally
-
Understanding 2026 Eco-Design Regulations
-
How to Choose the Best Local Installer
-
Top Wood Stove Types and Costs
-
The Professional Installation Process
-
Safety and Maintenance Rules
-
Frequently Asked Questions
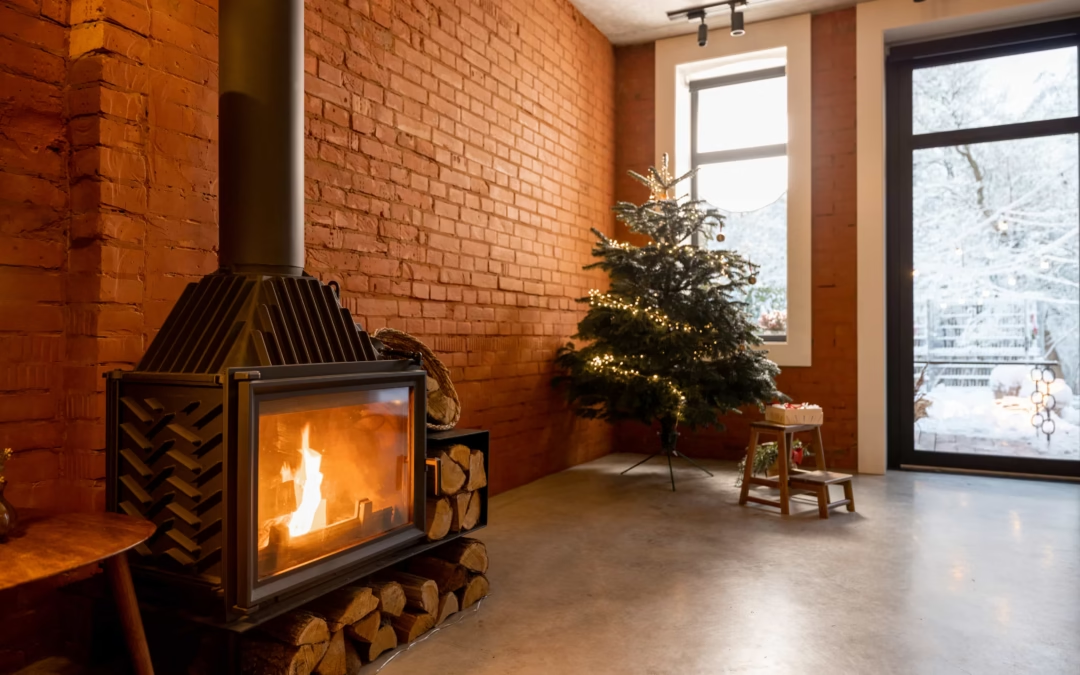
Quick Answer: Modern wood stoves operate at over 80% thermal efficiency, allowing homeowners to reduce reliance on the electrical grid, lower utility bills through zone heating, and utilize renewable biomass energy.
Even alongside smart home tech and heat pumps, modern wood heating appliances remain in incredibly high demand. Homeowners prioritize resilience, reliable zone heating, and authentic comfort.
Energy Independence and Resilience
A premium wood stove keeps your family warm without relying on the electrical grid or municipal gas lines. This is a vital asset during unexpected winter power outages or severe storms.
Cost-Effective Zone Heating
By utilizing zone heating—warming the room you actually use rather than cranking the central thermostat—a wood stove dramatically lowers overall utility expenses.
Unmatched Thermal Efficiency
Gone are the days of drafty open fireplaces that lose 90% of their heat. Modern appliances operate at over 80% efficiency. This ensures the vast majority of the heat radiates into your living space rather than escaping up the chimney flue.
📊 Data Point: According to the U.S. Department of Energy, modern EPA-certified wood stoves are up to 50% more energy-efficient and consume 1/3 less wood than older, uncertified models.
Quick Answer: Before visiting local fireplace showrooms, determine if you need a freestanding unit or a fireplace insert. You must also evaluate if your home has an existing masonry chimney or requires a prefabricated vent pipe.
Before you browse online catalogs for wood burning stoves near me, you must understand the structural needs of your property.
The Core Type of Stove You Need
-
Freestanding Stoves: Placed on a dedicated hearth in open floor space. They act as a striking architectural focal point.
-
Insert Stoves: Designed to slide directly into an existing brick masonry fireplace. These units reclaim lost thermal efficiency.
-
Catalytic vs. Non-Catalytic: Catalytic stoves pass smoky exhaust through a coated ceramic honeycomb, burning off gases at lower temperatures. Non-catalytic stoves use pre-heated air tubes to create a secondary combustion fire.
Chimney and Venting Compatibility
Not every property is plug-and-play. You may need a professional chimney sweep evaluation, a flexible stainless steel flue liner, or structural upgrades.
If you lack a traditional brick chimney, do not worry. Insulated twin-wall flue systems can be safely routed through an exterior wall or straight up through the roof.
✅ Quick Tip: Take photos of your current fireplace or the exact room corner you want to install the stove in before calling an installer. Measuring the square footage of the room will also help technicians calculate the exact kW heat output you need.
Quick Answer: In 2026, air quality laws mandate that new wood stoves meet strict Eco-Design and EPA emissions limits. These engineered models reduce harmful particulate matter by up to 90% compared to open fireplaces.
Air quality standards are stricter and more transparent than ever. Before finalizing any purchase of wood burning stoves near me, ensure your appliance complies with environmental protections.
EPA Certification and Eco-Design Standards
All new solid fuel stoves manufactured and sold must meet strict compliance metrics. These highly engineered units significantly reduce particulate matter (PM2.5) emissions.
If you live in a designated municipal Smoke Control Area, emitting thick smoke from a chimney is illegal unless you use a certified, exempt appliance. You must verify that your chosen model is cleared by regulatory bodies.
💡 Expert Insight: “In our years of field experience replacing outdated units, we frequently find older stoves producing dangerous levels of creosote. Modern EPA-certified models not only burn cleaner for the environment, but they keep your chimney vastly cleaner, reducing the risk of a house fire.” — Always Fire and Gas Master Technician
Quick Answer: Always verify that a local installer holds active credentials from the Chimney Safety Institute of America (CSIA) or the National Fireplace Institute (NFI), and ensure they handle the entire project from permits to final inspection.
When you open Google and search for wood burning stoves near me, you will see a chaotic mix of online drop-shippers, general handymen, and independent builders. Prioritizing safety over the lowest price is paramount.
How to Verify a Premium Provider
-
Check Industry Accreditations: Look for CSIA certification or NFI (National Fireplace Institute) badges.
-
Confirm In-House Services: Choose companies that handle site surveys, installations, and ongoing maintenance.
-
Verify Liability Insurance: Ensure they carry specialized insurance for solid fuel heating installations.
At Always a Sweep, our team holds full industry certifications. We manage the entire lifecycle of your appliance.
Looking to upgrade your home heating? 🔥 A professional wood burning stoves near me installation ensures safety, efficiency, and cozy comfort all winter long. Contact our experts in Portland, OR to get started today! #WoodStove #PortlandHomes #HomeHeating #StoveInstallation #EnergyEfficiency
Quick Answer: Total installation costs range from $3,500 to $7,500. This includes the stove unit, insulated chimney pipes, the non-combustible hearth, and certified professional labor.
To help narrow down your local search, review this breakdown of popular stove variations.
| Stove Category |
Ideal Architecture Layout |
Average Efficiency |
Primary Material Benefit |
| Traditional Cast Iron |
Historic homes, rustic cabins |
75% – 80% |
Incredible heat retention; radiates warmth long after the fire dies. |
| Sleek Steel Convection |
Modern homes, open-concept spaces |
80% – 85% |
Heats up instantly; features sharp, minimalist design lines. |
| Space-Saving Inset |
Compact rooms with an existing fireplace |
72% – 78% |
Flushes seamlessly into the wall to preserve floor space. |
| Double-Sided |
Large open-plan living zones |
75% – 82% |
A gorgeous visual focal point viewable from two separate rooms. |
Installation Costs Breakdown
Budgeting accurately requires looking past the physical stove’s price tag.
-
The Stove Unit: Entry-level cast iron or steel models start around $800 to $1,800. High-end panoramic models range from $3,000 to $6,500+.
-
The Component Kit: Expect to allocate $600 to $1,500 for flexible chimney liners, twin-wall flue pipes, and register plates.
-
Hearth & Labor: Safe, certified installation typically runs between $1,200 and $3,500, depending on roof access and custom stonework.
⚠️ Common Mistake: Buying a stove online purely based on aesthetics, only to find out from your installer that it is not legally rated for your home’s square footage or local emission laws. Always consult a professional before buying the unit.
Quick Answer: Our seamless process includes a technical in-home assessment, custom stove selection, insulated flue liner installation, precision fitment on a safe hearth, and a final compliance handover.
Transitioning our identity to Always Fire and Gas meant scaling up our technical operations to deliver a flawless installation experience.
-
The Technical Assessment: We measure room volume, calculate heat output requirements, check existing flue draw, and inspect combustible clearances.
-
Custom Selection: We help you select an Eco-Design compliant stove that balances interior design with practical heating.
-
Flue Preparation: We install a heavy-duty, insulated stainless steel liner down the length of the chimney to guarantee toxic gases vent perfectly.
-
Precision Fitment: We safely position your stove, seal all connections with high-temperature fire cement, and run live smoke draw tests.
-
Certification Handover: We provide compliance documentation, fit a carbon monoxide alarm, and walk you through your first “curing” fire.
Quick Answer: Burn only kiln-dried or seasoned wood with a moisture content under 20%. You must also schedule an annual professional chimney sweep to mechanically remove dangerous creosote buildup.
Owning one of the finest wood burning stoves near me brings immense joy, but it demands routine maintenance to protect your household.
The Golden Rules of Clean Burning
-
Burn Seasoned Wood Only: Never burn unseasoned “green” wood or painted scrap. Ensure your logs have a moisture content under 20% using a digital moisture meter.
-
Schedule Annual Sweeping: This is non-negotiable for safety. Creosote buildup is the primary cause of residential chimney fires.
-
Inspect Door Seals: The fire-rope gasket inside your stove door creates an airtight seal. Replace it every few seasons to prevent over-firing.
-
Manage Your Ash Pan: Never allow ash to touch the underside of your bottom grate. Compressed ash blocks airflow and causes metal components to warp or crack.
Can I install a wood burning stoves near me without a brick chimney?
Absolutely. Installers frequently use prefabricated, insulated twin-wall flue systems. These stainless steel pipes act as their own chimney and safely route smoke through an exterior wall or directly up through the ceiling and roof.
What is the difference between a wood stove and a multi-fuel stove?
A dedicated wood stove has a flat, solid firebox base because wood burning stoves near me best on a bed of its own ash. A multi-fuel stove features a raised grate and ash pan, allowing air to flow from underneath, which is required to burn smokeless mineral fuels.
Why did Always a Sweep change its name to Always Fire and Gas?
As heating technologies evolved, so did we. While keeping chimneys clean is our heritage, clients needed experts capable of handling advanced gas fireplace lines, custom stove installations, and mechanical venting. The new name reflects our full-service capabilities.
Is installing a modern wood stove a safe DIY project?
No. Incorrectly sizing a flue or violating combustible wall clearances can result in catastrophic house fires or deadly carbon monoxide leaks. Furthermore, manufacturers will completely void your warranty if the unit is not installed by a certified professional.
How often should a wood burning stove be professionally swept?
You should schedule a professional chimney sweep at least once a year. If you use your stove as your primary home heating source continuously throughout the winter, you may require two cleanings per season to safely manage creosote accumulation.
Transform Your Home Heating Today
Securing the best wood burning stoves near me requires more than just picking a beautiful cast-iron appliance; it demands technical precision, strict adherence to EPA guidelines, and professional, certified installation. From choosing the correct BTU output to ensuring your twin-wall flue vents perfectly, expert guidance keeps your family safe and warm.
As Always a Sweep transitions into Always Fire and Gas, our team is ready to handle your entire heating project from start to finish.
Next Steps to Secure Your New Stove:
-
Identify the room you wish to heat and note any existing fireplace structures.
-
Decide whether you prefer a traditional freestanding model or a fireplace insert.
-
Reach out to our certified team for a comprehensive in-home evaluation.
Ready to achieve true energy independence and unmatched winter comfort? Contact the Always a Sweep team today to schedule your safety consultation and begin your installation journey!
by Always A Sweep Team | Jun 8, 2026 | Always Home Repair Services, chimney repair, inspections & sweeping, installation
Ultimate Wood Stove Installation Near Me Guide: Clearance, Weight & Safety
Finding a certified expert for a wood stove installation near me ensures your new solid-fuel heating appliance operates with maximum efficiency and adheres to strict residential fire codes. Whether you want to slash high winter utility bills or enjoy the unmatched ambiance of a crackling fire, proper placement and venting are non-negotiable.
At Always A Sweep, we understand that upgrading your home heating system is a major investment. As our brand transitions to reflect our comprehensive hearth safety services, our commitment to technical precision remains our priority.
This guide breaks down exactly what to expect from professional hearth installations, including floor protection rules, clearance requirements, and how to select certified local experts.
📌 Key Takeaways
-
Never skip clearances: Unlisted wood stoves require a minimum 36-inch clearance from combustible walls without specialized heat shields.
-
Verify your floor support: Cast iron stoves and masonry hearth pads can weigh over 800 pounds, often requiring floor joist reinforcement.
-
Check CSIA credentials: Always hire installers certified by the Chimney Safety Institute of America (CSIA) to guarantee compliance and safety.
-
Buy EPA-certified: Modern units must meet strict EPA emission limits of 2.0 to 2.5 grams of smoke per hour to comply with 2026 clean air standards.
Table of Contents
-
Why Professional Installation Matters
-
Clearance, Weight, and Floor Requirements
-
Choosing the Right Stove Type
-
Navigating Local Building Codes
-
The Installation Process Explained
-
DIY vs. Professional Risks
-
Finding Certified Installers
-
Frequently Asked Questions
Quick Answer: Hiring a certified professional ensures your wood stove is vented perfectly, drastically reducing the risk of creosote accumulation and chimney fires. Furthermore, professional installation is usually required to keep your home insurance valid.
When homeowners search for a wood stove installation near me, they usually recognize the inherent risks of indoor fire. The “Do It Yourself” spirit is admirable for painting walls, but solid-fuel heating demands technical exactness.
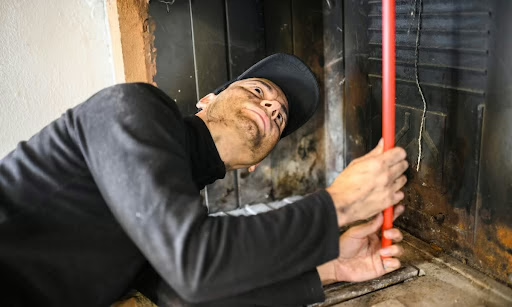
Preventing Devastating Chimney Fires
A poorly calibrated stove leads to rapid, dangerous creosote accumulation. Our technicians ensure that clearances to combustible materials meet the rigorous standards established by the National Fire Protection Association.
💡 Expert Insight: “Every winter, our field crews inspect DIY setups that are dangerously close to structural drywall. Even if a wall doesn’t catch fire immediately, long-term exposure to intense heat causes ‘pyrolysis,’ which lowers the ignition temperature of the wood framing over time until it spontaneously combusts.” — Always Fire and Gas Master Technician
Efficiency and Warranty Protection
A stove without proper draft calibration burns through seasoned cordwood faster while providing less heat. Heating experts tune the venting system calibration to ensure your unit hits its peak BTU output.
Additionally, most premium manufacturers instantly void their warranty if the unit is not installed by a certified professional.
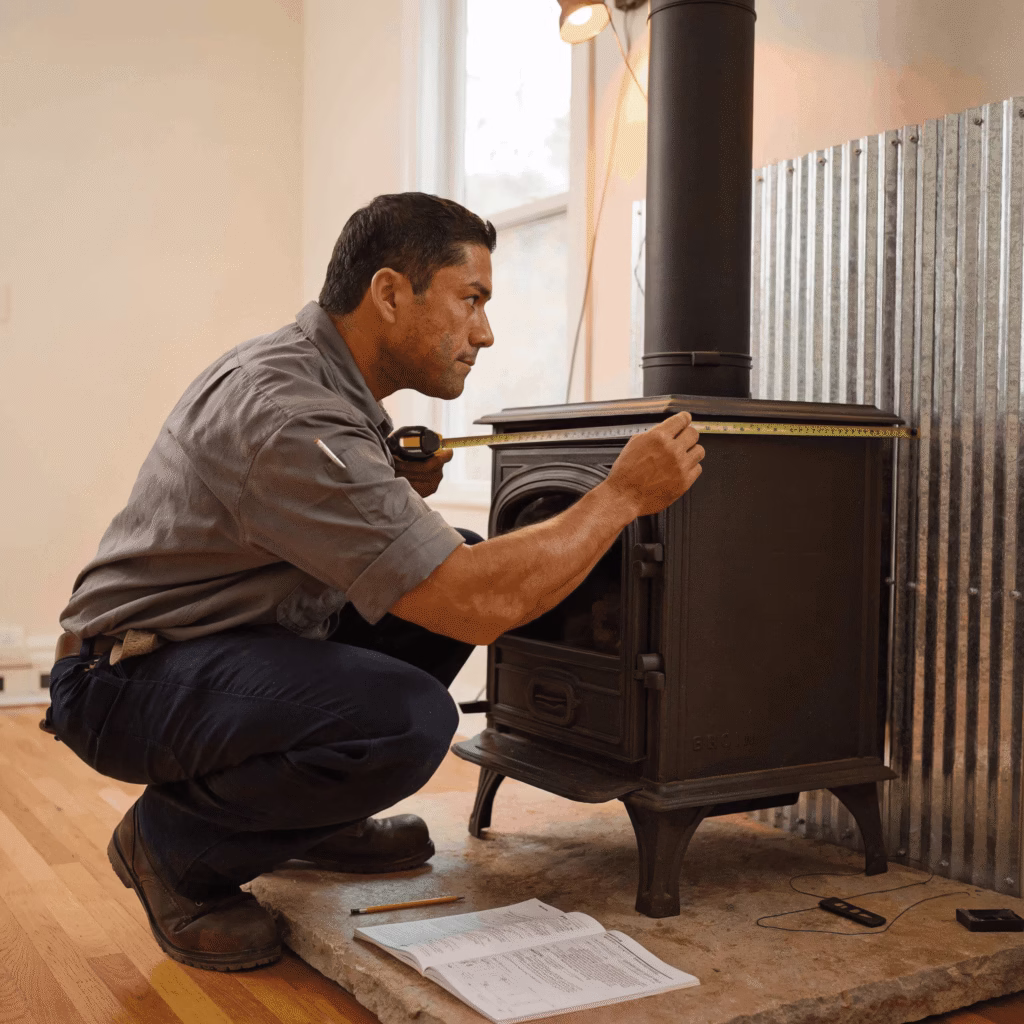
Quick Answer: Wood stoves require strict minimum distances from walls (up to 36 inches for unlisted models), sturdy subfloors to hold 500+ pounds of dead weight, and non-combustible hearth pads that extend 18 inches past the loading door.
Before buying an appliance, you must understand the physical constraints of your living room or basement.
Clearance to Combustibles
Clearance refers to the minimum safe distance between the stove and anything that can burn. According to NFPA 211 standards, unlisted wood stoves require 36 inches of clearance from combustible walls. However, listed models with properly installed heat shields can safely reduce this distance to as little as 6 inches.
Structural Weight Support
Cast iron and thick steel stoves weigh anywhere from 300 to 800 pounds. When you add the weight of a stone hearth pad, the total load is massive. Ground floors with concrete slabs require no extra reinforcement, but elevated wooden floor joists must be inspected carefully.
Non-Combustible Hearth Pads
A stove cannot sit on carpet, hardwood, or vinyl. It requires a non-combustible hearth pad for two reasons. First, it offers amber protection from stray sparks. Second, it provides thermal protection (R-value) to stop heat from baking the floor underneath. The pad must extend at least 18 inches in front of the door and 8 inches on all sides.
Thinking about adding a cozy wood-burning stove to your home? 🪵 Proper measurement and professional installation are key to safety and efficiency. Trust our experts in Denver, CO to handle your wood stove installation near me from start to finish. Click to learn more! #WoodStove #DenverHomes #HomeHeating #FireplaceInstallation #WoodBurningStove
Quick Answer: You can choose from heavy-duty cast iron stoves, modern high-efficiency steel models, automated pellet stoves, or fireplace inserts that transform open masonry hearths into powerful heaters.
Choosing the right equipment dictates how much you will spend on fuel and maintenance.
EPA-Certified Wood Stoves
Modern models are engineered for incredibly clean combustion. As of 2026, the Environmental Protection Agency (EPA) mandates that new wood heating appliances produce no more than 2.0 to 2.5 grams of particulate emissions per hour. Look for the white EPA tag on the back of the unit.
Fireplace Insert Stoves
If you already have a traditional open fireplace, an insert is brilliant. It slides directly into the fire box restoration space, converting a drafty, inefficient fireplace into a powerhouse heating system.
✅ Quick Tip: Always match the stove’s BTU rating to your home’s square footage. A stove that is too large will force you to run smoldering, low-temperature fires, which creates massive amounts of dangerous creosote in your chimney liner.
Quick Answer: You must pull municipal building permits before installing a wood stove. Post-installation, a city inspector will verify that the chimney height, floor protection, and emission standards match local zoning laws.
One of the most complex hurdles in a new installation is regulatory compliance. Unpermitted work can result in hefty fines.
| Requirement Category |
Standard Compliance Detail |
| Permit Requirements |
Municipal building permit must be approved before setup. |
| Clearances |
Must strictly meet manufacturer & NFPA 211 guidelines. |
| Safety Standards |
Appliance must pass UL-1482 or UL-127 safety testing. |
| Emissions Compliance |
Must meet the latest EPA clean air act limits. |
Professional installers handle this paperwork seamlessly, guaranteeing your setup complies with local laws.
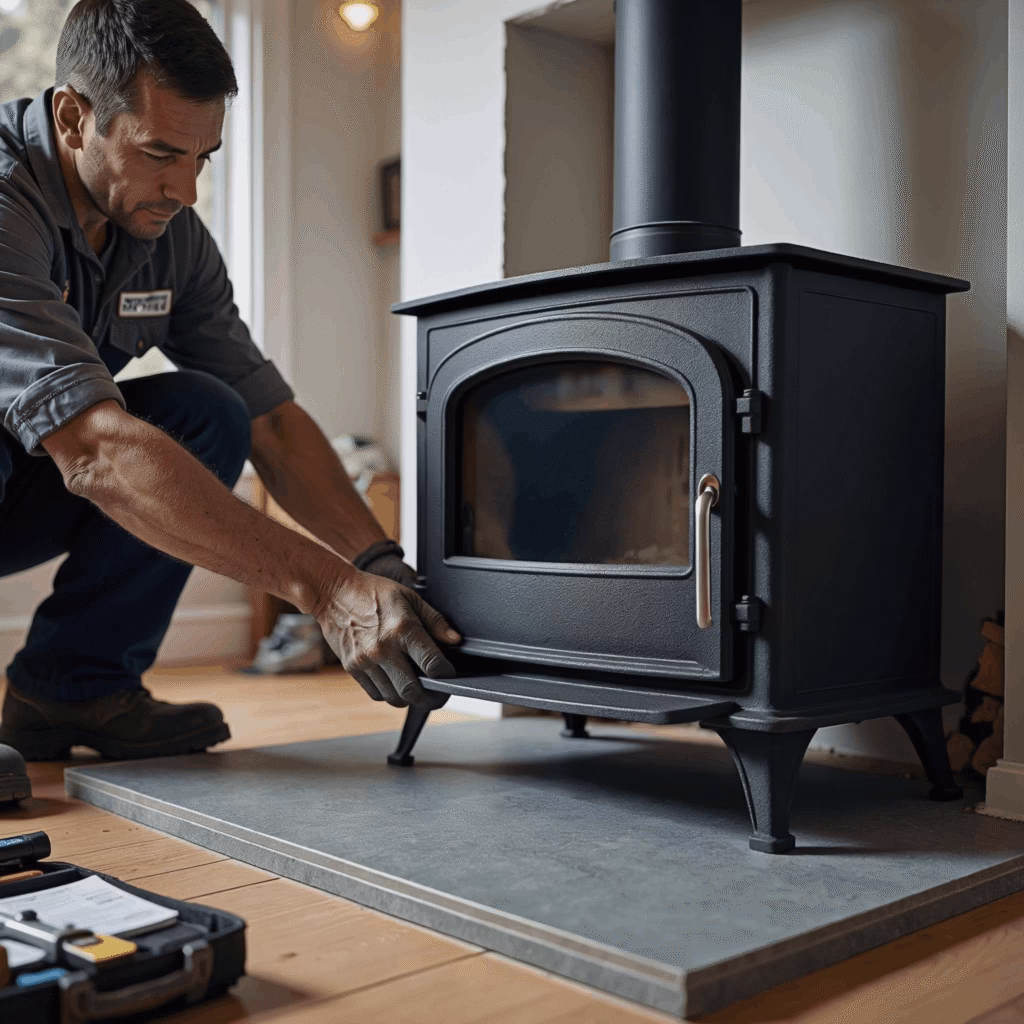
Quick Answer: Installation involves an in-home assessment, placing the thermal hearth pad, routing the insulated chimney pipe through the ceiling or exterior wall, and conducting a “first burn” to test the draft seals.
When you hire Always Fire and Gas for a wood stove installation near me, our process is heavily structured.
-
Home Assessment: We evaluate your floor support, roof pitch, and room layout.
-
Hearth Preparation: We install a certified pad that matches your home’s aesthetic.
-
Chimney Routing: We run a “Class A” insulated stainless steel chimney pipe through the roof or wall.
-
The First Burn: We connect the stove, fire it up, and teach you proper damper management.
📊 Data Point: According to energy efficiency studies, upgrading from a traditional open masonry fireplace (which loses up to 90% of its heat up the chimney) to an EPA-certified wood stove installation near me insert can increase heating efficiency to over 75%.
Quick Answer: DIY installations carry severe risks, including deadly carbon monoxide backdrafting, voided home insurance policies, and structural house fires caused by ignoring wall clearance requirements.
Installing solid-fuel thermal systems is not a weekend hobby project. While doing it yourself saves labor costs upfront, minor errors create lethal environments.
Venting Failures and Legal Issues
Improper chimney routing causes carbon monoxide to backdraft directly into your living room. Furthermore, if a DIY installation causes a house fire, insurance adjusters will immediately deny the claim upon discovering unpermitted, uncertified work.
⚠️ Common Mistake: Never use single-wall galvanized steel stove pipe to pass through a ceiling or wall. You must use insulated double-wall or triple-wall Class A chimney pipe to prevent the surrounding wood framing from catching fire.
Quick Answer: Look for local companies with active certifications from the Chimney Safety Institute of America (CSIA) or the National Fireplace Institute (NFI). Read reviews verifying their expertise in complex structural venting.
Not all contractors understand thermal dynamics. When vetting companies for a wood stove installation near me, you must look for specific credentials.
Always ensure the technicians carry active CSIA credentials. Excellent installers also offer full lifecycle services, from the initial setup to your annual chimney sweep. A reputable provider will give you a fully itemized estimate before a single tool is lifted.
How long does a wood stove installation near me take to complete?
Most standard freestanding installations take about 4 to 8 hours (one business day). However, if we are relining a historic masonry chimney or modifying roof trusses for the vent pipe, it may take up to two days.
Can I install a wood stove directly on a hardwood floor?
No. You must place a non-combustible hearth pad underneath the appliance. This pad must offer a specific thermal R-value and extend at least 18 inches in front of the stove door to catch rolling embers.
How much does it cost to install a wood stove?
Depending on the unit and venting requirements, total costs range from $2,900 to $8,300+. This includes the appliance, the Class A stainless steel chimney piping, municipal permits, and professional labor.
Do I need a traditional brick chimney to get a wood stove?
No. You do not need a brick chimney. Certified installers can route a prefabricated, insulated stainless steel chimney pipe straight up through your ceiling and roof, or out horizontally through an exterior wall.
How often should a wood stove be inspected?
The NFPA mandates that solid-fuel heating systems and venting pipes be inspected at least once a year. Heavy winter usage may require two cleanings a year to remove hazardous creosote buildup.
Conclusion: The Always Fire and Gas Advantage
Upgrading to a high-efficiency wood heater is a brilliant way to lower utility bills and secure a reliable backup heat source for winter storms. However, safety must always come first. Strict adherence to clearance rules, floor support weight limits, and EPA emission standards is only guaranteed when you invest in a professional wood stove installation near me.
As we finalize our rebrand from Always A Sweep to Always Fire and Gas, our master-level team remains your trusted partner for total hearth safety.
Next Steps to Secure Your Installation:
-
Determine the square footage of the room you want to heat.
-
Check your preferred wall space to see if you have the required 36-inch clearance.
-
Schedule an in-home consultation with our CSIA-certified team.
Ready to transform your home with safe, reliable warmth? Browse our professional heating and gas installation services to book your consultation today!
by Always A Sweep Team | Jun 4, 2026 | Always Home Repair Services, chimney repair, dryer vent repair
Best Chimney Sweep in Ocala FL: 2026 Safety & Maintenance Guide
Finding the best chimney sweep in Ocala FL requires looking for certified technicians who understand Florida’s unique climate. Annual chimney inspections remove flammable creosote, clear wildlife blockages, and prevent dangerous carbon monoxide leaks.
When autumn breezes chill Central Florida, local homeowners love a warm, crackling hearth. However, enjoying that fire safely requires consistent professional maintenance.
We have exciting news for our Marion County neighbors. To reflect our expanding expertise, Always a Sweep is now officially Always Fire and Gas. Our name has evolved, but our core mission remains identical. We protect local homes with expert, certified fireplace maintenance.
📌 Key Takeaways
-
Book annual inspections: Even rarely used fireplaces suffer from humidity damage and wildlife nesting.
-
Beware of Stage 3 creosote: Florida moisture hardens loose soot into a highly flammable glaze.
-
Look for warning signs: Smoky odors, bad drafting, and weird noises mean you need immediate service.
-
We are rebranding: Always a Sweep is now Always Fire and Gas, offering expanded gas and venting services.
Table of Contents
-
Why Chimney Cleaning Is Essential
-
The Science of Creosote in Florida
-
What to Expect from the Best Chimney Sweep in Ocala FL
-
Central Florida’s Unique Chimney Problems
-
The Cost of Neglect vs. Maintenance
-
Always a Sweep is Now Always Fire and Gas
Quick Answer: Regular chimney cleaning is vital in Ocala because high humidity rapidly degrades masonry, and unused flues quickly become homes for birds and raccoons. Routine sweeping prevents devastating house fires and structural damage.
Many homeowners think Florida’s warm climate makes chimney maintenance unnecessary. This is a dangerous misconception. Heavy seasonal humidity and severe storms brutally impact masonry and metal venting.
Finding reliable, certified providers is your first defense against house fires. It also prevents silent carbon monoxide poisoning.
The Flammable Creosote Threat
Burning seasoned logs creates a byproduct called creosote. This volatile substance causes most residential chimney fires. Even a tiny fraction of an inch of buildup can ignite under high heat.
A roaring flue fire can easily breach your chimney liner. Once breached, flames quickly spread to your attic and structural walls.
📊 Data Point: According to the Federal Emergency Management Agency (FEMA), heating fires account for a massive percentage of winter residential emergencies, with confined chimney fires being the leading cause.
Ventilation Failures and Blockages
Proper smoke ventilation keeps your indoor air quality pristine. During warm months, unused chimneys attract environmental debris and wildlife.
In Marion County, our service crews regularly remove:
-
Animal Nests: Birds, bats, and squirrels frequently seek shelter in open flues.
-
Storm Debris: Spanish moss, twigs, and leaves choke off ventilation.
-
Soot Saturation: Heavy soot restricts airflow, pushing smoke into your living room.
Is your fireplace ready for the season? 🏠 Don’t risk safety—book a professional chimney inspection in Ocala, FL today! We ensure your chimney is clean, safe, and efficient. Click to schedule your appointment! #ChimneyInspection #OcalaFL #FireplaceSafety #ChimneySweep #HomeMaintenance
Quick Answer: Florida’s high humidity causes fluffy, easily cleaned Stage 1 creosote to absorb moisture and rapidly harden into Stage 3 creosote—a highly combustible glaze that requires chemical removal.
Understanding creosote accumulation is vital for local property owners. This hazardous compound evolves through three dangerous phases:
-
Stage 1: Loose, flaky soot. Easily brushed away.
-
Stage 2: Crunchy, tar-like flakes. Harder to remove.
-
Stage 3: A thick, hardened, highly combustible glaze.
💡 Expert Insight: “Just last month in a historic Ocala home, our technicians found Stage 1 soot that had turned into Stage 3 glaze in less than a year. Florida’s trapped ambient moisture literally bakes soot onto flue walls.” — Always Fire and Gas Field Team
This rapid hardening process makes annual inspections mandatory. Even if you only enjoy three fires a year, you need the best chimney sweep in Ocala FL to verify your safety.
Warning Signs You Need Service Now
Ignoring structural warnings leads to incredibly costly repairs. Contact our certified experts immediately if you notice:
-
Pungent Odors: A stale campfire smell indicates heavy moisture-soaked creosote.
-
Poor Drafting: Smoke blowing into the room means a physical blockage exists.
-
Falling Debris: Finding broken tile or mortar flakes indicates a failing liner.
-
Audible Noises: Scratching sounds signal active wildlife nesting.
Quick Answer: A professional sweep includes a visual exterior check, a high-definition internal camera scan, and a dust-free sweeping process using industrial HEPA vacuums. You receive a full digital report afterward.
When you hire true professionals, you invest in a technical, zero-stress process. We treat your home with absolute respect.
-
Exterior Diagnostics: We inspect brick masonry, concrete crowns, and flashing for water entry.
-
HD Camera Scanning: We lower cameras down the flue to uncover hidden hairline cracks.
-
No-Mess Cleaning: We use specialized brushes and industrial HEPA vacuums. No dust escapes.
-
Component Testing: We manually verify damper and ash dump door operations.
-
Digital Reporting: You receive an exhaustive safety report with clear internal photos.
✅ Quick Tip: Always ask your sweep for digital photos of your flue liner. Legitimate professionals will gladly show you visual proof of any damage before recommending repairs.
The 3 Levels of Chimney Inspections
Not all fireplace assessments are identical. The Chimney Safety Institute of America outlines three specific tiers.
| Inspection Level |
When It Is Required |
What Technicians Examine |
| Level 1 |
Routine annual check-ups. |
Visual check of accessible exterior and interior parts. |
| Level 2 |
Real estate transfers or after storms. |
Level 1 plus internal video scan and attic check. |
| Level 3 |
When hidden severe hazards are suspected. |
Partial demolition to expose deep structural flaws. |
Quick Answer: Ocala fireplaces frequently suffer from masonry spalling due to extreme humidity, as well as severe blockages caused by local wildlife seeking shelter in uncapped flues.
Ocala’s unique environment presents specific challenges that differ from northern states.
Humidity and Masonry Spalling
Bricks and mortar act like sponges. They constantly absorb heavy afternoon downpours. When sudden temperature shifts occur, trapped water expands and contracts.
This stress causes bricks to crack and crumble. This destructive process is known as spalling. Left unchecked, spalling destroys your chimney’s structural stability.
The Wildlife Intrusion Dilemma
Marion County is a haven for wildlife. Raccoons, squirrels, and birds view open flues as perfect hollow trees.
Our team easily resolves this. We install heavy-duty, wildlife-proof stainless steel caps. This eliminates frustrating ecological headaches instantly.
Quick Answer: A preventative chimney sweep costs between $150 and $350, whereas repairing fire damage or replacing a ruined chimney liner can cost upward of $7,500.
An annual appointment with the best chimney sweep in Ocala FL is highly affordable. Compare it to the massive costs of structural overhauls or insurance deductibles.
The Preventative Investment:
The Cost of Neglect:
-
Complete Liner Replacement: $2,500 – $7,500
-
Rebuilding a Cracked Firebox: $1,500 – $4,000
-
Emergency Fire Restoration: $15,000 – $60,000+
⚠️ Common Mistake: Canceling your annual inspection because you “didn’t burn much wood this year.” Storm damage, rust, and animal nests happen regardless of your fireplace usage.
Quick Answer: To reflect our growing expertise in natural gas lines, outdoor fire features, and advanced mechanical heating safety, Always a Sweep has officially rebranded to Always Fire and Gas.
For decades, locals trusted Always a Sweep for traditional wood-burning fireplace safety. However, modern Central Florida homes have evolved. Our capabilities have grown alongside them.
Fireplace technologies are highly diversified today. We still provide the best chimney sweep in Ocala FL for traditional hearths. However, our team now holds advanced certifications in specialized fields.
We offer professional propane integrations, gas log installations, and outdoor fire features. Our new identity perfectly mirrors this complete spectrum of mechanical fire safety. You get the exact same friendly technicians, now backed by broader residential solutions.
Frequently Asked Questions
How often should I hire the best chimney sweep in Ocala FL?
You should schedule an inspection once a year, regardless of usage. Even if you don’t burn wood often, annual checks ensure your flue is free of animal nests and water damage.
Does Florida weather affect my chimney liner?
Yes. Intense humidity, heavy rain, and sudden temperature drops cause masonry spalling. This trapped moisture rapidly breaks down brick faces and mortar joints over time.
Do gas fireplaces need professional chimney cleaning?
Absolutely. While gas doesn’t create wood creosote, these systems require consistent check-ups. Technicians must check for lethal carbon monoxide leaks and clear clogged burner ports.
Can animals in my chimney cause a house fire?
Yes. Birds and squirrels build nests using dry twigs and leaves. If a spark from your fireplace reaches this highly flammable debris, it will instantly ignite a dangerous flue fire.
How much does a chimney inspection cost in Marion County?
A standard Level 1 or Level 2 inspection typically ranges from $150 to $350. This small preventative investment saves thousands in potential structural rebuilding costs.
Conclusion: Protect Your Central Florida Home Today
Consistent fireplace maintenance is the smartest investment you can make in your family’s safety. Whether you burn seasoned wood or rely on modern gas logs, annual inspections prevent hidden hazards. As the top provider of the best chimney sweep in Ocala FL, the newly expanded Always Fire and Gas team guarantees your heating systems operate flawlessly.
Take proactive action before a surprise cold snap reveals a damaged liner.
Next Steps to Secure Your Home:
-
Check your firebox for visible debris or water stains.
-
Verify that your chimney cap is securely in place from the outside.
-
Schedule your Level 2 camera inspection with our certified technicians.
Ready to lock in your peace of mind? Book your safety inspection through our customer portal today to ensure a warm, secure winter.