by Always A Sweep Team | May 4, 2026 | Always Home Repair Services, inspections & sweeping, installation
Why Your Clothes Are Taking Two Cycles to Dry (Hint: It’s Not Your Dryer)
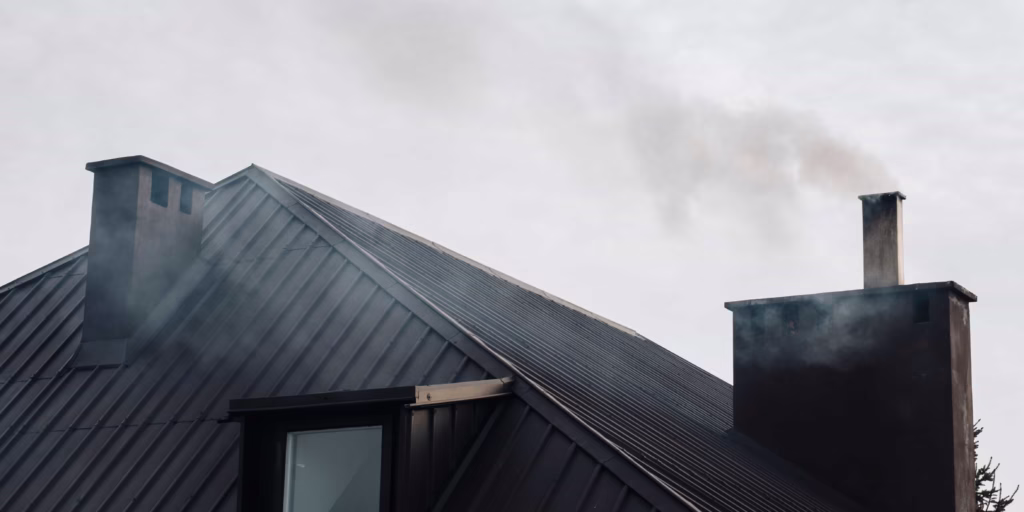
If your clothes are taking two cycles to dry, the culprit is almost always restricted airflow, not a mechanical failure of the dryer. When lint clogs your exhaust vent, moisture-laden air cannot escape, creating a “sauna effect” inside the drum that prevents evaporation. Cleaning your lint trap is not enough; a professional duct cleaning is usually required to restore efficiency and safety.
Does it feel like your laundry day has turned into a laundry weekend? You aren’t alone. One of the most common complaints homeowners have is why your clothes are taking two cycles to dry. It is a frustrating, expensive, and alarming problem that most people try to solve by prematurely buying a new appliance.
But here is the essential truth: Your dryer is likely screaming for help, not for retirement. At Always a Sweep, we specialize in the “lungs” of your home. In this 2026 update, we break down the science of airflow, the hidden dangers of lint, and why a performance restoration is the only way to save your home and your wallet.
Key Takeaways
-
Airflow is King: Heat without exhaust is just a sauna; your dryer needs to “breathe” to function.
-
Energy Drain: Running double cycles can cost the average household an extra $260 per year in utilities.
-
Fire Safety: Clogged vents are the #1 cause of over 15,000 annual home fires.
-
Professional Edge: DIY kits often cause duct damage or lint compaction; professional tools ensure a full clear.
Table of Contents
-
The Science of Airflow: Why Heat Isn’t Everything
-
The 5 Main Reasons for Double Dry Cycles
-
The Fire Risk & Mechanical Exhaustion
-
DIY vs. Professional Cleaning: A Comparison
-
Maintenance Tips for Longevity
-
Frequently Asked Questions
Quick Answer: For clothes to dry, moisture must be lifted from the fabric and physically transported out of the house. Without a clear path for exhaust, the air inside the dryer reaches 100% humidity, making further drying impossible regardless of the temperature.
To understand why your clothes are taking two cycles to dry, we need to look at the physics of moisture removal. Most people assume a dryer is essentially a large oven. While heat is necessary to pull moisture out of the fabric, that moisture-laden air has to go somewhere.
Expert Insight: In the industry, we measure this via CFM (Cubic Feet per Minute). A standard residential dryer needs roughly 100-150 CFM of unrestricted airflow to operate efficiently. When lint builds up, that number can drop below 50 CFM, doubling your drying time instantly.
Tired of running your dryer twice? Learn the science behind restricted airflow and why your clothes are taking two cycles to dry. From hidden lint clogs to pest infestations, this guide covers the 5 main culprits slowing down your laundry. Protect your home and save on energy bills with professional vent maintenance!
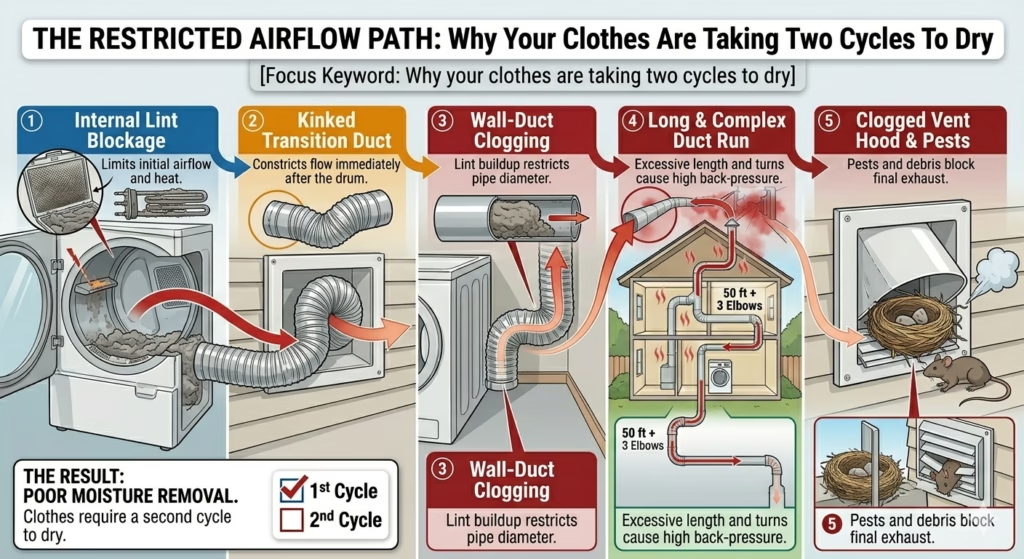
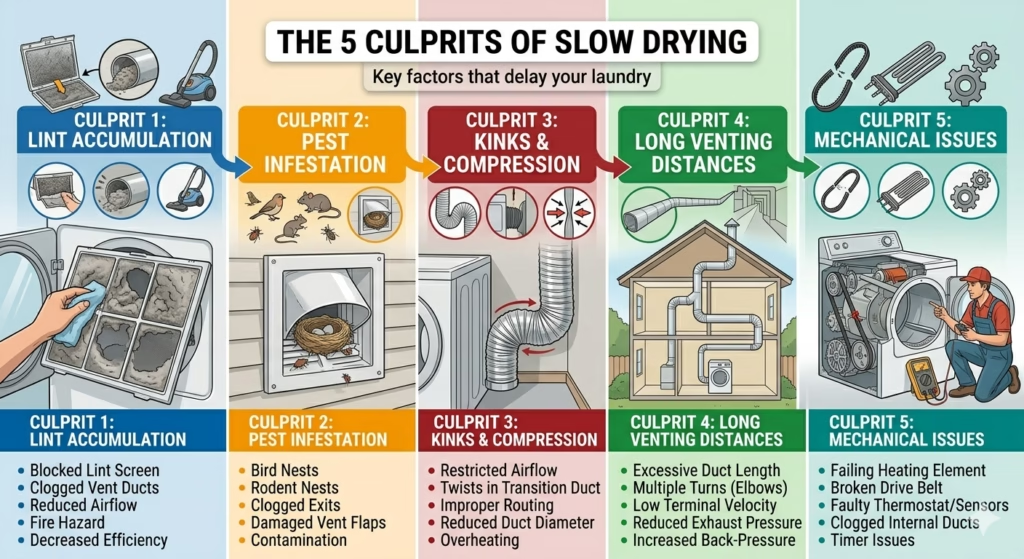
1. Massive Lint Accumulation in the Ductwork
Even if you clean your lint trap every time, about 25% of lint escapes into the internal ductwork. Over time, this builds a thick, carpet-like layer.
Quick Tip: If the top of your dryer feels hot to the touch during a cycle, it’s a sign the heat is trapped inside the cabinet instead of exiting the vent.
2. The “Hidden” External Clog
The exterior hood of your house is prime real estate for pests. Spiders, birds, and even wasps build nests in the louvers. When wet lint hits these obstructions, it creates a “paste” that seals the vent shut.
3. Crushed or Kinked Transition Hoses
Take a look behind your machine. If the dryer was pushed back too hard against the wall, the flexible foil hose is likely flattened. A crushed hose is a leading cause for why your clothes are taking two cycles to dry.
Data Point: A single 90-degree kink in a transition hose can reduce airflow by up to 30%, adding 15-20 minutes to every load.
4. Long Vent Runs and Too Many Elbows
If your laundry room is in the middle of the house, your vent might travel 30 feet to reach an outside wall. Every “elbow” (turn) in the pipe adds resistance. According to international residential codes, dryer vents should not exceed 35 feet in total length.
5. Mechanical Thermostat Failure (Rare)
While we emphasize airflow, a cycling thermostat can fail. However, a pro will always check the airflow first because 9 times out of 10, the vent is the culprit.
Is your dryer taking multiple cycles to get the job done? Don’t ignore the warning signs! This guide breaks down the 5 most common culprits behind slow drying times—from hidden lint clogs to improper venting distances. Keeping your vents clear doesn’t just save time; it prevents fire hazards and lowers energy bills. Save this checklist for your next home maintenance day!
As niche experts in home venting, Always a Sweep brings years of experience to your doorstep. We aren’t just cleaning pipes; we are performing fire prevention.
Many homeowners ignore the “burning smell” coming from their laundry room, assuming it’s just “hot dust.” This is often the smell of lint near the heating element reaching its ignition point.
According to the National Fire Protection Association (NFPA), nearly 16,000 home fires annually are caused by dryers. The #1 cause is the failure to clean the vents. Lint is one of the most flammable substances in your home. When your dryer runs for two cycles, it stays at peak operating temperature for twice as long, significantly increasing the chance of an ignition event.
We understand the appeal of a $20 “drill-powered” cleaning kit. However, as professionals, we’ve seen these lead to disaster.
| Feature |
DIY Drill Kit |
Always a Sweep Professional |
| Tool Quality |
Brittle plastic rods |
Industrial-grade flexible steel/nylon |
| Debris Removal |
Pushes lint into corners |
HEPA-filtered high-powered suction |
| Inspection |
Blind guessing |
HD Video Camera Inspection |
| Risk |
Rod snaps, duct punctures |
Zero-risk guarantee |
| Verification |
“Looks okay” |
Airflow velocity (Anemometer) test |
While you should leave the deep cleaning to the experts, these habits will keep your system running smoothly between professional visits:
-
Clean the lint screen after every single load. No exceptions.
-
Deep clean the screen: Every 6 months, wash the lint screen with soap and water to remove waxy buildup from dryer sheets.
-
Vacuum the cabinet: Once a year, use a crevice tool to vacuum the area inside the dryer where the lint screen sits.
“As of 2024, many new ‘Smart Dryers’ have sensors that trigger a ‘Check Vent’ light. Do not ignore this. If your machine is smart enough to tell you it’s choking, listen to it before the heating element snaps.”
Frequently Asked Questions
Q: My dryer is brand new and the clothes still take two cycles to dry. Why?
Answer: This is the ultimate proof that it isn’t the dryer! A new, powerful dryer trying to push air through an old, clogged pipe will actually fail faster than an old one. The vent must be cleared to match the power of the new machine.
Q: How often should I have my vents professionally cleaned?
Answer: For most families, once every 12 months is the standard. If you have a large family, pets that shed, or a long vent run (over 15 feet), you should consider a cleaning every 6-9 months.
Q: Can I just blow out the vent with a leaf blower?
Answer: We advise against this. A leaf blower lacks the concentrated agitation needed to remove “pasted” lint. Furthermore, it can blow the lint deeper into the wall cavities if there is a small break in the duct.
Final Thoughts and Stop Wasting Time
Why your clothes are taking two cycles to dry is a question with a simple, albeit vital, answer: Your home needs to breathe. Don’t settle for damp clothes and high energy bills. Trust the experts who bring professional restoration to every job.
Ready to get your laundry done in one cycle again?
-
Check your external vent for visible clogs.
-
Inspect the transition hose behind your dryer.
-
Schedule a Professional Performance Restoration with Always a Sweep to ensure your home is safe and efficient.
by Always A Sweep Team | May 1, 2026 | Always Home Repair Services, chimney repair
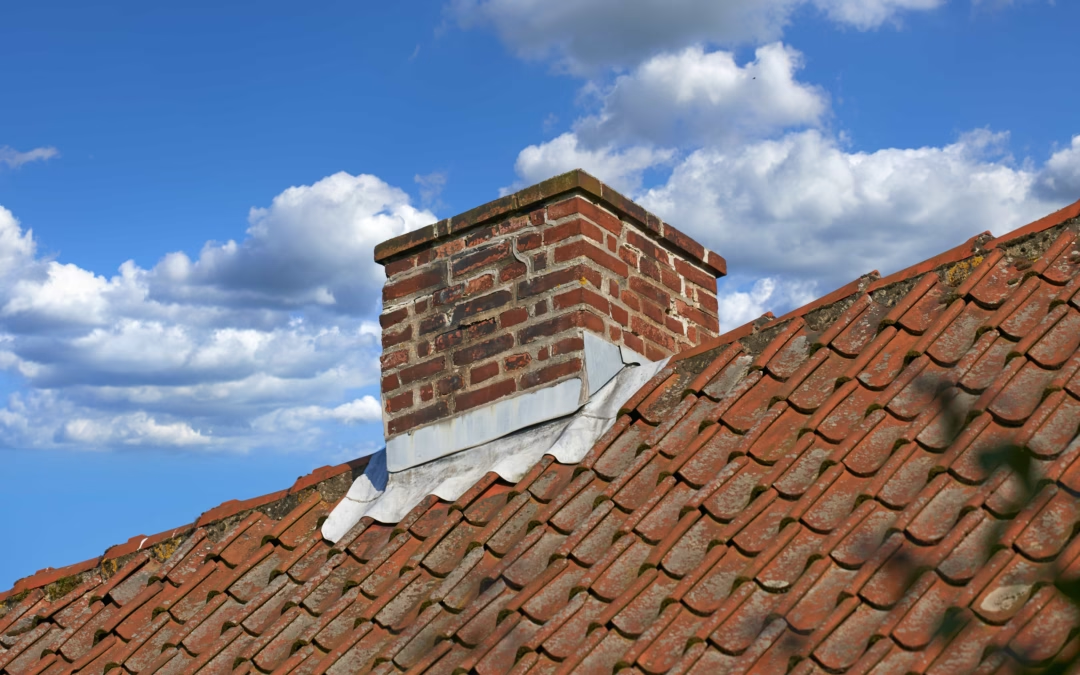
Waterproofing Your Chimney and Is Your Home Ready for Florida’s Afternoon Rainstorms?
Waterproofing your chimney is the process of applying a professional-grade, vapor-permeable water repellent to masonry to prevent moisture absorption, structural spalling, and interior leaks. In Florida’s high-humidity climate, this maintenance is essential to prevent “internal rot” caused by trapped moisture and hydrostatic pressure from torrential afternoon storms.
Key Takeaways
-
Brick is Porous: Standard masonry acts like a sponge, absorbing inches of rain during Florida storms.
-
Avoid DIY Sealants: Hardware store “film-forming” sealants trap moisture inside the brick, causing faster decay.
-
The “Breathability” Factor: Only professional silane-siloxane repellents allow water vapor to escape while blocking liquid rain.
-
Early Warning Signs: White salt stains (efflorescence) and crumbling brick (spalling) indicate immediate waterproofing needs.
Table of Contents
-
The Florida Factor: Climate vs. Masonry
-
The Science of Saturated Masonry
-
Why DIY Waterproofing Fails
-
Warning Signs of Water Damage
-
The Professional Waterproofing Process
-
Comprehensive Storm Protection
-
Frequently Asked Questions
The Florida Factor and Why Your Chimney is at Risk
Florida’s climate is unique, and unfortunately, it is perfectly designed to destroy masonry. Unlike the dry heat of the Southwest or the steady freezes of the North, Florida offers a “pressure cooker” environment that accelerates the decay of unprotected chimneys.
The Intensity of Afternoon Rainstorms
Quick Answer: Florida storms can dump 2+ inches of rain in an hour, creating extreme hydrostatic pressure that forces water into the microscopic pores of untreated brick.
In cities like Jacksonville or St. Augustine, we don’t just get light rain. Our afternoon storms often dump inches of water in under an hour. This volume creates a massive amount of hydrostatic pressure against your chimney. If the surface isn’t sealed with a professional repellent, that water is forced deep into the core of the brickwork.
Humidity and the Salt Air
For those of us along the coast, the air is thick with salt. Salt is corrosive. When salt-laden moisture penetrates your chimney, it crystallizes inside the brick. This process, known as subflorescence, creates internal pressure that can literally blow the face off a brick.
Many homeowners wait until they see a leak inside the firebox to act. By that time, the exterior masonry may already be structurally compromised by salt-crystallization.
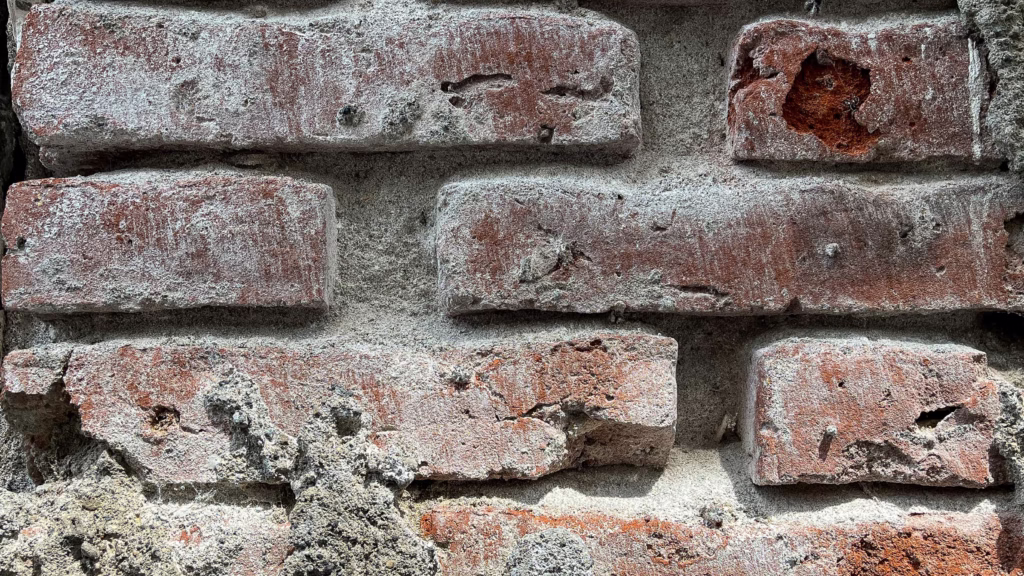
Don’t let crumbling mortar ruin your home’s structural integrity or curb appeal. Our masonry restoration experts specialize in tuckpointing, brick replacement, and waterproofing to bring your exterior back to life. Protect your investment with professional care!
The Science of Saturated Masonry and Why Brick Acts Like a Sponge
Many people assume that because bricks are hard and heavy, they are waterproof. This is a dangerous misconception. To a water molecule, a brick looks like a series of interconnected tunnels.
Understanding Capillary Action
Through a process called capillary action, moisture is “sucked” upward and inward through the pores of the brick and mortar. Once the masonry is saturated, the water has nowhere to go but into your home’s framing.
The Heat-Moisture Cycle
In Florida, the sun comes out immediately after a storm. This rapid heating causes the water trapped inside the brick to turn into vapor. If your chimney hasn’t been treated with a breathable professional sealant, that vapor expands rapidly, causing micro-fractures in the mortar. Over time, these small cracks become major structural failures.
“According to industry standards from the Masonry Institute, untreated brick can increase in weight by over 20% when fully saturated, putting immense stress on the chimney’s foundation.”
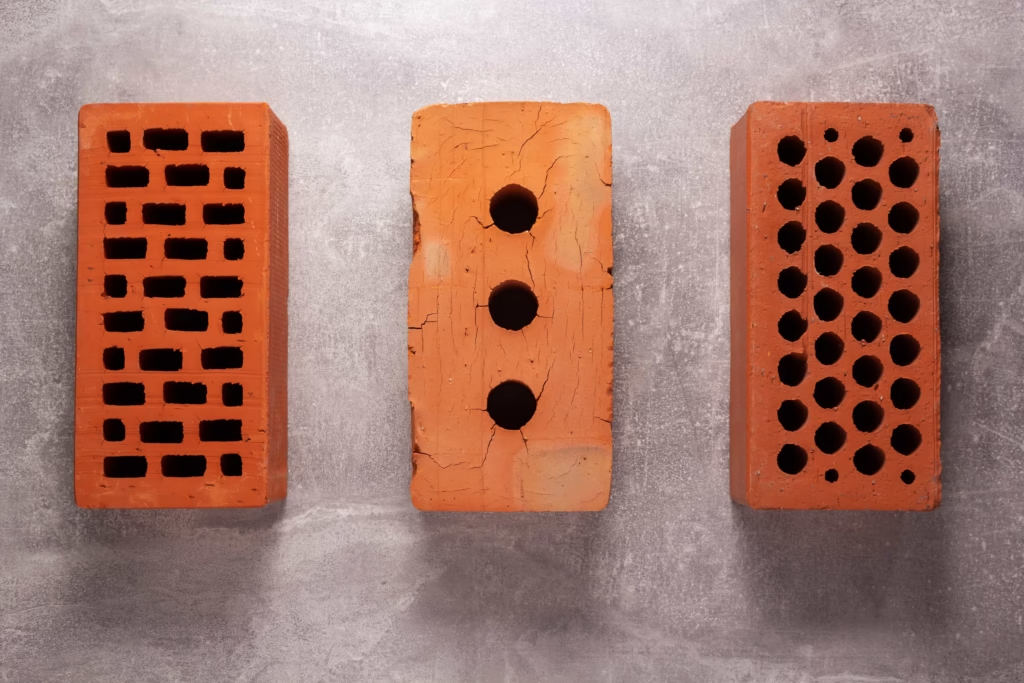
Choosing the right materials is the foundation of any lasting build. These high-durability perforated clay bricks offer excellent thermal insulation and structural integrity for your next residential or commercial project. Perfect for classic brick siding or modern masonry designs.
The Dangers of DIY and Why “Off-the-Shelf” Solutions Fail
We live in a world of DIY enthusiasts, but waterproofing your chimney is one task where a “do-it-yourself” approach can actually cause more damage than the rain itself. At Always A Sweep, we frequently repair chimneys ruined by improper retail sealants.
The “Plastic Wrap” Mistake
Most sealants found at local hardware stores are silicone-based or acrylic “film-forming” water-blockers. They work by creating a solid coating over the brick, essentially wrapping your chimney in plastic.
Why is this bad for Florida homes?
-
Trapped Vapor: Your chimney produces heat and moisture from the inside (even in Florida, using a fireplace or gas logs creates water vapor).
-
Internal Rot: A DIY sealant prevents this internal moisture from escaping. The water stays trapped, causing the chimney to rot from the inside out.
-
Scaling and Spalling: Within two years, the “sealant” will begin to peel, taking the top layer of your brick with it.
If a sealant promises a “glossy” or “wet” look, avoid it. Professional waterproofing should be invisible to allow the brick to breathe.
Identifying the Warning Signs of Water Intrusion
How do you know if you are already losing the battle against Florida’s rain? Before you even consider waterproofing your chimney, look for these red flags:
1. Efflorescence (White Staining)
Look for white, powdery streaks on the exterior of the chimney. This is salt residue left behind by evaporating water. It is a clear sign that water is moving through your bricks.
2. Spalling and Crumbling
If you find chips or chunks of brick on your roof or in your yard, your masonry is failing structurally. This is a primary indicator that the internal moisture-heat cycle is breaking the brick apart.
3. The “Musty” Fireplace
If your living room smells like a wet basement after a storm, you likely have mold growing behind the chimney liner. This indicates a high level of saturation within the wall cavity.
A 2025 study on Florida residential structures found that 60% of chimney leaks were caused by failed masonry crowns and lack of water repellent.
The Professional Edge for Our Specialized Waterproofing Process
At Always A Sweep, we don’t just “spray and go.” Our process is a comprehensive restoration designed to withstand 100+ mph winds and torrential rain.
Step 1: Professional Cleaning
We use eco-friendly, masonry-safe cleaners to remove carbon, algae, and mold. This opens up the “pores” of the brick so the repellent can sink in deep.
Step 2: Masonry “Triage”
Before waterproofing your chimney, we inspect the mortar joints. If they are receding or sandy, we perform repointing—the process of replacing old mortar with new, high-strength material.
Step 3: Application of Vapor-Permeable Repellents
We exclusively use 100% breathable silane-siloxane water repellents. These products are not “coatings”; they are “penetrants”. They bond chemically to the brick, lining the pores without clogging them. This allows the chimney to “breathe” out gases while shedding 99.9% of liquid water.
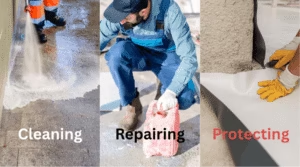
Revitalize and safeguard your property with our complete three-step approach: Clean, Repair, and Protect. From high-pressure washing to expert surface sealing, we ensure your home or business stays in peak condition. Save this for your next exterior renovation project!
Comprehensive Protection the Beyond the Brick
Waterproofing your chimney is the main event, but a truly storm-ready chimney requires a holistic approach.
-
The Chimney Crown: The concrete “roof” of your chimney. If cracked, it acts as a funnel. We apply a specialized “CrownCoat” flexible membrane.
-
Flashings and Caps: The metal area where the chimney meets the roof is a common failure point in Florida. We ensure your flashing is watertight.
Frequently Asked Questions
How often should I perform waterproofing on my chimney?
In the Florida climate, we recommend waterproofing your chimney every 5 to 7 years. The high UV index and salt air can break down even professional repellents over time.
Does chimney waterproofing change the color of my brick?
No. Professional silane-siloxane repellents are invisible. Unlike DIY acrylics, they do not create a “glossy” finish or change the natural aesthetic of your masonry.
Can I waterproof a chimney that is already leaking?
Waterproofing is a preventative measure. If you have an active leak, we must first identify the entry point (often the crown or flashing) and repair it before applying repellent.
Is waterproofing worth the cost?
Yes. The average cost of waterproofing is a fraction of the cost of a full chimney rebuild. It is one of the highest-ROI maintenance tasks for Florida homeowners.
The ideal time is during the “dry season” (typically late fall or winter). However, it can be done year-round as long as the masonry has 24–48 hours to dry before application.
Protecting Your Florida Investment
Your home is likely your largest financial investment. Allowing a maintenance task like waterproofing your chimney to turn into a $15,000 chimney rebuild is a risk no homeowner should take.
Florida’s afternoon rainstorms are a certainty. Whether your chimney survives them or succumbs to them depends on the steps you take today.
Ready to protect your home?
-
Schedule an Inspection: Have a professional evaluate your masonry health.
-
Clear Debris: Ensure your gutters and roof are clear of leaves that trap moisture.
-
Choose Quality: Only use vapor-permeable repellents.
Book Your Professional Chimney Inspection Today with Always A Sweep

by Always A Sweep Team | Apr 27, 2026 | Always Home Repair Services, inspections & sweeping
Searching for a fireplace remodel design consultation near me is the first step in turning a dated, soot-stained hearth into the stunning centerpiece of your living room. In North Central Florida, the fireplace isn’t just about heat; it’s a lifestyle statement. Whether you have a traditional masonry chimney or a modern prefab unit, a remodel can completely shift the energy of your home.
How does a professional consultation help? Most homeowners know they want a change, but they aren’t sure if their dream design is structurally possible. By booking a fireplace remodel design consultation near me, you gain access to experts who understand the balance between aesthetic beauty and fire safety.
At Always A Sweep, we don’t just look at the exterior. We evaluate your entire system, from the Chimney Cap to the Smoke Chamber. A dreamy remodel is only successful if it functions perfectly and safely for years to come.
Table of Contents
-
How Does a Fireplace Remodel Design Consultation Near Me Transform Your Home?
-
What Happens During a Professional Fireplace Design Consultation?
-
Why is Technical Expertise Critical for a Fireplace Remodel?
-
How Do You Choose Between Wood, Gas, or Electric Fireplaces?
-
Where Can You Find Inspiration for Your New Hearth Design?
-
How Does Professional Masonry Repair Integrate with Your Remodel?
-
What Are the Safety Requirements for a Fireplace Overhaul?
-
Conclusion and Expert Resources
What Happens During a Professional Fireplace Design Consultation?
What should you expect when an expert arrives for a fireplace remodel design consultation near me? The process is collaborative and data-driven. We don’t just pick out tile; we engineer a solution.
-
How do we assess the current structure? We perform a deep inspection to see if you need a Chimney Relining or Damper Repair before the cosmetic work begins.
-
How do we determine your style? We discuss materials like natural stone, modern shiplap, or traditional brick.
-
What about measurements? We take precise dimensions to ensure your new Gas Fireplaces or Woodburning Stoves meet all local Florida building codes.
Why is Technical Expertise Critical for a Fireplace Remodel?
Why can’t you just hire a general handyman for this? A fireplace remodel design consultation near me requires a deep understanding of “The Physics of Fire.” If a mantle is installed too close to the firebox, or if a new stone facade blocks essential airflow, you create a massive fire hazard.
As experts in Gas System Maintenance & Service, we ensure that if you are switching from wood to gas, your New Gas Line & Appliance Connection is handled with surgical precision. How does this protect you? It ensures that your home remains safe from gas leaks and carbon monoxide while looking like it belongs in a luxury magazine.
How Do You Choose Between Wood, Gas, or Electric Fireplaces?
How do you know which fuel source is right for your lifestyle? During your fireplace remodel design consultation near me, we help you weigh the pros and cons:
-
Woodburning Fireplaces: Why choose wood? For the authentic crackle, smell, and high heat output. It requires regular Inspections & Sweeping.
-
Gas Fireplaces: How do they offer success? They provide instant heat with the flip of a switch and require less maintenance than wood.
-
Electric or Water Vapor Fireplaces: Where do these fit? Perfect for bedrooms or homes without existing chimneys, offering ambiance without the need for venting.
Where Can You Find Inspiration for Your New Hearth Design?
Where do the best design ideas come from? Your fireplace remodel design consultation near me is the perfect time to bring your Pinterest boards to life. Are you looking for a “Coastal Chic” look with white-washed brick? Or perhaps a “Modern Industrial” vibe with a custom steel surround?
At Always A Sweep, we help you visualize how different textures will react to the light in your specific room. How does the choice of a Chimney Cap or Chase Cover affect the exterior aesthetic of your home? We look at the project holistically, ensuring the inside and outside match your vision.
How Does Professional Masonry Repair Integrate with Your Remodel?
How often does a remodel reveal hidden issues? It is very common to find cracked firebricks or a deteriorating Smoke Chamber once an old mantle is removed. This is why a fireplace remodel design consultation near me is so valuable.
Instead of hitting a roadblock, our team can perform Masonry Repair or a full Chimney Rebuild as part of the project. How does this save you money? By fixing the structural “bones” of the fireplace during the remodel, you avoid having to tear apart your beautiful new stonework later to fix a leak or a crack.
What Are the Safety Requirements for a Fireplace Overhaul?
How do we ensure your new design is legal and safe? Every fireplace remodel design consultation near me focuses on “Clearance to Combustibles.”
-
How far should the mantle be? We follow strict NFPA guidelines to prevent heat transfer to wooden elements.
-
Why check the venting? If we install a more efficient insert, we must ensure the Chimney Relining is sized correctly to prevent “back-puffing.”
-
What about gas safety? We always include a Gas Leak Inspection as part of any gas-related remodel to ensure your peace of mind.
Conclusion and Expert Resources
Conclusion: Ready to Build Your Dream Hearth?
Booking a fireplace remodel design consultation near me is the best way to ensure your home improvement project is a total success. Why settle for a dated fireplace when you can have a high-efficiency, stunningly beautiful focal point?
At Always A Sweep, we bring years of expertise in North Central Florida to every consultation. From Damper Repair to Fireplace Design, we handle every detail so you can simply sit back and enjoy the glow.
Are you ready to transform your home? Contact Always A Sweep today to book your fireplace remodel design consultation near me. How can we help you bring your vision to life?
by Always A Sweep Team | Apr 20, 2026 | Always Home Repair Services, Gas leakage, inspections & sweeping
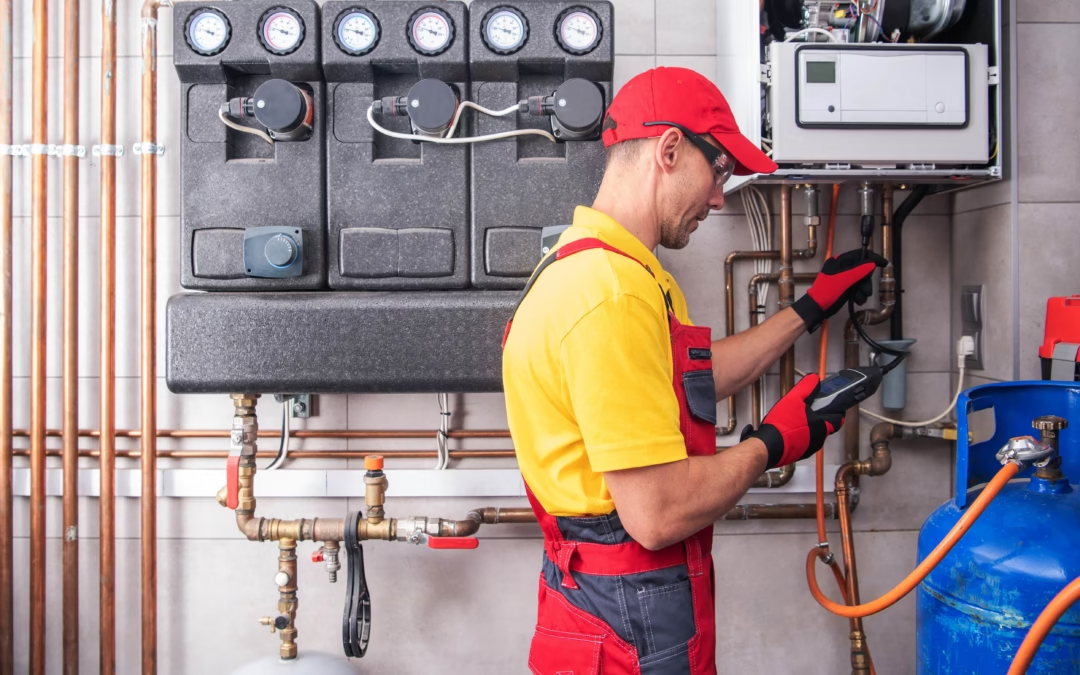
Annual gas system maintenance checklist completion is the single most important task a homeowner in North Central Florida can perform to ensure year-round safety. While gas is an incredibly efficient fuel source for heating and cooking, it requires proactive management to prevent hazards like carbon monoxide poisoning or leaks.
At Always A Sweep, we understand that your fireplace and gas appliances are the heart of your home’s comfort. Neglecting these systems doesn’t just lead to inefficiency; it can lead to costly emergency repairs during the peak of winter.
A well-maintained system operates at peak performance, lowering your monthly utility bills. By following a structured maintenance routine, you extend the lifespan of your appliances and gain peace of mind knowing your family is protected.
Table of Contents
-
The Importance of Gas Safety
-
Annual Gas System Maintenance Checklist: The Essentials
-
Visualizing Your Gas System
-
The Critical Role of Professional Inspections
-
Common Signs of Gas System Wear
-
Internal & External Resources
-
Conclusion
Annual Gas System Maintenance Checklist: The Essentials
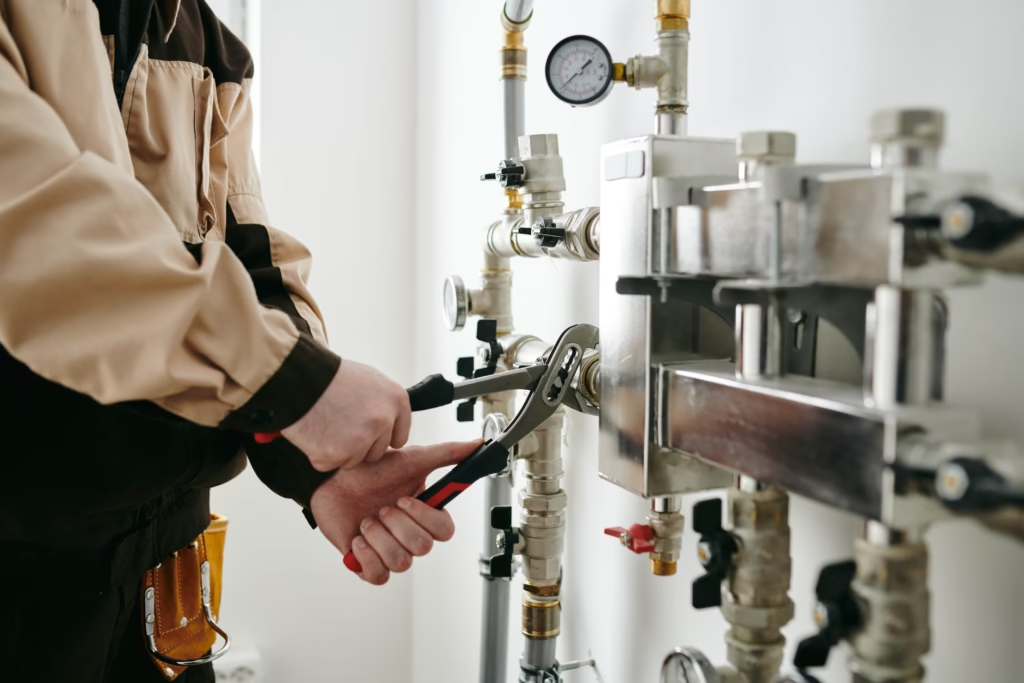
Start by examining all visible gas lines leading to your water heater, furnace, and fireplace. Look for signs of corrosion, rust, or physical damage to the pipes.
You must ensure that your CO detectors are functioning perfectly. Replace batteries annually and check the “replace by” date on the back of the device, as sensors degrade over time.
Dust and debris can clog burner ports, leading to incomplete combustion. This is especially true for gas fireplaces and outdoor propane setups.
4. Checking the Pilot Light
If your appliance has a standing pilot light, the flame should be a crisp blue. A yellow or flickering flame suggests a lack of oxygen or a dirty burner that requires immediate attention.
Ensure that exhaust vents are clear of bird nests, debris, or soot buildup. Proper venting is crucial for moving combustion gases safely out of your home.
Expert Tip: If you notice a “rotten egg” smell, leave the house immediately and call for emergency leak detection. Do not turn any lights on or off.
Visualizing Your Gas System
The Critical Role of Professional Inspections
Why DIY Isn’t Enough
While the annual gas system maintenance checklist includes tasks you can do yourself, professional expertise is non-negotiable for high-pressure components. Our team at Always A Sweep uses specialized equipment to detect leaks that are too small for the human nose to sense.
Advanced Leak Detection
We utilize electronic combustible gas detectors to sniff out trace amounts of propane or natural gas. This ensures that even “micro-leaks” at joints or valves are identified and repaired before they become dangerous.
Whether you are using a municipal natural gas line or a private propane tank installation, the maintenance requirements differ slightly. Our specialists are trained in the specific pressures and regulator settings required for both fuel types.
-
Soot Buildup: If you see black carbon deposits on your gas logs or near the furnace burners, your gas-to-air ratio is off.
-
Physical Corrosion: White or green powdery substances on copper or brass fittings indicate chemical corrosion that could lead to a breach.
-
Odd Noises: Hissing sounds near a connection point or “booming” sounds when an appliance ignites are major red flags.
-
Increased Bills: A sudden spike in gas usage without a change in weather usually indicates an underground leak or a highly inefficient burner.
By staying ahead of these issues with your annual gas system maintenance checklist, you avoid the stress of a mid-winter breakdown.
Conclusion
Completing an annual gas system maintenance checklist is more than just a chore; it is a commitment to your home’s longevity and your family’s safety. From checking pilot lights to ensuring your propane tank is properly anchored, every step counts.
Don’t wait until the first cold snap hits North Central Florida to realize your system has a fault. Always A Sweep is here to provide professional gas system inspections, new gas line connections, and comprehensive repairs.
Ready to secure your home? Contact Always A Sweep today to schedule your professional gas system maintenance and ensure your home stays warm, safe, and efficient all year long.
by Always A Sweep Team | Apr 13, 2026 | Always Home Repair Services, chimney repair, dryer vent repair, roof termination replacement
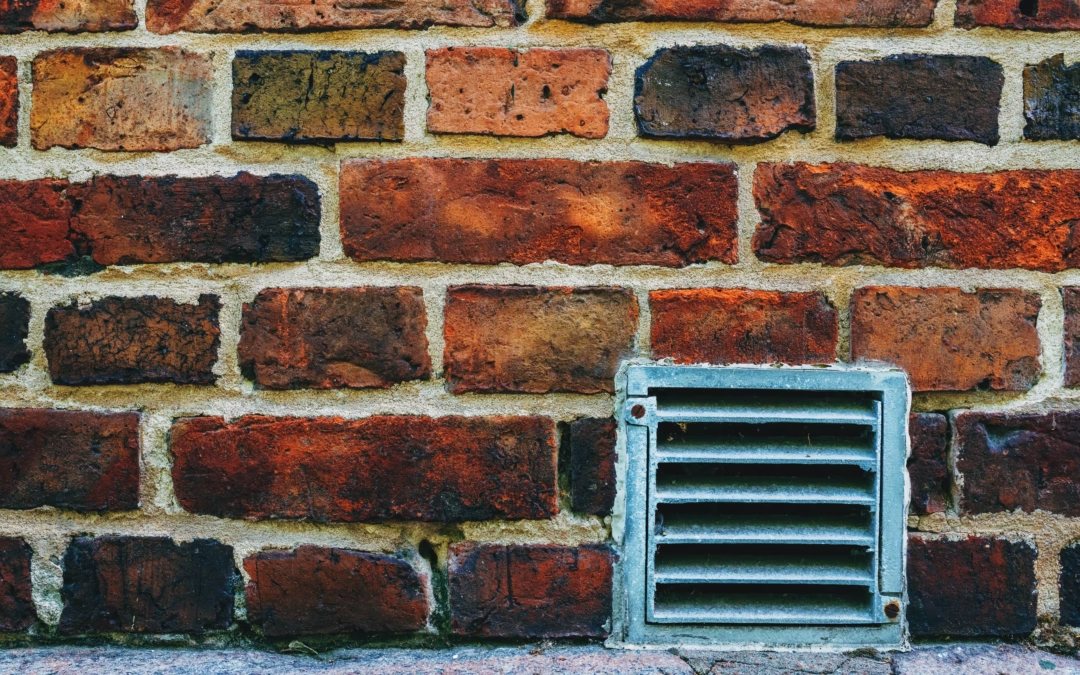
A pest proof dryer vent cover for exterior wall acts as a critical mechanical barrier between the comfort of your home and the unpredictable wildlife of North Central Florida. When your dryer is running, the vent allows hot, moist air to escape; however, the moment the cycle ends, a standard vent often leaves a gaping hole in your building envelope.
By utilizing a pest proof dryer vent cover for exterior wall, you ensure that the exit point remains hermetically sealed against intruders. How does this impact your safety? It prevents highly flammable nesting materials—like straw, dried grass, and twigs—from being deposited inside your ductwork. This simple addition significantly reduces the risk of lint-related fires, which remain a leading cause of residential property damage.
At Always A Sweep, we don’t just see a vent; we see a vital component of your home’s defense system. How many homeowners realize that a small bird can completely block a dryer line in less than 48 hours? Installing the right cover is the most effective way to preempt this disaster.
Table of Contents
-
How Does a Pest Proof Dryer Vent Cover for Exterior Wall Protect Your Home?
-
Why Are Local Critters Attracted to Your Dryer Exhaust?
-
What Features Make a Vent Cover Truly Pest-Proof?
-
How Do You Know if Your Current Vent Cover Has Failed?
-
Where Should You Install a High-Performance Exterior Vent?
-
How Can Professional Installation Improve Energy Efficiency?
-
What Maintenance is Required for a Pest-Proof System?
-
Expert Resources and Next Steps
Why Are Local Critters Attracted to Your Dryer Exhaust?
Why do birds, squirrels, and even bats target your dryer vent? The answer lies in the heat. During the cooler months in North Central Florida, the warm air blowing from your laundry room signals a perfect, pre-heated nesting spot.
Without a pest proof dryer vent cover for exterior wall, these animals view your ducting as a safe, sheltered tunnel away from predators. How do they get inside? Many basic plastic covers have thin louvers that a squirrel can easily chew through or a bird can pry open with its beak. Once inside, they begin building nests that trap lint, creating a “plug” that prevents your dryer from breathing.
How does this affect your appliances? When the exhaust is restricted, your dryer’s internal temperature spikes. This doesn’t just wear out the heating element; it creates a volatile environment where a single spark from the motor can ignite the trapped lint and nesting material.
What Features Make a Vent Cover Truly Pest-Proof?
When shopping for a pest proof dryer vent cover for exterior wall, what should you look for? Not all covers are created equal. To achieve the best success in keeping critters out, a cover must have specific engineering features:
-
Dual-Door Technology: How does this work? It uses an inner and outer door to provide two layers of defense.
-
Magnetic Latches: How do these improve safety? Magnetic seals ensure the door stays shut against high winds and curious paws but opens easily under the air pressure of the dryer.
-
Heavy-Duty Materials: Why choose metal over plastic? Powder-coated steel or thick UV-resistant polymers prevent the sun from making the unit brittle and easily breakable.
-
Vertical Discharge: How does this help? Some designs allow air to exit downward, making it nearly impossible for birds to gain the leverage needed to fly “up” into the pipe.
How Do You Know if Your Current Vent Cover Has Failed?
How can you tell if your pest proof dryer vent cover for exterior wall is no longer doing its job? There are several “silent” indicators that every homeowner should watch for:
-
How do the louvers look? If they are missing, stuck open, or warped, your vent is compromised.
-
How long do your clothes take to dry? If a load that used to take 40 minutes now takes 80, there is a blockage—likely a nest—preventing airflow.
-
What do you see on the ground? Finding bits of lint or bird droppings directly under the vent is a clear sign of an active intrusion.
-
Is there a smell? A foul odor coming from the dryer area often indicates that an animal has become trapped and perished within the line.
If you answer “yes” to any of these, it is time to consider a Replacement / Repair / Reconnection of Dryer Vent and a high-quality pest proof dryer vent cover for exterior wall.
Where Should You Install a High-Performance Exterior Vent?
Where is the most effective location for a pest proof dryer vent cover for exterior wall? While the exit point is determined by your laundry room’s location, the “how” of the installation is just as important as the “where.”
At Always A Sweep, we ensure that the vent is installed at a height that prevents ground-dwelling rodents from jumping in, while also ensuring it is accessible for annual cleaning. How do we handle different siding types? We specialize in Dryer Wall Exhaust Termination for stucco, brick, and vinyl siding, ensuring a watertight seal that prevents secondary issues like wood rot or mold.
How Can Professional Installation Improve Energy Efficiency?
How does a pest proof dryer vent cover for exterior wall actually save you money? It all comes down to “backdrafting” and thermal loss. In the summer, an unsealed vent allows the hot, humid Florida air to leak back into your air-conditioned home.
By installing a professional-grade pest proof dryer vent cover for exterior wall, you create a one-way street. How does this help your wallet? Your HVAC system won’t have to work as hard to combat the heat leaking in through the laundry room. Furthermore, because your dryer can exhaust air more efficiently through a clean, pest-free vent, it uses significantly less electricity per load.
What Maintenance is Required for a Pest-Proof System?
Even with a pest proof dryer vent cover for exterior wall, how often should you perform maintenance? We recommend a simple three-step check twice a year:
-
Step 1: While the dryer is running, walk outside. Is the vent door opening fully?
-
Step 2: Once the dryer stops, check if the door snapped shut.
-
Step 3: Look for any lint “fuzz” caught on the edges of the pest proof dryer vent cover for exterior wall and wipe it away.
How can you ensure the deep interior of the duct is safe? Schedule a professional Dryer Vent Cleaning & Inspection once a year. This removes the fine lint that bypasses the dryer’s internal filter and accumulates in the ductwork over time.
Expert Resources and Next Steps
How Will You Secure Your Home?
Choosing to install a pest proof dryer vent cover for exterior wall is a proactive step toward a safer, more efficient home. How much is peace of mind worth when you know that no squirrels, birds, or snakes can enter your living space through your appliances?
At Always A Sweep, we are dedicated to helping North Central Florida residents maintain their homes with the highest level of expertise. Whether you need a Roof Termination Replacement or a new pest proof dryer vent cover for exterior wall, our team is ready to help.
Ready to stop the critters? Contact Always A Sweep today to schedule your professional installation and dryer vent inspection. How can we help you breathe easier today?