by Always A Sweep Team | Jun 8, 2026 | Always Home Repair Services, chimney repair, inspections & sweeping, installation
Ultimate Wood Stove Installation Near Me Guide: Clearance, Weight & Safety
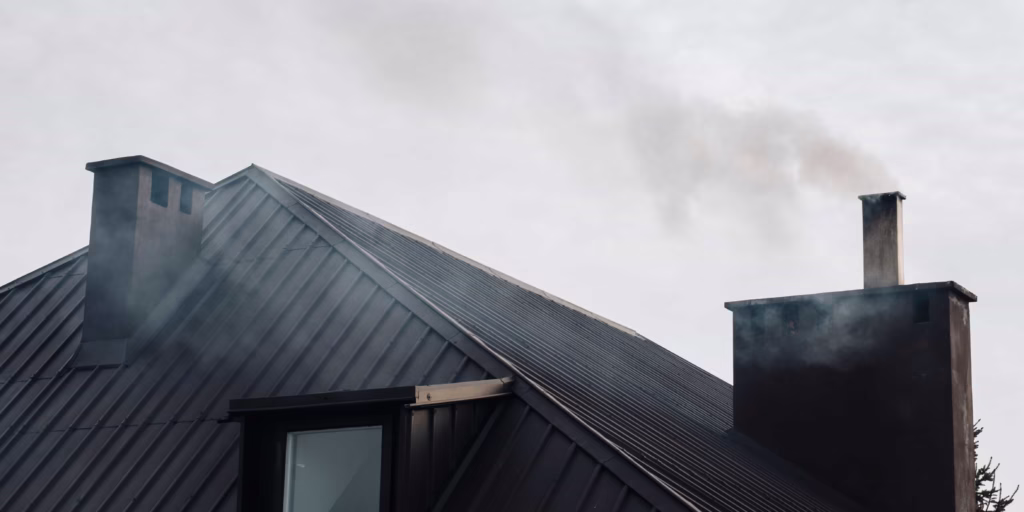
Finding a certified expert for a wood stove installation near me ensures your new solid-fuel heating appliance operates with maximum efficiency and adheres to strict residential fire codes. Whether you want to slash high winter utility bills or enjoy the unmatched ambiance of a crackling fire, proper placement and venting are non-negotiable.
At Always A Sweep, we understand that upgrading your home heating system is a major investment. As our brand transitions to reflect our comprehensive hearth safety services, our commitment to technical precision remains our priority.
This guide breaks down exactly what to expect from professional hearth installations, including floor protection rules, clearance requirements, and how to select certified local experts.
📌 Key Takeaways
-
Never skip clearances: Unlisted wood stoves require a minimum 36-inch clearance from combustible walls without specialized heat shields.
-
Verify your floor support: Cast iron stoves and masonry hearth pads can weigh over 800 pounds, often requiring floor joist reinforcement.
-
Check CSIA credentials: Always hire installers certified by the Chimney Safety Institute of America (CSIA) to guarantee compliance and safety.
-
Buy EPA-certified: Modern units must meet strict EPA emission limits of 2.0 to 2.5 grams of smoke per hour to comply with 2026 clean air standards.
Table of Contents
-
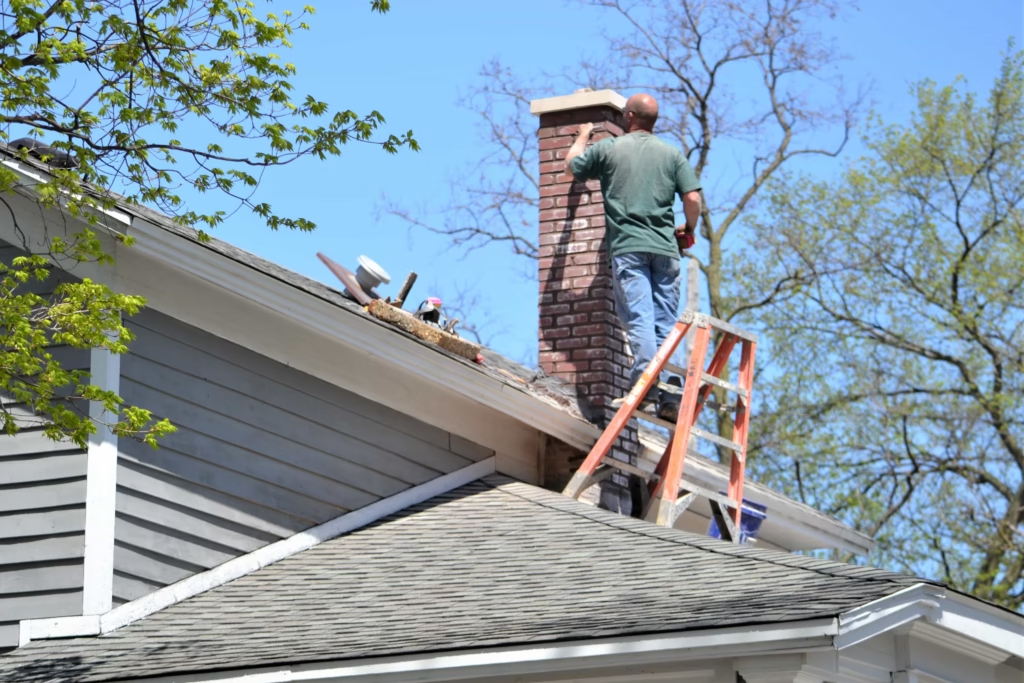
Why Professional Installation Matters
-
Clearance, Weight, and Floor Requirements
-
Choosing the Right Stove Type
-
Navigating Local Building Codes
-
The Installation Process Explained
-
DIY vs. Professional Risks
-
Finding Certified Installers
-
Frequently Asked Questions
Quick Answer: Hiring a certified professional ensures your wood stove is vented perfectly, drastically reducing the risk of creosote accumulation and chimney fires. Furthermore, professional installation is usually required to keep your home insurance valid.
When homeowners search for a wood stove installation near me, they usually recognize the inherent risks of indoor fire. The “Do It Yourself” spirit is admirable for painting walls, but solid-fuel heating demands technical exactness.
Preventing Devastating Chimney Fires
A poorly calibrated stove leads to rapid, dangerous creosote accumulation. Our technicians ensure that clearances to combustible materials meet the rigorous standards established by the National Fire Protection Association.
💡 Expert Insight: “Every winter, our field crews inspect DIY setups that are dangerously close to structural drywall. Even if a wall doesn’t catch fire immediately, long-term exposure to intense heat causes ‘pyrolysis,’ which lowers the ignition temperature of the wood framing over time until it spontaneously combusts.” — Always Fire and Gas Master Technician
Efficiency and Warranty Protection
A stove without proper draft calibration burns through seasoned cordwood faster while providing less heat. Heating experts tune the venting system calibration to ensure your unit hits its peak BTU output.
Additionally, most premium manufacturers instantly void their warranty if the unit is not installed by a certified professional.
Quick Answer: Wood stoves require strict minimum distances from walls (up to 36 inches for unlisted models), sturdy subfloors to hold 500+ pounds of dead weight, and non-combustible hearth pads that extend 18 inches past the loading door.
Before buying an appliance, you must understand the physical constraints of your living room or basement.
Clearance to Combustibles
Clearance refers to the minimum safe distance between the stove and anything that can burn. According to NFPA 211 standards, unlisted wood stoves require 36 inches of clearance from combustible walls. However, listed models with properly installed heat shields can safely reduce this distance to as little as 6 inches.
Structural Weight Support
Cast iron and thick steel stoves weigh anywhere from 300 to 800 pounds. When you add the weight of a stone hearth pad, the total load is massive. Ground floors with concrete slabs require no extra reinforcement, but elevated wooden floor joists must be inspected carefully.
Non-Combustible Hearth Pads
A stove cannot sit on carpet, hardwood, or vinyl. It requires a non-combustible hearth pad for two reasons. First, it offers amber protection from stray sparks. Second, it provides thermal protection (R-value) to stop heat from baking the floor underneath. The pad must extend at least 18 inches in front of the door and 8 inches on all sides.
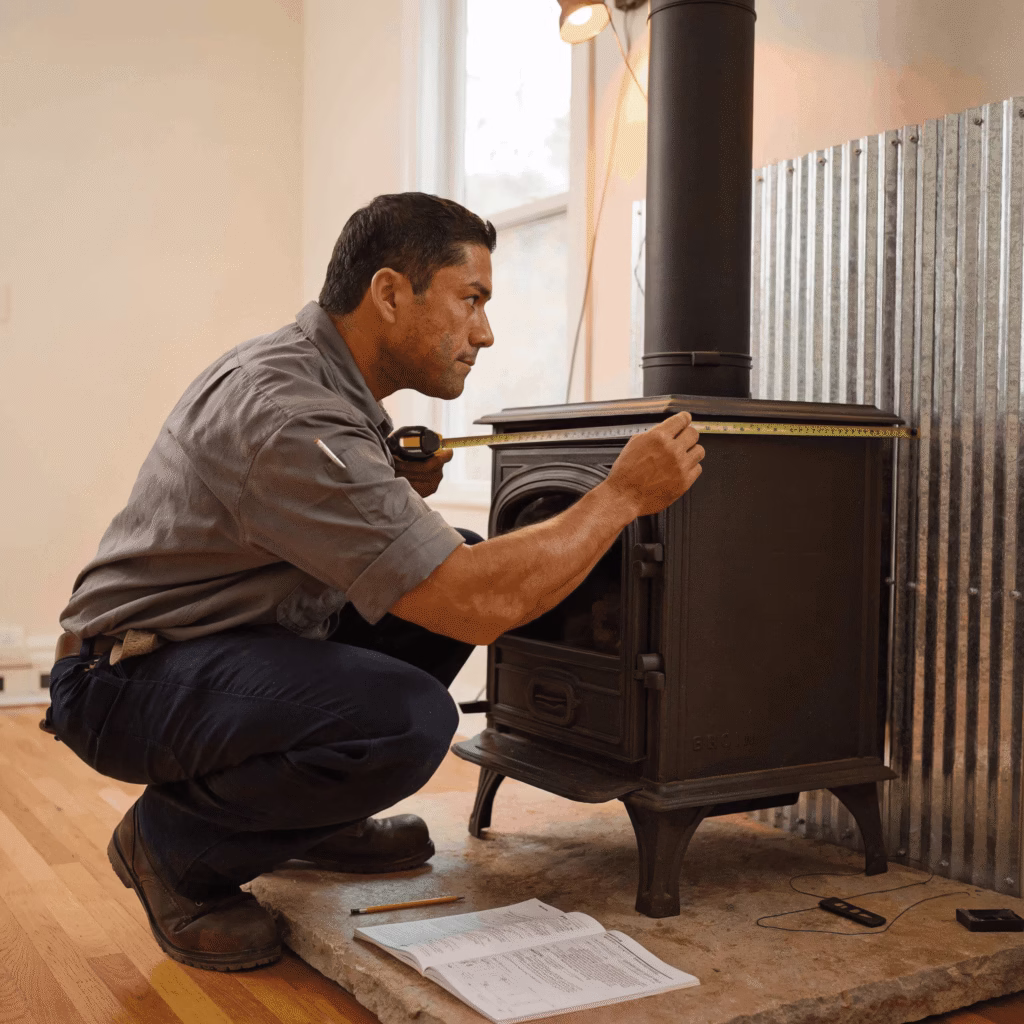
Thinking about adding a cozy wood-burning stove to your home? 🪵 Proper measurement and professional installation are key to safety and efficiency. Trust our experts in Denver, CO to handle your wood stove installation near me from start to finish. Click to learn more! #WoodStove #DenverHomes #HomeHeating #FireplaceInstallation #WoodBurningStove
Quick Answer: You can choose from heavy-duty cast iron stoves, modern high-efficiency steel models, automated pellet stoves, or fireplace inserts that transform open masonry hearths into powerful heaters.
Choosing the right equipment dictates how much you will spend on fuel and maintenance.
EPA-Certified Wood Stoves
Modern models are engineered for incredibly clean combustion. As of 2026, the Environmental Protection Agency (EPA) mandates that new wood heating appliances produce no more than 2.0 to 2.5 grams of particulate emissions per hour. Look for the white EPA tag on the back of the unit.
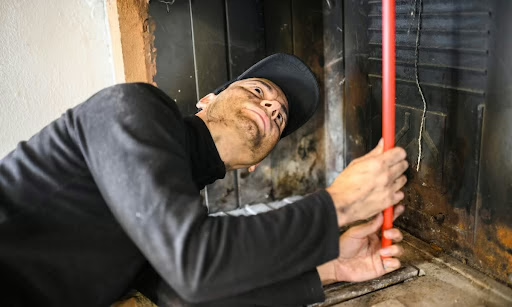
Fireplace Insert Stoves
If you already have a traditional open fireplace, an insert is brilliant. It slides directly into the fire box restoration space, converting a drafty, inefficient fireplace into a powerhouse heating system.
✅ Quick Tip: Always match the stove’s BTU rating to your home’s square footage. A stove that is too large will force you to run smoldering, low-temperature fires, which creates massive amounts of dangerous creosote in your chimney liner.
Quick Answer: You must pull municipal building permits before installing a wood stove. Post-installation, a city inspector will verify that the chimney height, floor protection, and emission standards match local zoning laws.
One of the most complex hurdles in a new installation is regulatory compliance. Unpermitted work can result in hefty fines.
| Requirement Category |
Standard Compliance Detail |
| Permit Requirements |
Municipal building permit must be approved before setup. |
| Clearances |
Must strictly meet manufacturer & NFPA 211 guidelines. |
| Safety Standards |
Appliance must pass UL-1482 or UL-127 safety testing. |
| Emissions Compliance |
Must meet the latest EPA clean air act limits. |
Professional installers handle this paperwork seamlessly, guaranteeing your setup complies with local laws.
Quick Answer: Installation involves an in-home assessment, placing the thermal hearth pad, routing the insulated chimney pipe through the ceiling or exterior wall, and conducting a “first burn” to test the draft seals.
When you hire Always Fire and Gas for a wood stove installation near me, our process is heavily structured.
-
Home Assessment: We evaluate your floor support, roof pitch, and room layout.
-
Hearth Preparation: We install a certified pad that matches your home’s aesthetic.
-
Chimney Routing: We run a “Class A” insulated stainless steel chimney pipe through the roof or wall.
-
The First Burn: We connect the stove, fire it up, and teach you proper damper management.
📊 Data Point: According to energy efficiency studies, upgrading from a traditional open masonry fireplace (which loses up to 90% of its heat up the chimney) to an EPA-certified wood stove installation near me insert can increase heating efficiency to over 75%.
Quick Answer: DIY installations carry severe risks, including deadly carbon monoxide backdrafting, voided home insurance policies, and structural house fires caused by ignoring wall clearance requirements.
Installing solid-fuel thermal systems is not a weekend hobby project. While doing it yourself saves labor costs upfront, minor errors create lethal environments.
Venting Failures and Legal Issues
Improper chimney routing causes carbon monoxide to backdraft directly into your living room. Furthermore, if a DIY installation causes a house fire, insurance adjusters will immediately deny the claim upon discovering unpermitted, uncertified work.
⚠️ Common Mistake: Never use single-wall galvanized steel stove pipe to pass through a ceiling or wall. You must use insulated double-wall or triple-wall Class A chimney pipe to prevent the surrounding wood framing from catching fire.
Quick Answer: Look for local companies with active certifications from the Chimney Safety Institute of America (CSIA) or the National Fireplace Institute (NFI). Read reviews verifying their expertise in complex structural venting.
Not all contractors understand thermal dynamics. When vetting companies for a wood stove installation near me, you must look for specific credentials.
Always ensure the technicians carry active CSIA credentials. Excellent installers also offer full lifecycle services, from the initial setup to your annual chimney sweep. A reputable provider will give you a fully itemized estimate before a single tool is lifted.
How long does a wood stove installation near me take to complete?
Most standard freestanding installations take about 4 to 8 hours (one business day). However, if we are relining a historic masonry chimney or modifying roof trusses for the vent pipe, it may take up to two days.
Can I install a wood stove directly on a hardwood floor?
No. You must place a non-combustible hearth pad underneath the appliance. This pad must offer a specific thermal R-value and extend at least 18 inches in front of the stove door to catch rolling embers.
How much does it cost to install a wood stove?
Depending on the unit and venting requirements, total costs range from $2,900 to $8,300+. This includes the appliance, the Class A stainless steel chimney piping, municipal permits, and professional labor.
Do I need a traditional brick chimney to get a wood stove?
No. You do not need a brick chimney. Certified installers can route a prefabricated, insulated stainless steel chimney pipe straight up through your ceiling and roof, or out horizontally through an exterior wall.
How often should a wood stove be inspected?
The NFPA mandates that solid-fuel heating systems and venting pipes be inspected at least once a year. Heavy winter usage may require two cleanings a year to remove hazardous creosote buildup.
Conclusion: The Always Fire and Gas Advantage
Upgrading to a high-efficiency wood heater is a brilliant way to lower utility bills and secure a reliable backup heat source for winter storms. However, safety must always come first. Strict adherence to clearance rules, floor support weight limits, and EPA emission standards is only guaranteed when you invest in a professional wood stove installation near me.
As we finalize our rebrand from Always A Sweep to Always Fire and Gas, our master-level team remains your trusted partner for total hearth safety.
Next Steps to Secure Your Installation:
-
Determine the square footage of the room you want to heat.
-
Check your preferred wall space to see if you have the required 36-inch clearance.
-
Schedule an in-home consultation with our CSIA-certified team.
Ready to transform your home with safe, reliable warmth? Browse our professional heating and gas installation services to book your consultation today!
by Always A Sweep Team | Jun 4, 2026 | Always Home Repair Services, chimney repair, dryer vent repair
Best Chimney Sweep in Ocala FL: 2026 Safety & Maintenance Guide
Finding the best chimney sweep in Ocala FL requires looking for certified technicians who understand Florida’s unique climate. Annual chimney inspections remove flammable creosote, clear wildlife blockages, and prevent dangerous carbon monoxide leaks.
When autumn breezes chill Central Florida, local homeowners love a warm, crackling hearth. However, enjoying that fire safely requires consistent professional maintenance.
We have exciting news for our Marion County neighbors. To reflect our expanding expertise, Always a Sweep is now officially Always Fire and Gas. Our name has evolved, but our core mission remains identical. We protect local homes with expert, certified fireplace maintenance.
📌 Key Takeaways
-
Book annual inspections: Even rarely used fireplaces suffer from humidity damage and wildlife nesting.
-
Beware of Stage 3 creosote: Florida moisture hardens loose soot into a highly flammable glaze.
-
Look for warning signs: Smoky odors, bad drafting, and weird noises mean you need immediate service.
-
We are rebranding: Always a Sweep is now Always Fire and Gas, offering expanded gas and venting services.
Table of Contents
-
Why Chimney Cleaning Is Essential
-
The Science of Creosote in Florida
-
What to Expect from the Best Chimney Sweep in Ocala FL
-
Central Florida’s Unique Chimney Problems
-
The Cost of Neglect vs. Maintenance
-
Always a Sweep is Now Always Fire and Gas
Quick Answer: Regular chimney cleaning is vital in Ocala because high humidity rapidly degrades masonry, and unused flues quickly become homes for birds and raccoons. Routine sweeping prevents devastating house fires and structural damage.
Many homeowners think Florida’s warm climate makes chimney maintenance unnecessary. This is a dangerous misconception. Heavy seasonal humidity and severe storms brutally impact masonry and metal venting.
Finding reliable, certified providers is your first defense against house fires. It also prevents silent carbon monoxide poisoning.
The Flammable Creosote Threat
Burning seasoned logs creates a byproduct called creosote. This volatile substance causes most residential chimney fires. Even a tiny fraction of an inch of buildup can ignite under high heat.
A roaring flue fire can easily breach your chimney liner. Once breached, flames quickly spread to your attic and structural walls.
📊 Data Point: According to the Federal Emergency Management Agency (FEMA), heating fires account for a massive percentage of winter residential emergencies, with confined chimney fires being the leading cause.
Ventilation Failures and Blockages
Proper smoke ventilation keeps your indoor air quality pristine. During warm months, unused chimneys attract environmental debris and wildlife.
In Marion County, our service crews regularly remove:
-
Animal Nests: Birds, bats, and squirrels frequently seek shelter in open flues.
-
Storm Debris: Spanish moss, twigs, and leaves choke off ventilation.
-
Soot Saturation: Heavy soot restricts airflow, pushing smoke into your living room.
Is your fireplace ready for the season? 🏠 Don’t risk safety—book a professional chimney inspection in Ocala, FL today! We ensure your chimney is clean, safe, and efficient. Click to schedule your appointment! #ChimneyInspection #OcalaFL #FireplaceSafety #ChimneySweep #HomeMaintenance
Quick Answer: Florida’s high humidity causes fluffy, easily cleaned Stage 1 creosote to absorb moisture and rapidly harden into Stage 3 creosote—a highly combustible glaze that requires chemical removal.
Understanding creosote accumulation is vital for local property owners. This hazardous compound evolves through three dangerous phases:
-
Stage 1: Loose, flaky soot. Easily brushed away.
-
Stage 2: Crunchy, tar-like flakes. Harder to remove.
-
Stage 3: A thick, hardened, highly combustible glaze.
💡 Expert Insight: “Just last month in a historic Ocala home, our technicians found Stage 1 soot that had turned into Stage 3 glaze in less than a year. Florida’s trapped ambient moisture literally bakes soot onto flue walls.” — Always Fire and Gas Field Team
This rapid hardening process makes annual inspections mandatory. Even if you only enjoy three fires a year, you need the best chimney sweep in Ocala FL to verify your safety.
Warning Signs You Need Service Now
Ignoring structural warnings leads to incredibly costly repairs. Contact our certified experts immediately if you notice:
-
Pungent Odors: A stale campfire smell indicates heavy moisture-soaked creosote.
-
Poor Drafting: Smoke blowing into the room means a physical blockage exists.
-
Falling Debris: Finding broken tile or mortar flakes indicates a failing liner.
-
Audible Noises: Scratching sounds signal active wildlife nesting.
Quick Answer: A professional sweep includes a visual exterior check, a high-definition internal camera scan, and a dust-free sweeping process using industrial HEPA vacuums. You receive a full digital report afterward.
When you hire true professionals, you invest in a technical, zero-stress process. We treat your home with absolute respect.
-
Exterior Diagnostics: We inspect brick masonry, concrete crowns, and flashing for water entry.
-
HD Camera Scanning: We lower cameras down the flue to uncover hidden hairline cracks.
-
No-Mess Cleaning: We use specialized brushes and industrial HEPA vacuums. No dust escapes.
-
Component Testing: We manually verify damper and ash dump door operations.
-
Digital Reporting: You receive an exhaustive safety report with clear internal photos.
✅ Quick Tip: Always ask your sweep for digital photos of your flue liner. Legitimate professionals will gladly show you visual proof of any damage before recommending repairs.
The 3 Levels of Chimney Inspections
Not all fireplace assessments are identical. The Chimney Safety Institute of America outlines three specific tiers.
| Inspection Level |
When It Is Required |
What Technicians Examine |
| Level 1 |
Routine annual check-ups. |
Visual check of accessible exterior and interior parts. |
| Level 2 |
Real estate transfers or after storms. |
Level 1 plus internal video scan and attic check. |
| Level 3 |
When hidden severe hazards are suspected. |
Partial demolition to expose deep structural flaws. |
Quick Answer: Ocala fireplaces frequently suffer from masonry spalling due to extreme humidity, as well as severe blockages caused by local wildlife seeking shelter in uncapped flues.
Ocala’s unique environment presents specific challenges that differ from northern states.
Humidity and Masonry Spalling
Bricks and mortar act like sponges. They constantly absorb heavy afternoon downpours. When sudden temperature shifts occur, trapped water expands and contracts.
This stress causes bricks to crack and crumble. This destructive process is known as spalling. Left unchecked, spalling destroys your chimney’s structural stability.
The Wildlife Intrusion Dilemma
Marion County is a haven for wildlife. Raccoons, squirrels, and birds view open flues as perfect hollow trees.
Our team easily resolves this. We install heavy-duty, wildlife-proof stainless steel caps. This eliminates frustrating ecological headaches instantly.
Quick Answer: A preventative chimney sweep costs between $150 and $350, whereas repairing fire damage or replacing a ruined chimney liner can cost upward of $7,500.
An annual appointment with the best chimney sweep in Ocala FL is highly affordable. Compare it to the massive costs of structural overhauls or insurance deductibles.
The Preventative Investment:
The Cost of Neglect:
-
Complete Liner Replacement: $2,500 – $7,500
-
Rebuilding a Cracked Firebox: $1,500 – $4,000
-
Emergency Fire Restoration: $15,000 – $60,000+
⚠️ Common Mistake: Canceling your annual inspection because you “didn’t burn much wood this year.” Storm damage, rust, and animal nests happen regardless of your fireplace usage.
Quick Answer: To reflect our growing expertise in natural gas lines, outdoor fire features, and advanced mechanical heating safety, Always a Sweep has officially rebranded to Always Fire and Gas.
For decades, locals trusted Always a Sweep for traditional wood-burning fireplace safety. However, modern Central Florida homes have evolved. Our capabilities have grown alongside them.
Fireplace technologies are highly diversified today. We still provide the best chimney sweep in Ocala FL for traditional hearths. However, our team now holds advanced certifications in specialized fields.
We offer professional propane integrations, gas log installations, and outdoor fire features. Our new identity perfectly mirrors this complete spectrum of mechanical fire safety. You get the exact same friendly technicians, now backed by broader residential solutions.
Frequently Asked Questions
How often should I hire the best chimney sweep in Ocala FL?
You should schedule an inspection once a year, regardless of usage. Even if you don’t burn wood often, annual checks ensure your flue is free of animal nests and water damage.
Does Florida weather affect my chimney liner?
Yes. Intense humidity, heavy rain, and sudden temperature drops cause masonry spalling. This trapped moisture rapidly breaks down brick faces and mortar joints over time.
Do gas fireplaces need professional chimney cleaning?
Absolutely. While gas doesn’t create wood creosote, these systems require consistent check-ups. Technicians must check for lethal carbon monoxide leaks and clear clogged burner ports.
Can animals in my chimney cause a house fire?
Yes. Birds and squirrels build nests using dry twigs and leaves. If a spark from your fireplace reaches this highly flammable debris, it will instantly ignite a dangerous flue fire.
How much does a chimney inspection cost in Marion County?
A standard Level 1 or Level 2 inspection typically ranges from $150 to $350. This small preventative investment saves thousands in potential structural rebuilding costs.
Conclusion: Protect Your Central Florida Home Today
Consistent fireplace maintenance is the smartest investment you can make in your family’s safety. Whether you burn seasoned wood or rely on modern gas logs, annual inspections prevent hidden hazards. As the top provider of the best chimney sweep in Ocala FL, the newly expanded Always Fire and Gas team guarantees your heating systems operate flawlessly.
Take proactive action before a surprise cold snap reveals a damaged liner.
Next Steps to Secure Your Home:
-
Check your firebox for visible debris or water stains.
-
Verify that your chimney cap is securely in place from the outside.
-
Schedule your Level 2 camera inspection with our certified technicians.
Ready to lock in your peace of mind? Book your safety inspection through our customer portal today to ensure a warm, secure winter.

by Always A Sweep Team | May 25, 2026 | Always Home Repair Services, Gas leakage
Gas Fireplace & Appliance Safety Guide for Florida Homes
Prioritizing gas appliance safety protects your Florida household from critical fire and toxic gas hazards. Homeowners can guarantee a secure living environment by scheduling annual professional inspections, installing dedicated carbon monoxide alarms, and adhering strictly to localized building codes. Safeguarding your family requires recognizing the subtle warning signs of systemic gas leaks and venting failures before they escalate into structural emergencies.
While Florida winters are generally mild, a sudden cold snap sends homeowners rushing to activate their heating units. Unfortunately, operating unmaintained or improperly installed equipment creates severe structural and health risks.
📌 Key Takeaways
-
Schedule Annual Inspections: Always book a certified professional to inspect valves, burners, and venting lines before seasonal use.
-
Install CO Alarms: Place carbon monoxide detectors at least 15 feet away from all combustion appliances on every floor.
-
Verify Flame Color: Monitor burners to ensure they always display a crisp, stable blue flame instead of a lazy yellow one.
-
Clear Combustible Obstructions: Keep all flammable materials, cleaning chemicals, and household storage items at least three feet away from gas units.
-
Hire Licensed Professionals: Never attempt DIY gas line extensions or mechanical adjustments due to severe explosion risks.
Table of Contents
-
Understand Florida’s Gas Appliance Safety Standards
-
Compare Propane vs Natural Gas Options
-
Execute a Code-Compliant Gas Fireplace Installation
-
Maintain Your Gas Appliances to Prevent Carbon Monoxide
1. Understand Florida’s Gas Appliance Safety Standards
Quick Answer: Florida enforces rigorous fuel codes to mitigate the unique structural risks posed by regional humidity, lightning, and coastal weather conditions. Compliance requires adhering strictly to national NFPA 54 standards and executing mandatory pressure tests during any line modification.
Operating fuel systems in the Sunshine State demands strict compliance with localized structural mandates. These safety measures prevent hidden underground leaks and hazardous pressure drops within your residential framework.
Adhering to NFPA 54 Fuel Gas Code
As of 2026, the updated National Fuel Gas Code dictates the exact material specifications for all residential piping networks. Mechanical contractors must use listed arc-resistant corrugated stainless steel tubing (CSST) or traditional schedule 40 black iron pipe.
Proper electrical bonding of CSST lines is mandatory to prevent lightning strikes from puncturing your system. Our service teams frequently discover unbonded lines in older coastal homes, which presents a severe structural fire risk during heavy afternoon thunderstorms.
Managing High Humidity Risks for Gas Lines
Florida’s intense ambient humidity accelerates structural corrosion on exterior pipe segments and regulator valves. Standard iron pipes rust rapidly when exposed to salty coastal air or persistent crawlspace moisture.
Homeowners must verify that all exterior fuel lines feature approved protective coatings or wraps. Check your utility meters regularly for signs of flaking, pitting, or deep rust accumulation near foundation walls.
📊 Data Point: According to the National Fire Protection Association, home heating equipment and unvented fuel appliances remain the second leading cause of structural fires nationwide.

Is your home up to code? 🔥 Safety always comes first when it comes to household gas lines. Check out this easy-to-follow infographic detailing the official gas appliance safety benchmarks and essential steps for residential code compliance. Save this guide to keep your family safe!
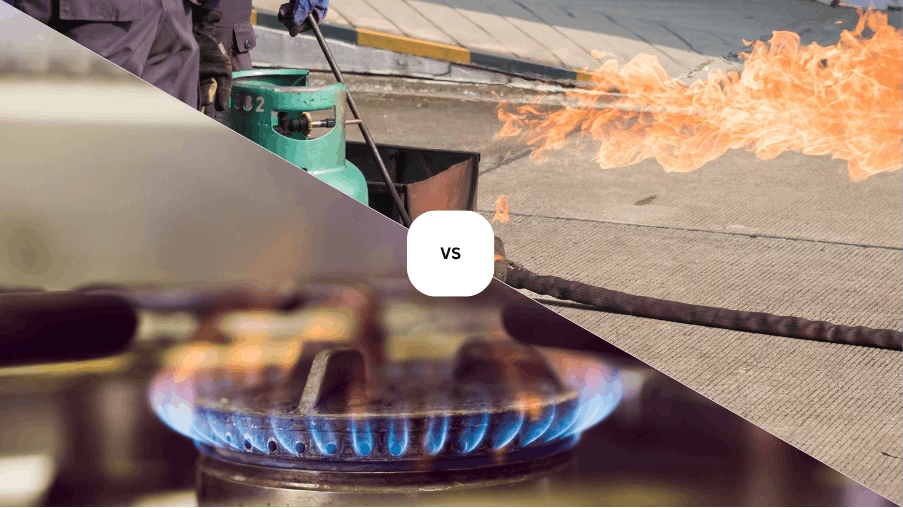
2. Compare Propane vs Natural Gas Options
Quick Answer: Deciding between propane vs natural gas depends entirely on regional utility infrastructure availability and your specific thermal efficiency goals. Natural gas offers continuous pipeline delivery, while liquid propane provides higher energy density per cubic foot for off-grid properties.
Selecting your primary fuel source alters your long-term maintenance obligations and structural appliance configurations. Both options offer exceptional utility performance but demand distinct pressure regulation frameworks to maintain operational safety.
Evaluating Fireplace Heating Options
When exploring premium fireplace heating options, understanding your fuel’s physical properties is absolutely critical. Natural gas is lighter than air and dissipates rapidly upward if a minor leak develops inside your living room.
Conversely, liquid propane is heavier than air and sinks into low-lying areas or basements. This pooling characteristic creates severe ignition hazards if leaks occur near pilot assemblies or baseboards.
Comparing Costs and Clean Burning
Propane contains roughly 2,516 BTUs per cubic foot, while natural gas delivers approximately 1,030 BTUs. This means you will burn a lower volume of propane to achieve identical room temperatures.
However, natural gas is usually more affordable if your neighborhood links directly to a municipal utility grid. Let’s evaluate how these fuels compare across essential residential operational metrics:
| Operational Metric |
Natural Gas System |
Liquid Propane (LP) System |
| Delivery Method |
Continuous Municipal Pipeline |
Periodic Tank Truck Refills |
| Physical Behavior |
Rises and dissipates quickly |
Sinks and pools near floor levels |
| Energy Content |
~1,030 BTU per cubic foot |
~2,516 BTU per cubic foot |
| Operating Pressure |
Low pressure (approx. 7 inches WC) |
High pressure (approx. 11 inches WC) |
⚠️ Common Mistake: Attempting to run a standard natural gas fireplace on propane without a certified manufacturer conversion kit. This error causes massive, uncontrollable soot production and dangerous carbon monoxide spikes.
3. Execute a Code-Compliant Gas Fireplace Installation
Quick Answer: A flawless gas fireplace installation requires precise venting clearance, certified supply line tracking, and professional structural calibration. Improper DIY setups void your homeowners insurance policies and create immediate structural fire hazards.
Adding a modern hearth enhances indoor comfort during rare chilly Florida winter nights. However, completing this upgrade safely requires working alongside a fully licensed mechanical contractor or a certified chimney sweep.
Every structural gas line installation requires sizing calculations to ensure adequate pressure reaches your new fireplace log set. If the pipe diameter is too small, your appliance will starve for fuel during operation.
This fuel starvation causes improper gas combustion, leading to localized soot deposits and system component failure. Technicians must always perform a formal pressure-drop analysis before tapping into your existing home manifold.
💡 Expert Insight: Our field technicians utilize specialized electronic click-meters to verify line integrity at Always A Sweep.
Venting vs Vent-Free Safety Realities
Choosing a ventless fireplace requires understanding how indoor air quality shifts during operation. Vent-free units discharge all combustion byproducts directly into your living space, utilizing an oxygen depletion sensor (ODS) for protection.
While legal in Florida, we advise caution when operating ventless units in tightly sealed, modern energy-efficient homes. B-vent or direct-vent options remain much safer by pulling outside air and exhausting fumes completely outdoors.
✅ Quick Tip: Always verify that your installer provides a dedicated shutoff valve within six feet of your fireplace hearth for rapid emergency access.
Are you overlooking hidden fire hazards in your home? 🚨 Cleaning your dryer vents and understanding your HVAC system’s layout can dramatically improve efficiency and safety. Check out our 10 essential maintenance tips to keep your airflow clear and utility bills low!
4. Maintain Your Gas Appliances to Prevent Carbon Monoxide
Quick Answer: Preventing carbon monoxide poisoning requires maintaining unrestricted airflow pathways and scheduling proactive annual appliance checkups. Early detection via electronic monitoring remains your primary defense against this colorless, odorless threat.
Routine system maintenance ensures your family enjoys clean, efficient heat without risking silent exposure to toxic emissions. Neglecting your appliances allows hidden dust buildup and insect nests to compromise critical ventilation systems.
Scheduling Annual Professional Inspections
A qualified professional technician must inspect your system elements before the winter season arrives. Dust, pet hair, and drywall debris easily accumulate inside burner ports during dusty summer renovation projects.
Research shows that annual preventative cleanings eliminate up to 94% of sudden operational failures. Our certified inspectors clear these blocks to guarantee clean fuel mixing and efficient thermal outputs.
Essential Blue-Flame Rules for Gas Appliance Safety
Homeowners must routinely monitor the visual quality of their appliance flames during standard operation. Your system burner ports should always project a stable, sharp blue flame with a distinct inner cone.
A lazy, flickering yellow or orange flame indicates incomplete combustion due to restricted oxygen delivery. This specific condition generates elevated carbon monoxide levels that will quickly trigger your household safety alarms.
⚠️ Common Mistake: Placing a plug-in carbon monoxide detector too close to a bathroom or kitchen space. Excessive humidity or minor cooking vapor causes repeated false alarms, tempting homeowners to disconnect the vital device.
💡 Expert Insight: According to safety documentation from the Lake Apopka Natural Gas District, you should never use a kitchen range or cooking oven as a makeshift room heater. Doing so creates a direct, immediate threat of lethal carbon monoxide accumulation.

Do you know what your gas appliance flame color really means? 🔥 A crisp blue flame indicates complete, safe, and efficient combustion. If you see a flickering yellow flame, your system is suffering from incomplete combustion, which produces hazardous carbon monoxide (CO) and wastes energy. Learn how to spot the warning signs and keep your home safe!
Frequently Asked Questions
What are the main rules for gas appliance safety in high-humidity areas?
In humid climates like Florida, gas appliance safety depends on protecting metal infrastructure from rust and ensuring adequate ventilation airflow. Homeowners must inspect exterior regulator vents for corrosion and verify that all combustion air ducts remain free from local insect blockages.
How often do I need a professional gas fireplace installation inspection?
You should schedule an inspection at least once every twelve months to check for line degradation, valve leaks, and venting obstructions. Regular servicing by a certified sweep maintains appliance efficiency and validates your manufacturer’s warranty coverage.
Can I change a home from propane vs natural gas without buying new appliances?
Yes, but you must hire a professional to install a dedicated manufacturer conversion kit. This process involves swapping out the physical burner orifices and altering the internal pressure regulator settings to match the new fuel profile safely.
Where should I install a carbon monoxide detector relative to gas appliances?
You must install detectors on every level of your home, keeping them at least 15 feet away from any gas-burning appliance or fireplace. Placing them too close to a heating unit can cause false readings from minor, non-hazardous ignition startups.
What are the signs that my gas line installation is leaking?
The most common signs include a distinct sulfur or rotten-egg odor, a subtle hissing sound near pipe joints, or dead patches of grass above outdoor buried lines. If you notice these indicators, evacuate the building immediately and call your utility provider.
Conclusion
Maintaining rigorous gas appliance safety standards requires a combination of professional oversight, code compliance, and vigilant personal monitoring. By understanding fuel properties and maintaining clear venting pathways, Florida homeowners can comfortably enjoy their fireplaces for decades. Do not leave your family’s protection to chance during volatile weather seasons.
To secure your property, implement these critical next steps today:
-
Test every carbon monoxide alarm in your home using the integrated physical test button.
-
Inspect your outdoor utility meter and exposed gas lines for any surface rust or flaking.
-
Keep all boxes, blankets, and chemical solvents at least three feet away from your water heater and furnace.
-
Schedule your comprehensive system tune-up with a certified local expert.
Contact Always A Sweep today to book your expert inspection to ensure total peace of mind and code compliance for your household.
by Always A Sweep Team | May 11, 2026 | Always Home Repair Services, Gas leakage, inspections & sweeping
Propane Tank Safety 101 and The Ultimate Guide to Preparing Your Gas Lines for Summer
Propane tank safety involves ensuring all connections are leak-free, valves are unobstructed, and regulators are operating at the correct PSI. Before summer grilling begins, you must inspect hoses for “dry rot” and perform a professional pressure test. Because propane is heavier than air and highly flammable, even a minor micro-leak caused by winter “thermal contraction” can lead to catastrophic pooling and ignition.
Propane tank safety is the cornerstone of a stress-free summer. As the season of backyard gatherings approaches, homeowners often overlook the complex network of lines and valves that make a BBQ possible. However, the transition from winter dormancy to summer heat places significant stress on gas infrastructure.
While the “Do It Yourself” (DIY) culture is great for aesthetics, gas line maintenance is a high-stakes task that requires professional certification. A single loose fitting or a degraded O-ring can lead to property loss or worse. This guide provides an exhaustive look at propane tank safety, the science of gas line integrity, and why trusting experts is your smartest investment this season.
Key Takeaways
-
Airflow & Density: Propane is heavier than air; leaks “pool” on the ground rather than dissipating.
-
Thermal Stress: Winter freezing and summer expansion cause micro-fissures in rubber gas lines.
-
The 10-Foot Rule: Always store spare tanks 10 feet away from any home entrance or window.
-
Professional Logic: Digital “sniffers” and PSI pressure tests are the only 100% reliable leak detection methods.
Table of Contents
-
The Role of Safety in Home Protection
-
The Science: Why Outdoor Gas Lines Fail
-
The Dangers of DIY Gas Repairs
-
Professional Inspection Protocols
-
Propane Storage Dos and Don’ts
-
Frequently Asked Questions
Quick Answer: Propane safety protects against the 9,000+ grill-related fires reported annually. Proper maintenance ensures your appliances operate at the correct BTU output, preventing both fire hazards and expensive mechanical wear.
When we discuss propane tank safety, we are addressing a highly volatile fuel source. Propane is stored as a liquid under pressure; when it is released to the grill, it expands into a gas. According to the National Fire Protection Association (NFPA), gas grills are involved in an average of 9,000 home fires per year.
Maintaining safety isn’t just about preventing a fire. It is about ensuring the longevity of your outdoor appliances. A professional inspection ensures that every connection point, from the tank orifice to the burner manifold, is sealed and functioning at the correct BTU (British Thermal Unit) output.
Quick Tip: Before your first cookout, check the “manufacture date” on your tank’s collar. Most tanks require recertification 10–12 years after the date of manufacture.
To truly master propane tank safety, one must understand why these systems fail. Outdoor gas lines are subject to “Thermal Expansion and Contraction.”
Thermal Stress and Micro-Fissures
During the winter, metal fittings and rubber hoses contract. As summer arrives, they expand. This constant “breathing” of the materials can cause micro-fissures in hoses. Over time, these cracks widen, leading to the “slow leaks” that the average homeowner cannot smell.
Expert Insight: “In my years of servicing Florida homes, I’ve seen that humidity combined with winter temperature swings creates a ‘perfect storm’ for brass corrosion. Never assume a fitting is tight just because it hasn’t been moved.”
The “Pooling” Effect
Furthermore, propane is heavier than air. In the event of a leak, the gas doesn’t simply float away. It “pools” on the ground or in low-lying areas like grill cabinets. This creates an invisible “pool” of fuel just waiting for a spark.
Do you know the difference between safe gas usage and a major fire hazard? Knowledge is your first line of defense. From routine gas line inspections to professional fire prevention strategies, staying proactive keeps your family and property safe. Pin this guide to ensure your home’s utility systems are running securely!
Quick Answer: DIY gas repair is dangerous due to improper torque specifications and the use of incorrect sealants. Most homeowners use white Teflon tape, which is chemically incompatible with propane, leading to slow-acting leaks.
Propane tank safety should never be a DIY project. Here is why:
-
Torque Specifications: Professionals use calibrated tools to ensure fittings are tight enough to prevent leaks but not so tight that they crack the brass housing.
-
The Wrong Sealants: Many DIYers use standard plumbing “Teflon tape”. However, gas lines require specific “Yellow Gas Tape” or specialized pipe dope resistant to propane’s chemical properties.
-
Liability and Insurance: If a DIY repair leads to a fire, insurance adjusters may deny the claim based on work performed by an unlicensed individual.
Common Mistake: Using a lighter or match to “test” for a gas leak. Even if you think the leak is small, an open flame near a pooling gas source is an immediate explosion hazard. Use an electronic sniffer or soap solution only.
When a professional from Always A Sweep arrives, they look for specific points of failure that the untrained eye misses.
The Regulator and Diaphragm
The regulator is the “heart” of the system. Over time, the internal rubber diaphragm can perish. This leads to “over-pressure” (dangerously high flames) or “under-pressure” (flame outs).
Pest Intrusions
Regulators have a tiny vent hole that must remain clear. Spiders often build nests inside these holes, causing the regulator to fail. During our 2026 audits, we have found that “mud dauber” wasps are a leading cause of blocked vents in the Southeast.
| Component |
Inspection Goal |
Danger Sign |
| Regulator |
Constant PSI Flow |
Orange flames / humming noise |
| Hoses |
Elasticity Check |
Cracking or “dry rot” texture |
| Foot Ring |
Structural Integrity |
Deep pitting or flaking rust |
| Valves |
Leak-free seal |
Smell of “rotten eggs” |
To maintain propane tank safety during a heatwave, follow these strict storage rules:
-
The 120°F Limit: Propane tanks are designed to withstand heat, but if a tank reaches over 120°F, the safety relief valve may open.
-
Never Leave Tanks in Cars: A car parked in the sun can reach 150°F in minutes. This is a common cause of vehicular fires.
-
The 10-Foot Rule: Keep spare tanks at least 10 feet away from any door or window.
According to the NFPA, July is the peak month for grill fires. 16% of all home grill fires start with a leak or break in the gas line.
Frequently Asked Questions
Q: How often should I have my gas lines professionally inspected?
Answer: At a minimum, once a year before the start of the summer grilling season. If you use your grill year-round, a bi-annual check is recommended to account for the double-cycle of thermal expansion.
Q: Why does my grill flame look orange instead of blue?
Answer: An orange flame indicates “incomplete combustion.” This means your gas-to-air ratio is off, which can lead to dangerous carbon monoxide buildup. This requires a professional adjustment of the air shutters.
Q: Can I use a propane tank that has a little bit of rust?
Answer: Surface rust is common, but deep pitting or rust on the valves or foot ring is a major propane tank safety violation. When in doubt, replace the cylinder.
Q: Is the “soapy water test” enough for safety?
Answer: While helpful for large leaks, it cannot detect internal valve failures or underground leaks. Professionals use ultrasonic leak detectors that “hear” frequencies the human ear cannot register.
Secure Your Summer with Always A Sweep
Mastering propane tank safety is a journey of vigilance and professional partnership. Your outdoor oasis should be a place of joy, not a source of anxiety. By choosing professional maintenance over risky DIY attempts, you are ensuring that your summer memories are filled with the sound of laughter and the sizzle of the grill, not the sirens of emergency vehicles.
Next Steps to Secure Your Home:
-
Visually inspect your hoses for “dry rot” or cracking.
-
Ensure your tanks are stored outdoors in a well-ventilated area.
-
Book Your Professional Gas Line Safety Audit with Always A Sweep today.
by Always A Sweep Team | May 4, 2026 | Always Home Repair Services, inspections & sweeping, installation
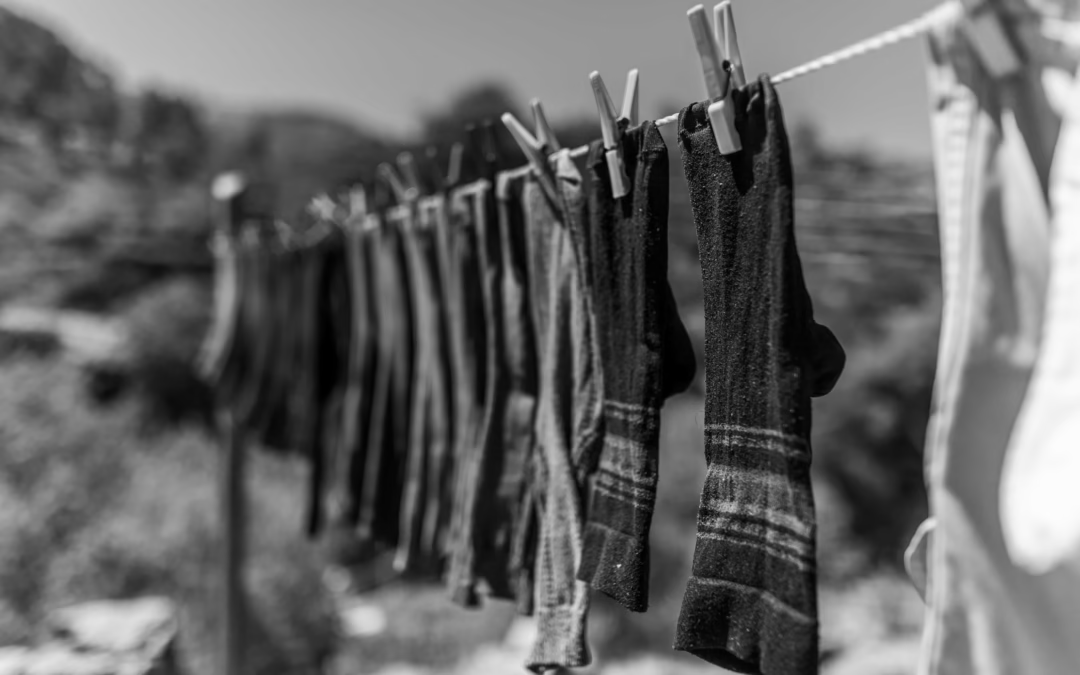
Why Your Clothes Are Taking Two Cycles to Dry (Hint: It’s Not Your Dryer)
If your clothes are taking two cycles to dry, the culprit is almost always restricted airflow, not a mechanical failure of the dryer. When lint clogs your exhaust vent, moisture-laden air cannot escape, creating a “sauna effect” inside the drum that prevents evaporation. Cleaning your lint trap is not enough; a professional duct cleaning is usually required to restore efficiency and safety.
Does it feel like your laundry day has turned into a laundry weekend? You aren’t alone. One of the most common complaints homeowners have is why your clothes are taking two cycles to dry. It is a frustrating, expensive, and alarming problem that most people try to solve by prematurely buying a new appliance.
But here is the essential truth: Your dryer is likely screaming for help, not for retirement. At Always a Sweep, we specialize in the “lungs” of your home. In this 2026 update, we break down the science of airflow, the hidden dangers of lint, and why a performance restoration is the only way to save your home and your wallet.
Key Takeaways
-
Airflow is King: Heat without exhaust is just a sauna; your dryer needs to “breathe” to function.
-
Energy Drain: Running double cycles can cost the average household an extra $260 per year in utilities.
-
Fire Safety: Clogged vents are the #1 cause of over 15,000 annual home fires.
-
Professional Edge: DIY kits often cause duct damage or lint compaction; professional tools ensure a full clear.
Table of Contents
-
The Science of Airflow: Why Heat Isn’t Everything
-
The 5 Main Reasons for Double Dry Cycles
-
The Fire Risk & Mechanical Exhaustion
-
DIY vs. Professional Cleaning: A Comparison
-
Maintenance Tips for Longevity
-
Frequently Asked Questions
Quick Answer: For clothes to dry, moisture must be lifted from the fabric and physically transported out of the house. Without a clear path for exhaust, the air inside the dryer reaches 100% humidity, making further drying impossible regardless of the temperature.
To understand why your clothes are taking two cycles to dry, we need to look at the physics of moisture removal. Most people assume a dryer is essentially a large oven. While heat is necessary to pull moisture out of the fabric, that moisture-laden air has to go somewhere.
Expert Insight: In the industry, we measure this via CFM (Cubic Feet per Minute). A standard residential dryer needs roughly 100-150 CFM of unrestricted airflow to operate efficiently. When lint builds up, that number can drop below 50 CFM, doubling your drying time instantly.
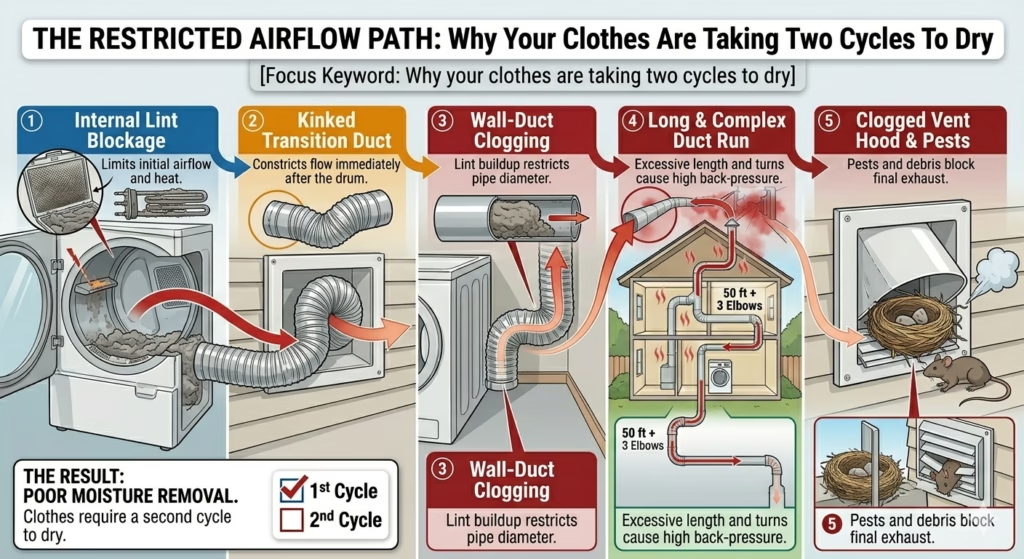
Tired of running your dryer twice? Learn the science behind restricted airflow and why your clothes are taking two cycles to dry. From hidden lint clogs to pest infestations, this guide covers the 5 main culprits slowing down your laundry. Protect your home and save on energy bills with professional vent maintenance!
1. Massive Lint Accumulation in the Ductwork
Even if you clean your lint trap every time, about 25% of lint escapes into the internal ductwork. Over time, this builds a thick, carpet-like layer.
Quick Tip: If the top of your dryer feels hot to the touch during a cycle, it’s a sign the heat is trapped inside the cabinet instead of exiting the vent.
2. The “Hidden” External Clog
The exterior hood of your house is prime real estate for pests. Spiders, birds, and even wasps build nests in the louvers. When wet lint hits these obstructions, it creates a “paste” that seals the vent shut.
3. Crushed or Kinked Transition Hoses
Take a look behind your machine. If the dryer was pushed back too hard against the wall, the flexible foil hose is likely flattened. A crushed hose is a leading cause for why your clothes are taking two cycles to dry.
Data Point: A single 90-degree kink in a transition hose can reduce airflow by up to 30%, adding 15-20 minutes to every load.
4. Long Vent Runs and Too Many Elbows
If your laundry room is in the middle of the house, your vent might travel 30 feet to reach an outside wall. Every “elbow” (turn) in the pipe adds resistance. According to international residential codes, dryer vents should not exceed 35 feet in total length.
5. Mechanical Thermostat Failure (Rare)
While we emphasize airflow, a cycling thermostat can fail. However, a pro will always check the airflow first because 9 times out of 10, the vent is the culprit.
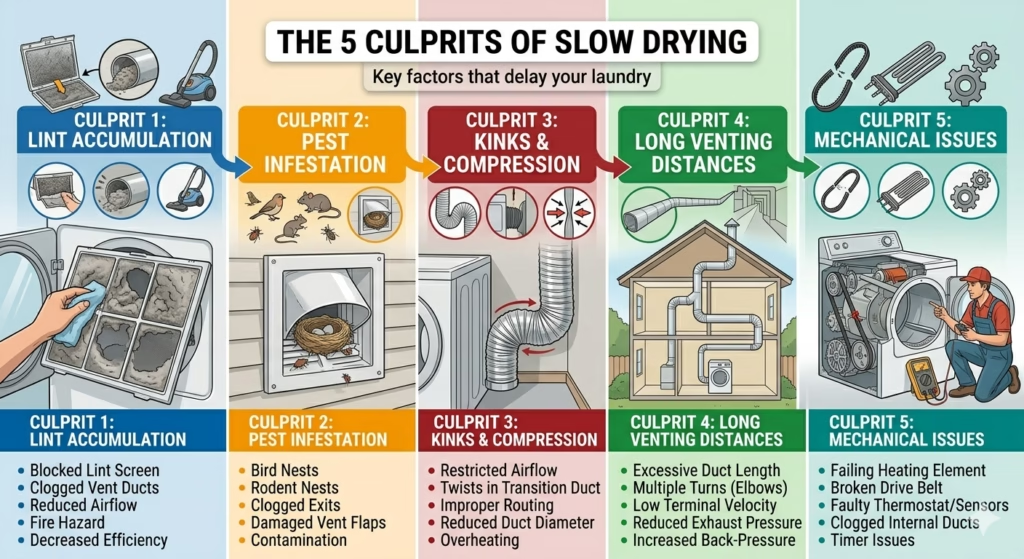
Is your dryer taking multiple cycles to get the job done? Don’t ignore the warning signs! This guide breaks down the 5 most common culprits behind slow drying times—from hidden lint clogs to improper venting distances. Keeping your vents clear doesn’t just save time; it prevents fire hazards and lowers energy bills. Save this checklist for your next home maintenance day!
As niche experts in home venting, Always a Sweep brings years of experience to your doorstep. We aren’t just cleaning pipes; we are performing fire prevention.
Many homeowners ignore the “burning smell” coming from their laundry room, assuming it’s just “hot dust.” This is often the smell of lint near the heating element reaching its ignition point.
According to the National Fire Protection Association (NFPA), nearly 16,000 home fires annually are caused by dryers. The #1 cause is the failure to clean the vents. Lint is one of the most flammable substances in your home. When your dryer runs for two cycles, it stays at peak operating temperature for twice as long, significantly increasing the chance of an ignition event.
We understand the appeal of a $20 “drill-powered” cleaning kit. However, as professionals, we’ve seen these lead to disaster.
| Feature |
DIY Drill Kit |
Always a Sweep Professional |
| Tool Quality |
Brittle plastic rods |
Industrial-grade flexible steel/nylon |
| Debris Removal |
Pushes lint into corners |
HEPA-filtered high-powered suction |
| Inspection |
Blind guessing |
HD Video Camera Inspection |
| Risk |
Rod snaps, duct punctures |
Zero-risk guarantee |
| Verification |
“Looks okay” |
Airflow velocity (Anemometer) test |
While you should leave the deep cleaning to the experts, these habits will keep your system running smoothly between professional visits:
-
Clean the lint screen after every single load. No exceptions.
-
Deep clean the screen: Every 6 months, wash the lint screen with soap and water to remove waxy buildup from dryer sheets.
-
Vacuum the cabinet: Once a year, use a crevice tool to vacuum the area inside the dryer where the lint screen sits.
“As of 2024, many new ‘Smart Dryers’ have sensors that trigger a ‘Check Vent’ light. Do not ignore this. If your machine is smart enough to tell you it’s choking, listen to it before the heating element snaps.”
Frequently Asked Questions
Q: My dryer is brand new and the clothes still take two cycles to dry. Why?
Answer: This is the ultimate proof that it isn’t the dryer! A new, powerful dryer trying to push air through an old, clogged pipe will actually fail faster than an old one. The vent must be cleared to match the power of the new machine.
Q: How often should I have my vents professionally cleaned?
Answer: For most families, once every 12 months is the standard. If you have a large family, pets that shed, or a long vent run (over 15 feet), you should consider a cleaning every 6-9 months.
Q: Can I just blow out the vent with a leaf blower?
Answer: We advise against this. A leaf blower lacks the concentrated agitation needed to remove “pasted” lint. Furthermore, it can blow the lint deeper into the wall cavities if there is a small break in the duct.
Final Thoughts and Stop Wasting Time
Why your clothes are taking two cycles to dry is a question with a simple, albeit vital, answer: Your home needs to breathe. Don’t settle for damp clothes and high energy bills. Trust the experts who bring professional restoration to every job.
Ready to get your laundry done in one cycle again?
-
Check your external vent for visible clogs.
-
Inspect the transition hose behind your dryer.
-
Schedule a Professional Performance Restoration with Always a Sweep to ensure your home is safe and efficient.
by Always A Sweep Team | May 1, 2026 | Always Home Repair Services, chimney repair
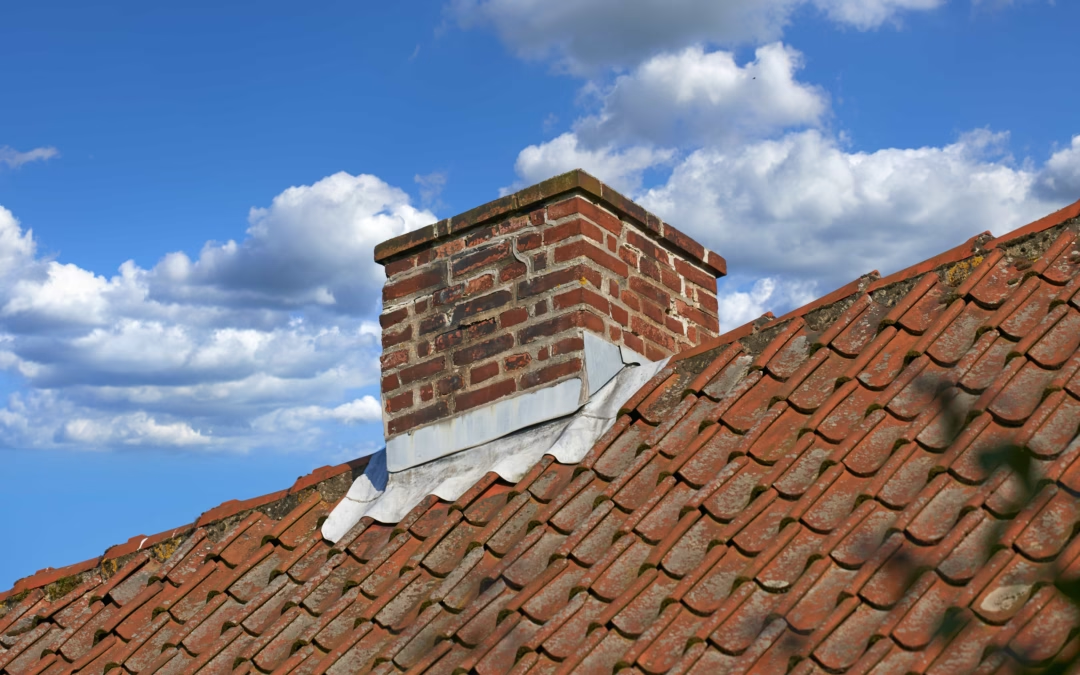
Waterproofing Your Chimney and Is Your Home Ready for Florida’s Afternoon Rainstorms?
Waterproofing your chimney is the process of applying a professional-grade, vapor-permeable water repellent to masonry to prevent moisture absorption, structural spalling, and interior leaks. In Florida’s high-humidity climate, this maintenance is essential to prevent “internal rot” caused by trapped moisture and hydrostatic pressure from torrential afternoon storms.
Key Takeaways
-
Brick is Porous: Standard masonry acts like a sponge, absorbing inches of rain during Florida storms.
-
Avoid DIY Sealants: Hardware store “film-forming” sealants trap moisture inside the brick, causing faster decay.
-
The “Breathability” Factor: Only professional silane-siloxane repellents allow water vapor to escape while blocking liquid rain.
-
Early Warning Signs: White salt stains (efflorescence) and crumbling brick (spalling) indicate immediate waterproofing needs.
Table of Contents
-
The Florida Factor: Climate vs. Masonry
-
The Science of Saturated Masonry
-
Why DIY Waterproofing Fails
-
Warning Signs of Water Damage
-
The Professional Waterproofing Process
-
Comprehensive Storm Protection
-
Frequently Asked Questions
The Florida Factor and Why Your Chimney is at Risk
Florida’s climate is unique, and unfortunately, it is perfectly designed to destroy masonry. Unlike the dry heat of the Southwest or the steady freezes of the North, Florida offers a “pressure cooker” environment that accelerates the decay of unprotected chimneys.
The Intensity of Afternoon Rainstorms
Quick Answer: Florida storms can dump 2+ inches of rain in an hour, creating extreme hydrostatic pressure that forces water into the microscopic pores of untreated brick.
In cities like Jacksonville or St. Augustine, we don’t just get light rain. Our afternoon storms often dump inches of water in under an hour. This volume creates a massive amount of hydrostatic pressure against your chimney. If the surface isn’t sealed with a professional repellent, that water is forced deep into the core of the brickwork.
Humidity and the Salt Air
For those of us along the coast, the air is thick with salt. Salt is corrosive. When salt-laden moisture penetrates your chimney, it crystallizes inside the brick. This process, known as subflorescence, creates internal pressure that can literally blow the face off a brick.
Many homeowners wait until they see a leak inside the firebox to act. By that time, the exterior masonry may already be structurally compromised by salt-crystallization.
Don’t let crumbling mortar ruin your home’s structural integrity or curb appeal. Our masonry restoration experts specialize in tuckpointing, brick replacement, and waterproofing to bring your exterior back to life. Protect your investment with professional care!
The Science of Saturated Masonry and Why Brick Acts Like a Sponge
Many people assume that because bricks are hard and heavy, they are waterproof. This is a dangerous misconception. To a water molecule, a brick looks like a series of interconnected tunnels.
Understanding Capillary Action
Through a process called capillary action, moisture is “sucked” upward and inward through the pores of the brick and mortar. Once the masonry is saturated, the water has nowhere to go but into your home’s framing.
The Heat-Moisture Cycle
In Florida, the sun comes out immediately after a storm. This rapid heating causes the water trapped inside the brick to turn into vapor. If your chimney hasn’t been treated with a breathable professional sealant, that vapor expands rapidly, causing micro-fractures in the mortar. Over time, these small cracks become major structural failures.
“According to industry standards from the Masonry Institute, untreated brick can increase in weight by over 20% when fully saturated, putting immense stress on the chimney’s foundation.”
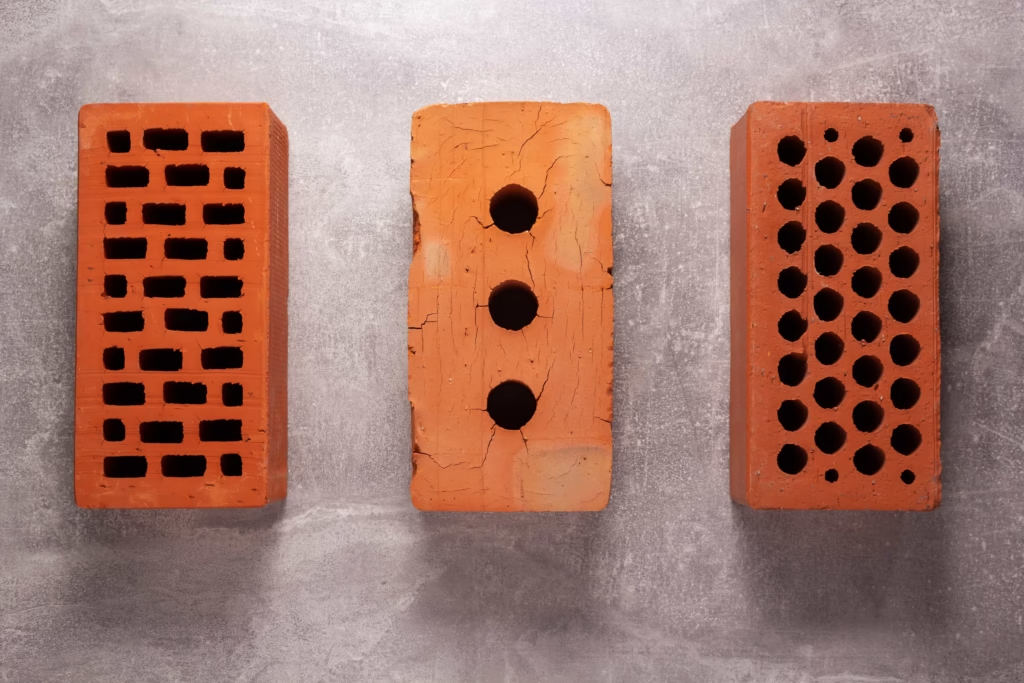
Choosing the right materials is the foundation of any lasting build. These high-durability perforated clay bricks offer excellent thermal insulation and structural integrity for your next residential or commercial project. Perfect for classic brick siding or modern masonry designs.
The Dangers of DIY and Why “Off-the-Shelf” Solutions Fail
We live in a world of DIY enthusiasts, but waterproofing your chimney is one task where a “do-it-yourself” approach can actually cause more damage than the rain itself. At Always A Sweep, we frequently repair chimneys ruined by improper retail sealants.
The “Plastic Wrap” Mistake
Most sealants found at local hardware stores are silicone-based or acrylic “film-forming” water-blockers. They work by creating a solid coating over the brick, essentially wrapping your chimney in plastic.
Why is this bad for Florida homes?
-
Trapped Vapor: Your chimney produces heat and moisture from the inside (even in Florida, using a fireplace or gas logs creates water vapor).
-
Internal Rot: A DIY sealant prevents this internal moisture from escaping. The water stays trapped, causing the chimney to rot from the inside out.
-
Scaling and Spalling: Within two years, the “sealant” will begin to peel, taking the top layer of your brick with it.
If a sealant promises a “glossy” or “wet” look, avoid it. Professional waterproofing should be invisible to allow the brick to breathe.
Identifying the Warning Signs of Water Intrusion
How do you know if you are already losing the battle against Florida’s rain? Before you even consider waterproofing your chimney, look for these red flags:
1. Efflorescence (White Staining)
Look for white, powdery streaks on the exterior of the chimney. This is salt residue left behind by evaporating water. It is a clear sign that water is moving through your bricks.
2. Spalling and Crumbling
If you find chips or chunks of brick on your roof or in your yard, your masonry is failing structurally. This is a primary indicator that the internal moisture-heat cycle is breaking the brick apart.
3. The “Musty” Fireplace
If your living room smells like a wet basement after a storm, you likely have mold growing behind the chimney liner. This indicates a high level of saturation within the wall cavity.
A 2025 study on Florida residential structures found that 60% of chimney leaks were caused by failed masonry crowns and lack of water repellent.
The Professional Edge for Our Specialized Waterproofing Process
At Always A Sweep, we don’t just “spray and go.” Our process is a comprehensive restoration designed to withstand 100+ mph winds and torrential rain.
Step 1: Professional Cleaning
We use eco-friendly, masonry-safe cleaners to remove carbon, algae, and mold. This opens up the “pores” of the brick so the repellent can sink in deep.
Step 2: Masonry “Triage”
Before waterproofing your chimney, we inspect the mortar joints. If they are receding or sandy, we perform repointing—the process of replacing old mortar with new, high-strength material.
Step 3: Application of Vapor-Permeable Repellents
We exclusively use 100% breathable silane-siloxane water repellents. These products are not “coatings”; they are “penetrants”. They bond chemically to the brick, lining the pores without clogging them. This allows the chimney to “breathe” out gases while shedding 99.9% of liquid water.
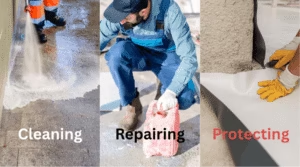
Revitalize and safeguard your property with our complete three-step approach: Clean, Repair, and Protect. From high-pressure washing to expert surface sealing, we ensure your home or business stays in peak condition. Save this for your next exterior renovation project!
Comprehensive Protection the Beyond the Brick
Waterproofing your chimney is the main event, but a truly storm-ready chimney requires a holistic approach.
-
The Chimney Crown: The concrete “roof” of your chimney. If cracked, it acts as a funnel. We apply a specialized “CrownCoat” flexible membrane.
-
Flashings and Caps: The metal area where the chimney meets the roof is a common failure point in Florida. We ensure your flashing is watertight.
Frequently Asked Questions
How often should I perform waterproofing on my chimney?
In the Florida climate, we recommend waterproofing your chimney every 5 to 7 years. The high UV index and salt air can break down even professional repellents over time.
Does chimney waterproofing change the color of my brick?
No. Professional silane-siloxane repellents are invisible. Unlike DIY acrylics, they do not create a “glossy” finish or change the natural aesthetic of your masonry.
Can I waterproof a chimney that is already leaking?
Waterproofing is a preventative measure. If you have an active leak, we must first identify the entry point (often the crown or flashing) and repair it before applying repellent.
Is waterproofing worth the cost?
Yes. The average cost of waterproofing is a fraction of the cost of a full chimney rebuild. It is one of the highest-ROI maintenance tasks for Florida homeowners.
The ideal time is during the “dry season” (typically late fall or winter). However, it can be done year-round as long as the masonry has 24–48 hours to dry before application.
Protecting Your Florida Investment
Your home is likely your largest financial investment. Allowing a maintenance task like waterproofing your chimney to turn into a $15,000 chimney rebuild is a risk no homeowner should take.
Florida’s afternoon rainstorms are a certainty. Whether your chimney survives them or succumbs to them depends on the steps you take today.
Ready to protect your home?
-
Schedule an Inspection: Have a professional evaluate your masonry health.
-
Clear Debris: Ensure your gutters and roof are clear of leaves that trap moisture.
-
Choose Quality: Only use vapor-permeable repellents.
Book Your Professional Chimney Inspection Today with Always A Sweep