by Always A Sweep Team | Apr 27, 2026 | Always Home Repair Services, inspections & sweeping
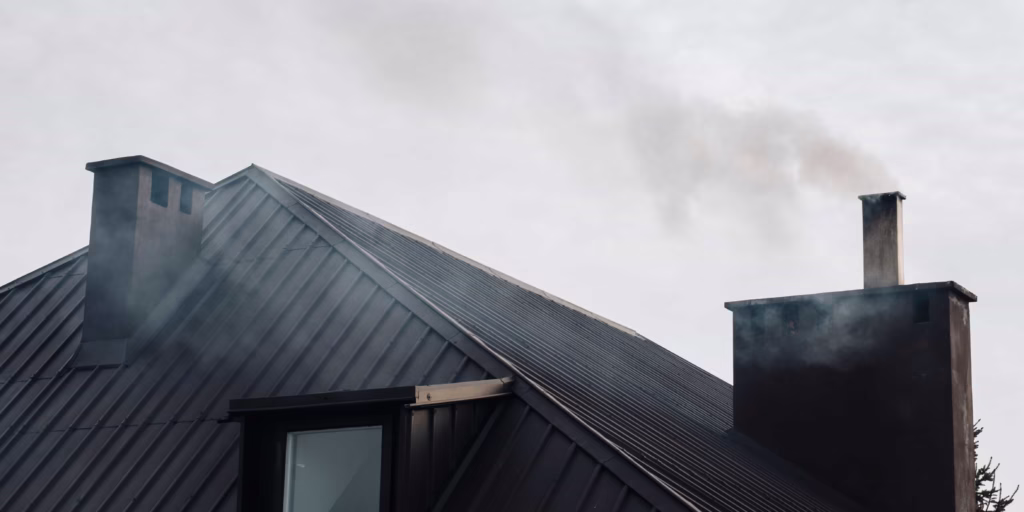
Searching for a fireplace remodel design consultation near me is the first step in turning a dated, soot-stained hearth into the stunning centerpiece of your living room. In North Central Florida, the fireplace isn’t just about heat; it’s a lifestyle statement. Whether you have a traditional masonry chimney or a modern prefab unit, a remodel can completely shift the energy of your home.
How does a professional consultation help? Most homeowners know they want a change, but they aren’t sure if their dream design is structurally possible. By booking a fireplace remodel design consultation near me, you gain access to experts who understand the balance between aesthetic beauty and fire safety.
At Always A Sweep, we don’t just look at the exterior. We evaluate your entire system, from the Chimney Cap to the Smoke Chamber. A dreamy remodel is only successful if it functions perfectly and safely for years to come.
Table of Contents
-
How Does a Fireplace Remodel Design Consultation Near Me Transform Your Home?
-
What Happens During a Professional Fireplace Design Consultation?
-
Why is Technical Expertise Critical for a Fireplace Remodel?
-
How Do You Choose Between Wood, Gas, or Electric Fireplaces?
-
Where Can You Find Inspiration for Your New Hearth Design?
-
How Does Professional Masonry Repair Integrate with Your Remodel?
-
What Are the Safety Requirements for a Fireplace Overhaul?
-
Conclusion and Expert Resources
What Happens During a Professional Fireplace Design Consultation?
What should you expect when an expert arrives for a fireplace remodel design consultation near me? The process is collaborative and data-driven. We don’t just pick out tile; we engineer a solution.
-
How do we assess the current structure? We perform a deep inspection to see if you need a Chimney Relining or Damper Repair before the cosmetic work begins.
-
How do we determine your style? We discuss materials like natural stone, modern shiplap, or traditional brick.
-
What about measurements? We take precise dimensions to ensure your new Gas Fireplaces or Woodburning Stoves meet all local Florida building codes.
Why is Technical Expertise Critical for a Fireplace Remodel?
Why can’t you just hire a general handyman for this? A fireplace remodel design consultation near me requires a deep understanding of “The Physics of Fire.” If a mantle is installed too close to the firebox, or if a new stone facade blocks essential airflow, you create a massive fire hazard.
As experts in Gas System Maintenance & Service, we ensure that if you are switching from wood to gas, your New Gas Line & Appliance Connection is handled with surgical precision. How does this protect you? It ensures that your home remains safe from gas leaks and carbon monoxide while looking like it belongs in a luxury magazine.
How Do You Choose Between Wood, Gas, or Electric Fireplaces?
How do you know which fuel source is right for your lifestyle? During your fireplace remodel design consultation near me, we help you weigh the pros and cons:
-
Woodburning Fireplaces: Why choose wood? For the authentic crackle, smell, and high heat output. It requires regular Inspections & Sweeping.
-
Gas Fireplaces: How do they offer success? They provide instant heat with the flip of a switch and require less maintenance than wood.
-
Electric or Water Vapor Fireplaces: Where do these fit? Perfect for bedrooms or homes without existing chimneys, offering ambiance without the need for venting.
Where Can You Find Inspiration for Your New Hearth Design?
Where do the best design ideas come from? Your fireplace remodel design consultation near me is the perfect time to bring your Pinterest boards to life. Are you looking for a “Coastal Chic” look with white-washed brick? Or perhaps a “Modern Industrial” vibe with a custom steel surround?
At Always A Sweep, we help you visualize how different textures will react to the light in your specific room. How does the choice of a Chimney Cap or Chase Cover affect the exterior aesthetic of your home? We look at the project holistically, ensuring the inside and outside match your vision.
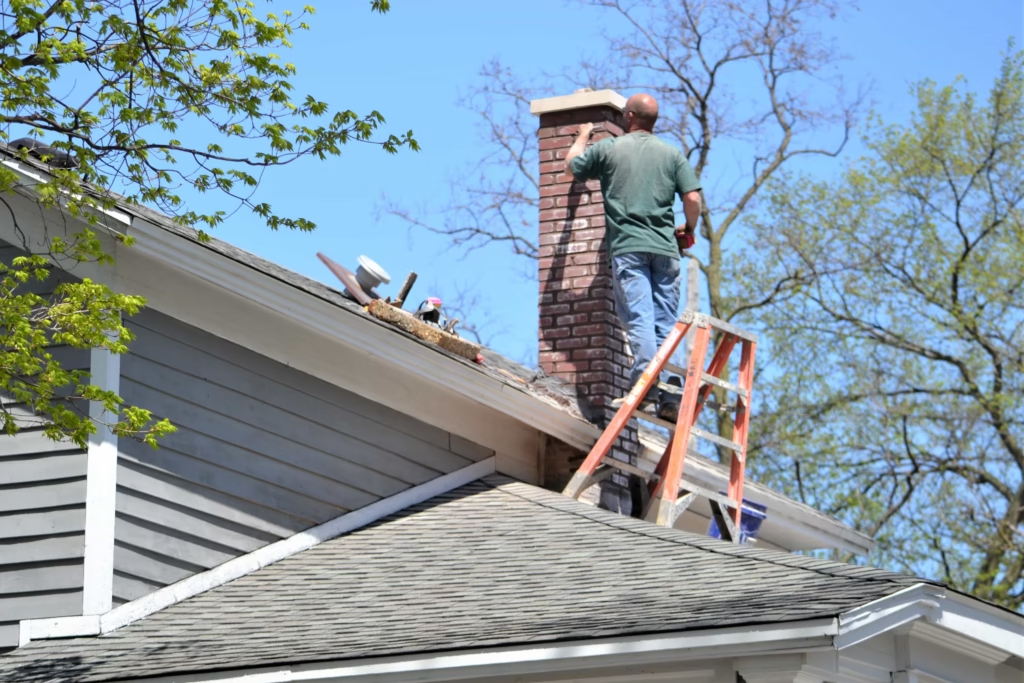
How Does Professional Masonry Repair Integrate with Your Remodel?
How often does a remodel reveal hidden issues? It is very common to find cracked firebricks or a deteriorating Smoke Chamber once an old mantle is removed. This is why a fireplace remodel design consultation near me is so valuable.
Instead of hitting a roadblock, our team can perform Masonry Repair or a full Chimney Rebuild as part of the project. How does this save you money? By fixing the structural “bones” of the fireplace during the remodel, you avoid having to tear apart your beautiful new stonework later to fix a leak or a crack.
What Are the Safety Requirements for a Fireplace Overhaul?
How do we ensure your new design is legal and safe? Every fireplace remodel design consultation near me focuses on “Clearance to Combustibles.”
-
How far should the mantle be? We follow strict NFPA guidelines to prevent heat transfer to wooden elements.
-
Why check the venting? If we install a more efficient insert, we must ensure the Chimney Relining is sized correctly to prevent “back-puffing.”
-
What about gas safety? We always include a Gas Leak Inspection as part of any gas-related remodel to ensure your peace of mind.
Conclusion and Expert Resources
Conclusion: Ready to Build Your Dream Hearth?
Booking a fireplace remodel design consultation near me is the best way to ensure your home improvement project is a total success. Why settle for a dated fireplace when you can have a high-efficiency, stunningly beautiful focal point?
At Always A Sweep, we bring years of expertise in North Central Florida to every consultation. From Damper Repair to Fireplace Design, we handle every detail so you can simply sit back and enjoy the glow.
Are you ready to transform your home? Contact Always A Sweep today to book your fireplace remodel design consultation near me. How can we help you bring your vision to life?
by Always A Sweep Team | Apr 20, 2026 | Always Home Repair Services, Gas leakage, inspections & sweeping
Annual gas system maintenance checklist completion is the single most important task a homeowner in North Central Florida can perform to ensure year-round safety. While gas is an incredibly efficient fuel source for heating and cooking, it requires proactive management to prevent hazards like carbon monoxide poisoning or leaks.
At Always A Sweep, we understand that your fireplace and gas appliances are the heart of your home’s comfort. Neglecting these systems doesn’t just lead to inefficiency; it can lead to costly emergency repairs during the peak of winter.
A well-maintained system operates at peak performance, lowering your monthly utility bills. By following a structured maintenance routine, you extend the lifespan of your appliances and gain peace of mind knowing your family is protected.
Table of Contents
-
The Importance of Gas Safety
-
Annual Gas System Maintenance Checklist: The Essentials
-
Visualizing Your Gas System
-
The Critical Role of Professional Inspections
-
Common Signs of Gas System Wear
-
Internal & External Resources
-
Conclusion
Annual Gas System Maintenance Checklist: The Essentials
Start by examining all visible gas lines leading to your water heater, furnace, and fireplace. Look for signs of corrosion, rust, or physical damage to the pipes.
You must ensure that your CO detectors are functioning perfectly. Replace batteries annually and check the “replace by” date on the back of the device, as sensors degrade over time.
Dust and debris can clog burner ports, leading to incomplete combustion. This is especially true for gas fireplaces and outdoor propane setups.
4. Checking the Pilot Light
If your appliance has a standing pilot light, the flame should be a crisp blue. A yellow or flickering flame suggests a lack of oxygen or a dirty burner that requires immediate attention.
Ensure that exhaust vents are clear of bird nests, debris, or soot buildup. Proper venting is crucial for moving combustion gases safely out of your home.
Expert Tip: If you notice a “rotten egg” smell, leave the house immediately and call for emergency leak detection. Do not turn any lights on or off.
Visualizing Your Gas System
The Critical Role of Professional Inspections
Why DIY Isn’t Enough
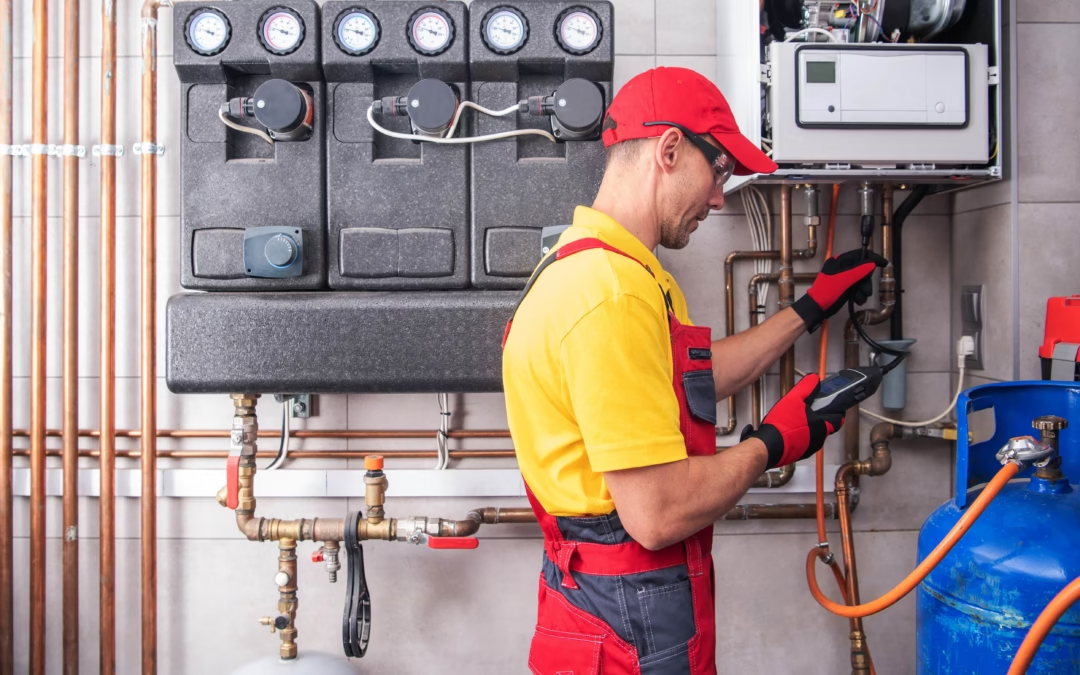
While the annual gas system maintenance checklist includes tasks you can do yourself, professional expertise is non-negotiable for high-pressure components. Our team at Always A Sweep uses specialized equipment to detect leaks that are too small for the human nose to sense.
Advanced Leak Detection
We utilize electronic combustible gas detectors to sniff out trace amounts of propane or natural gas. This ensures that even “micro-leaks” at joints or valves are identified and repaired before they become dangerous.
Whether you are using a municipal natural gas line or a private propane tank installation, the maintenance requirements differ slightly. Our specialists are trained in the specific pressures and regulator settings required for both fuel types.
-
Soot Buildup: If you see black carbon deposits on your gas logs or near the furnace burners, your gas-to-air ratio is off.
-
Physical Corrosion: White or green powdery substances on copper or brass fittings indicate chemical corrosion that could lead to a breach.
-
Odd Noises: Hissing sounds near a connection point or “booming” sounds when an appliance ignites are major red flags.
-
Increased Bills: A sudden spike in gas usage without a change in weather usually indicates an underground leak or a highly inefficient burner.
By staying ahead of these issues with your annual gas system maintenance checklist, you avoid the stress of a mid-winter breakdown.
Conclusion
Completing an annual gas system maintenance checklist is more than just a chore; it is a commitment to your home’s longevity and your family’s safety. From checking pilot lights to ensuring your propane tank is properly anchored, every step counts.
Don’t wait until the first cold snap hits North Central Florida to realize your system has a fault. Always A Sweep is here to provide professional gas system inspections, new gas line connections, and comprehensive repairs.
Ready to secure your home? Contact Always A Sweep today to schedule your professional gas system maintenance and ensure your home stays warm, safe, and efficient all year long.
by Always A Sweep Team | Apr 13, 2026 | Always Home Repair Services, chimney repair, dryer vent repair, roof termination replacement
A pest proof dryer vent cover for exterior wall acts as a critical mechanical barrier between the comfort of your home and the unpredictable wildlife of North Central Florida. When your dryer is running, the vent allows hot, moist air to escape; however, the moment the cycle ends, a standard vent often leaves a gaping hole in your building envelope.
By utilizing a pest proof dryer vent cover for exterior wall, you ensure that the exit point remains hermetically sealed against intruders. How does this impact your safety? It prevents highly flammable nesting materials—like straw, dried grass, and twigs—from being deposited inside your ductwork. This simple addition significantly reduces the risk of lint-related fires, which remain a leading cause of residential property damage.
At Always A Sweep, we don’t just see a vent; we see a vital component of your home’s defense system. How many homeowners realize that a small bird can completely block a dryer line in less than 48 hours? Installing the right cover is the most effective way to preempt this disaster.
Table of Contents
-
How Does a Pest Proof Dryer Vent Cover for Exterior Wall Protect Your Home?
-
Why Are Local Critters Attracted to Your Dryer Exhaust?
-
What Features Make a Vent Cover Truly Pest-Proof?
-
How Do You Know if Your Current Vent Cover Has Failed?
-
Where Should You Install a High-Performance Exterior Vent?
-
How Can Professional Installation Improve Energy Efficiency?
-
What Maintenance is Required for a Pest-Proof System?
-
Expert Resources and Next Steps
Why Are Local Critters Attracted to Your Dryer Exhaust?
Why do birds, squirrels, and even bats target your dryer vent? The answer lies in the heat. During the cooler months in North Central Florida, the warm air blowing from your laundry room signals a perfect, pre-heated nesting spot.
Without a pest proof dryer vent cover for exterior wall, these animals view your ducting as a safe, sheltered tunnel away from predators. How do they get inside? Many basic plastic covers have thin louvers that a squirrel can easily chew through or a bird can pry open with its beak. Once inside, they begin building nests that trap lint, creating a “plug” that prevents your dryer from breathing.
How does this affect your appliances? When the exhaust is restricted, your dryer’s internal temperature spikes. This doesn’t just wear out the heating element; it creates a volatile environment where a single spark from the motor can ignite the trapped lint and nesting material.
What Features Make a Vent Cover Truly Pest-Proof?
When shopping for a pest proof dryer vent cover for exterior wall, what should you look for? Not all covers are created equal. To achieve the best success in keeping critters out, a cover must have specific engineering features:
-
Dual-Door Technology: How does this work? It uses an inner and outer door to provide two layers of defense.
-
Magnetic Latches: How do these improve safety? Magnetic seals ensure the door stays shut against high winds and curious paws but opens easily under the air pressure of the dryer.
-
Heavy-Duty Materials: Why choose metal over plastic? Powder-coated steel or thick UV-resistant polymers prevent the sun from making the unit brittle and easily breakable.
-
Vertical Discharge: How does this help? Some designs allow air to exit downward, making it nearly impossible for birds to gain the leverage needed to fly “up” into the pipe.
How Do You Know if Your Current Vent Cover Has Failed?
How can you tell if your pest proof dryer vent cover for exterior wall is no longer doing its job? There are several “silent” indicators that every homeowner should watch for:
-
How do the louvers look? If they are missing, stuck open, or warped, your vent is compromised.
-
How long do your clothes take to dry? If a load that used to take 40 minutes now takes 80, there is a blockage—likely a nest—preventing airflow.
-
What do you see on the ground? Finding bits of lint or bird droppings directly under the vent is a clear sign of an active intrusion.
-
Is there a smell? A foul odor coming from the dryer area often indicates that an animal has become trapped and perished within the line.
If you answer “yes” to any of these, it is time to consider a Replacement / Repair / Reconnection of Dryer Vent and a high-quality pest proof dryer vent cover for exterior wall.
Where Should You Install a High-Performance Exterior Vent?
Where is the most effective location for a pest proof dryer vent cover for exterior wall? While the exit point is determined by your laundry room’s location, the “how” of the installation is just as important as the “where.”
At Always A Sweep, we ensure that the vent is installed at a height that prevents ground-dwelling rodents from jumping in, while also ensuring it is accessible for annual cleaning. How do we handle different siding types? We specialize in Dryer Wall Exhaust Termination for stucco, brick, and vinyl siding, ensuring a watertight seal that prevents secondary issues like wood rot or mold.
How Can Professional Installation Improve Energy Efficiency?
How does a pest proof dryer vent cover for exterior wall actually save you money? It all comes down to “backdrafting” and thermal loss. In the summer, an unsealed vent allows the hot, humid Florida air to leak back into your air-conditioned home.
By installing a professional-grade pest proof dryer vent cover for exterior wall, you create a one-way street. How does this help your wallet? Your HVAC system won’t have to work as hard to combat the heat leaking in through the laundry room. Furthermore, because your dryer can exhaust air more efficiently through a clean, pest-free vent, it uses significantly less electricity per load.
What Maintenance is Required for a Pest-Proof System?
Even with a pest proof dryer vent cover for exterior wall, how often should you perform maintenance? We recommend a simple three-step check twice a year:
-
Step 1: While the dryer is running, walk outside. Is the vent door opening fully?
-
Step 2: Once the dryer stops, check if the door snapped shut.
-
Step 3: Look for any lint “fuzz” caught on the edges of the pest proof dryer vent cover for exterior wall and wipe it away.
How can you ensure the deep interior of the duct is safe? Schedule a professional Dryer Vent Cleaning & Inspection once a year. This removes the fine lint that bypasses the dryer’s internal filter and accumulates in the ductwork over time.
Expert Resources and Next Steps
How Will You Secure Your Home?
Choosing to install a pest proof dryer vent cover for exterior wall is a proactive step toward a safer, more efficient home. How much is peace of mind worth when you know that no squirrels, birds, or snakes can enter your living space through your appliances?
At Always A Sweep, we are dedicated to helping North Central Florida residents maintain their homes with the highest level of expertise. Whether you need a Roof Termination Replacement or a new pest proof dryer vent cover for exterior wall, our team is ready to help.
Ready to stop the critters? Contact Always A Sweep today to schedule your professional installation and dryer vent inspection. How can we help you breathe easier today?

by Always A Sweep Team | Apr 6, 2026 | Always Home Repair Services, dryer vent repair, inspections & sweeping, installation
Dryer wall box installation for tight spaces is the proven secret to transforming a cramped, inefficient laundry room into a streamlined and safe workspace. In many North Central Florida homes, laundry closets are notoriously small, forcing homeowners to push their dryers right up against the wall. This often results in a crushed transition duct, which restricts airflow, increases energy bills, and—most dangerously—creates a significant fire hazard.
At Always A Sweep, we understand that every inch counts. By installing a recessed dryer wall box, we allow your dryer to sit flush against the wall without damaging the venting system. This simple upgrade not only saves space but also optimizes your machine’s performance.
Table of Contents
-
What is a Recessed Dryer Wall Box?
-
Why Tight Spaces Demand Better Venting
-
The Benefits of Professional Installation
-
Signs You Need a Dryer Wall Box
-
The Always A Sweep Installation Process
-
Service Areas: Expert Care in North Central Florida
-
Conclusion
What is a Recessed Dryer Wall Box?
A dryer wall box is a metal or high-impact plastic housing that is inset into the wall stud bay, directly behind the dryer. Think of it like a recessed outlet for your dryer vent. Instead of the heavy-duty flex hose protruding 4 to 6 inches from the wall, the connection happens inside the wall cavity.
When performing a dryer wall box installation for tight spaces, the goal is to provide a dedicated “home” for the transition duct. This prevents the hose from being kinked or smashed when the dryer is pushed back into its permanent position. It is a sleek, architectural solution to a common mechanical problem.
Why Tight Spaces Demand Better Venting
In tight laundry quarters, the standard “out-of-the-wall” pipe is an enemy to efficiency. When space is limited, the tendency is to shove the appliance as far back as possible.
The Danger of the “Crushed Duct”
When a dryer vent hose is crushed, the lint has nowhere to go. It begins to accumulate in the bends of the pipe and inside the dryer cabinet itself. According to the National Fire Protection Association (NFPA), nearly 16,000 home fires are caused by clothes dryers every year, with “failure to clean” being the leading cause.
Reduced Airflow and Energy Waste
A restricted vent makes your dryer work twice as hard. If you find yourself running the same load of towels for two cycles, it likely isn’t a mechanical failure of the heating element—it is a lack of airflow. A dryer wall box installation for tight spaces ensures the air moves freely, reducing wear and tear on your appliance and lowering your monthly utility costs.
The Benefits of Professional Installation
Choosing a professional for your dryer wall box installation for tight spaces ensures that the structural integrity of your wall and the safety of your gas or electric lines remain intact.
-
Fire Safety: We ensure the box is made of non-combustible materials that act as a fire block.
-
Aesthetic Appeal: No more messy hoses peeking out from behind the machine. Your laundry room looks finished and professional.
-
Easier Maintenance: Because the hose is protected, it is much easier to detach and reattach during your annual Dryer Vent Cleaning & Inspections.
-
Protection for the Wall: A recessed box protects the drywall from the heat and vibration of the dryer vent.
Signs You Need a Dryer Wall Box
How do you know if your home is a candidate for a dryer wall box installation for tight spaces? Look for these common red flags in your laundry area:
-
The “Gap” Problem: Your dryer sticks out so far that you can’t close the laundry closet doors.
-
Visible Kinks: You can see the silver flex hose flattened against the wall.
-
Long Drying Times: Your clothes take more than 45 minutes to dry a standard load.
-
Excessive Heat: The top of your dryer feels hot to the touch during operation, or the laundry room feels like a sauna.
-
Dryer Movement: If your dryer “walks” or vibrates excessively, it may be struggling against a restricted vent.
If you notice these issues, it may also be time for a Replacement / Repair / Reconnection of Dryer Vent to ensure the entire line is clear and up to code.
The Always A Sweep Installation Process
At Always A Sweep, we don’t believe in “one size fits all” solutions. Every home in North Central Florida is different, and we tailor our approach to your specific wall construction.
Step 1: Inspection
We locate the wall studs and identify any potential obstructions, such as electrical wires or water lines for the washing machine.
Step 2: Precision Cutting
We carefully remove a section of the drywall to fit the recessed box perfectly between the studs.
Step 3: Vent Connection
We secure the Dryer Wall Exhaust Termination and ensure the internal piping is sealed airtight to prevent lint leaks behind your walls.
Step 4: Final Fitting
We install the dryer wall box installation for tight spaces and connect a high-quality Dryer Flex Hose Replacement / Upgrade. We then test the airflow to ensure your dryer is breathing better than ever.
Service Areas: Expert Care in North Central Florida
Always A Sweep is proud to serve the diverse communities of North Central Florida. From historic homes with shallow walls to modern builds with tight laundry closets, we have seen it all. Our expertise extends beyond dryer vents to full-scale chimney and gas system safety.
-
Ocala & Gainesville: We provide rapid response for dryer vent emergencies and routine safety upgrades.
-
The Villages & Nearby: We help homeowners maximize their utility spaces and ensure all gas connections are up to modern safety standards.
-
Comprehensive Safety: While we are there for your dryer, we can also perform Gas System Inspections or a Fireplace Sweep to keep your entire home protected.
For residents interested in broader household safety and energy standards, the U.S. Department of Energy provides excellent resources on appliance efficiency and ventilation.
Beyond the Box: Total Laundry Safety
A dryer wall box installation for tight spaces is a foundational step, but maintenance is what keeps your home safe long-term.
-
Clean the Lint Screen: Every single load, without exception.
-
Annual Professional Cleaning: Even with a wall box, lint can accumulate in the vertical sections of your vent or at the Roof Termination Replacement point.
-
Check the Outside Vent: Ensure the exterior flap opens freely and isn’t blocked by bird nests or debris.
Conclusion: Reclaim Your Space Today
Don’t let a small laundry room compromise your home’s safety or your machine’s efficiency. A dryer wall box installation for tight spaces is a low-cost, high-impact investment that pays for itself in lower energy bills and peace of mind.
At Always A Sweep, we are committed to the safety of our North Central Florida neighbors. From chimney relining to dryer vent upgrades, our team brings precision and expertise to every job. Stop fighting with your dryer hose and start enjoying a more organized, safer home.
Contact Always A Sweep today to schedule your dryer wall box installation and optimize your laundry room!

by Always A Sweep Team | Mar 31, 2026 | Always Home Repair Services, chimney repair
Signs your chimney flue tile is cracked are often subtle, but ignoring them can lead to catastrophic house fires or carbon monoxide poisoning. Your chimney liner is the silent guardian of your home, acting as a heat-resistant barrier between the intense flames of your fireplace and the combustible wood framing of your house. When this barrier fails, the safety of your entire household is at risk.
At Always A Sweep, we specialize in identifying these hidden dangers throughout North Central Florida. Whether you have a woodburning fireplace or a modern gas insert, understanding the condition of your clay tile liner is a non-negotiable part of home maintenance.
Table of Contents
-
What is a Chimney Flue Tile?
-
Top 5 Signs Your Chimney Flue Tile is Cracked
-
The Dangers of a Damaged Liner
-
Why Professional Inspection is Mandatory
-
Solutions: Chimney Relining and Repair
-
Service Areas: Keeping North Central Florida Safe
-
Conclusion
What is a Chimney Flue Tile?
Before diving into the signs your chimney flue tile is cracked, it is important to understand what you are looking at. Most traditional masonry chimneys are lined with terra cotta clay tiles. These tiles are stacked and sealed with mortar to create a smooth, continuous path for smoke and toxic gases to exit your home.
Clay is used because it is inexpensive and resistant to the corrosive byproducts of combustion. However, clay is also brittle. Over decades of use, the constant expansion and contraction caused by heat (thermal shock) can cause these tiles to split, flake, or shift.
Top 5 Signs Your Chimney Flue Tile is Cracked
Because you cannot simply look up your chimney and see the entire flue, you have to look for secondary clues. Here are the most common signs your chimney flue tile is cracked that every homeowner should watch for:
1. Flakes of Clay in the Firebox (Spalling)
If you notice thin, red or terra cotta-colored shards of material sitting on your smoke shelf or in the floor of your fireplace, your liner is “spalling.” This happens when moisture enters the clay and freezes, or when heat stress causes the surface of the tile to peel away.
While you shouldn’t climb your roof without safety gear, a technician during a Chimney Repair can often see vertical cracks in the top-most flue tile. If the top tile is cracked, it is highly likely the tiles further down are also damaged.
3. Efflorescence (White Staining)
White, powdery staining on the exterior masonry of your chimney is called efflorescence. This indicates that moisture is moving through the chimney structure. If the flue tile is cracked, water can seep through the gaps, carrying salts to the exterior of the brick.
A cracked flue creates turbulence in the airflow. When smoke hits a crack or a shifted tile, it slows down and cools, leading to rapid creosote accumulation. If your chimney seems unusually dirty shortly after a Fireplace Sweep, a cracked liner may be the culprit.
5. Odors and Draft Issues
Cracks allow smoke to linger or even seep into the walls of your home. If you smell a campfire scent in upstairs rooms or behind walls, the flue is no longer airtight.
The Dangers of a Damaged Liner
Recognizing the signs your chimney flue tile is cracked is the first step in preventing a disaster. A damaged liner fails in three primary ways:
-
Heat Transfer: A crack allows heat to reach the “combustible” parts of your home (like wooden studs and rafters). It only takes a few hours of high heat to ignite seasoned wood behind a chimney wall.
-
Carbon Monoxide Leaks: The flue’s job is to direct carbon monoxide out of the house. Cracks allow this odorless, colorless, and deadly gas to enter your living spaces. You can learn more about the symptoms of CO poisoning at the Centers for Disease Control and Prevention (CDC).
-
Corrosion of Masonry: When flue gases (which are acidic) escape through cracks, they eat away at the mortar holding your chimney together from the inside out, leading to structural failure.
Why Professional Inspection is Mandatory
You cannot diagnose a cracked flue with a flashlight alone. Professional signs your chimney flue tile is cracked are best identified through a Level 2 video inspection.
At Always A Sweep, we use specialized chimney cameras that travel the full length of the flue. This allows us to see “hairline” cracks that are invisible to the naked eye but large enough to leak dangerous gases.
The National Fire Protection Association (NFPA) recommends an annual inspection for all chimney systems to ensure they remain fit for use. If you haven’t had your chimney checked in over a year, you are essentially gambling with your home’s safety.
Solutions: Chimney Relining and Repair
If we confirm the signs your chimney flue tile is cracked, the most common and effective solution is Chimney Relining.
Stainless Steel Liners
We often recommend replacing the damaged clay tiles with a high-grade stainless steel liner. These liners are flexible, incredibly durable, and come with lifetime warranties. They are safer than clay because they don’t crack under thermal shock.
Masonry Repair
In some cases, if the damage is localized to the top of the chimney, a Masonry Repair or a new chimney cap can prevent further water intrusion that leads to cracking.
Service Areas: Keeping North Central Florida Safe
Always A Sweep is proud to provide expert chimney and gas services throughout North Central Florida. We don’t just stop at chimneys; we are your full-service provider for home safety.
-
Inspections & Sweeping: Our core service to ensure your fireplace is ready for the winter.
-
Gas System Services: We handle Propane & Natural Gas System Installations and emergency leak detection.
-
Dryer Vent Cleaning: A leading cause of household fires that we help you avoid through routine maintenance.
-
Water Intrusion: If your chimney is leaking, we provide specialized assessments to stop the rot before it starts.
Whether you are in Ocala, Gainesville, or the surrounding rural areas, our team is equipped to handle everything from Woodburning Stoves to complex Gas Fireplaces.
Maintaining Your Chimney After Repair
Once you have addressed the signs your chimney flue tile is cracked, maintenance is key to ensuring the problem never returns.
-
Burn Seasoned Wood Only: Wet wood creates more creosote and more heat stress on the tiles.
-
Install a Chimney Cap: This keeps rain out, which is the #1 enemy of clay tiles.
-
Schedule Annual Sweeps: Removing creosote prevents chimney fires, which are the leading cause of cracked tiles.
Conclusion
The signs your chimney flue tile is cracked are a warning you cannot afford to ignore. From falling clay flakes to unusual odors, these symptoms point toward a breach in your home’s primary fire defense.
At Always A Sweep, we combine years of expertise with advanced technology to provide the most thorough chimney relining and repair services in North Central Florida. Don’t wait for a chimney fire to tell you there’s a problem.
by Always A Sweep Team | Mar 23, 2026 | Always Home Repair Services, Gas leakage, inspections & sweeping, installation
Is Your Gas Fireplace Leaking? 5 Emergency Signs & What to Do Next
If you suspect a gas leak in your home, time is your most valuable asset. While gas fireplaces offer warmth and ambiance, a malfunction can lead to carbon monoxide poisoning or fire hazards. Knowing when to call for emergency gas leak detection services near me can protect your family and your property from a preventable disaster.
At Always A Sweep, we prioritize your home’s safety. From chimney inspections to gas line integrity, our mission is to ensure your heating systems are a source of comfort, not a source of danger.
Table of Contents
-
The “Rotten Egg” Myth: How Gas Leaks Actually Smell
-
5 Emergency Signs of a Gas Fireplace Leak
-
Immediate Steps: What to Do Before Help Arrives
-
Why Professional Detection Beats DIY Methods
-
The Role of Carbon Monoxide Detectors
-
EEAT: Why Local Expertise Matters in a Crisis
-
Conclusion: Prevention is the Best Medicine
The “Rotten Egg” Myth: How Gas Leaks Actually Smell
Natural gas is inherently odorless and colorless. To make it detectable to the human nose, utility companies add a chemical called mercaptan. This creates the distinct “rotten egg” or sulfurous odor most people associate with a leak.
However, “odor fade” can occur if the gas travels through soil or if the leak is very small. This is why searching for emergency gas leak detection services near me is vital if you have any physical symptoms, even if you don’t smell a thing.
5 Emergency Signs of a Gas Fireplace Leak
If you notice any of the following, do not wait. These are the red flags that require immediate professional intervention:
-
The Hissing Sound: A distinct whistling or hissing noise near the gas valve or fireplace connection indicates gas escaping under pressure.
-
Dying Houseplants: Natural gas displaces oxygen. If your indoor plants are suddenly wilting or turning yellow despite proper care, there may be a slow leak in the vicinity.
-
Physical Symptoms: Residents may experience unexplained headaches, dizziness, nausea, or fatigue.
-
White Mist or Bubbles: If the leak is near an exterior line, you might see a “cloud” of mist. If you suspect a leak in a pipe, the soap bubble test (applying soapy water to the pipe) will show growing bubbles at the leak site.
-
Soot or Scorching: Excessive soot buildup or scorching on the outside of the fireplace can indicate improper combustion and potential gas venting issues.
Immediate Steps: What to Do Before Help Arrives
If you are currently searching for emergency gas leak detection services near me because you smell gas, follow these steps immediately:
-
Evacuate: Get all people and pets out of the house.
-
Don’t Touch Electronics: Do not flip light switches, use the phone inside, or open the garage door. A single spark can ignite the gas.
-
Open Windows: If it is safe to do so on your way out, crack the windows to allow ventilation.
-
Shut Off the Main Valve: If you know where your gas meter is and have a wrench, turn the valve to the “off” position (perpendicular to the pipe).
-
Call from Outside: Dial 911 or your local gas utility once you are at a safe distance.
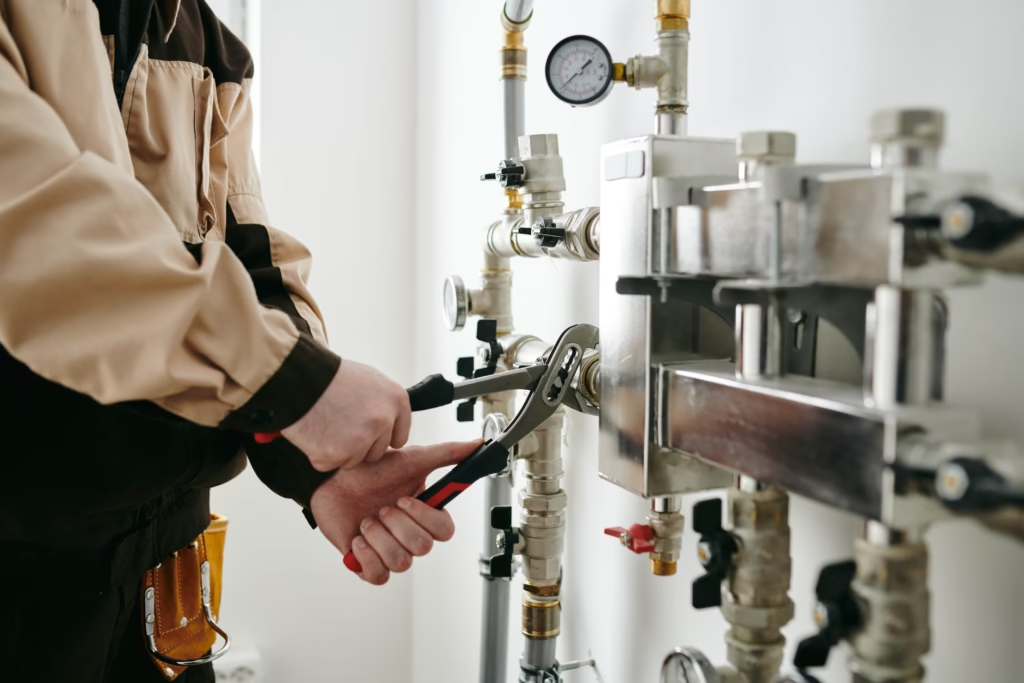
Why Professional Detection Beats DIY Methods
While “bubble tests” are okay for minor checks, true emergency gas leak detection services near me use calibrated equipment. Professionals at Always A Sweep and certified gas technicians use:
-
Electronic Combustible Gas Detectors: These can find leaks as small as 50 parts per million (ppm).
-
Ultrasonic Leak Detectors: These “listen” for the sound frequency of escaping gas that the human ear cannot detect.
The Role of Carbon Monoxide Detectors
A gas leak isn’t the only danger; improper burning leads to Carbon Monoxide (CO). According to the Consumer Product Safety Commission (CPSC), CO is the “silent killer.” Ensure your home has CO detectors on every level and near sleeping areas. If your CO alarm sounds, it is an automatic emergency.
Why Local Expertise Matters
When it involves gas, “Experience” isn’t just a buzzword—it’s a requirement. Finding emergency gas leak detection services near me ensures that the technician understands local building codes and the specific climate-related wear and tear common in your area.
At Always A Sweep, our years of experience in fireplace safety mean we don’t just find the leak; we understand the structural “why” behind it. We provide trustworthy advice because your family’s safety is our primary metric of success.
Conclusion: Prevention is the Best Medicine
The best way to avoid a crisis is through annual maintenance. A routine inspection of your gas fireplace, lines, and venting systems can catch micro-leaks before they become life-threatening.
Is your fireplace overdue for a check-up? Don’t wait for an emergency. Schedule a professional safety inspection with Always A Sweep today to ensure your home remains a safe haven.