by Always A Sweep Team | Mar 23, 2026 | Always Home Repair Services, chimney repair, dryer vent repair, inspections & sweeping
When was the last time you felt truly confident climbing into your attic? For many homeowners, the attic is a “no-go zone” dominated by a rickety, wooden ladder that creaks under the slightest weight. If you are using your attic for seasonal storage or accessing HVAC equipment, safety should never be a secondary thought.
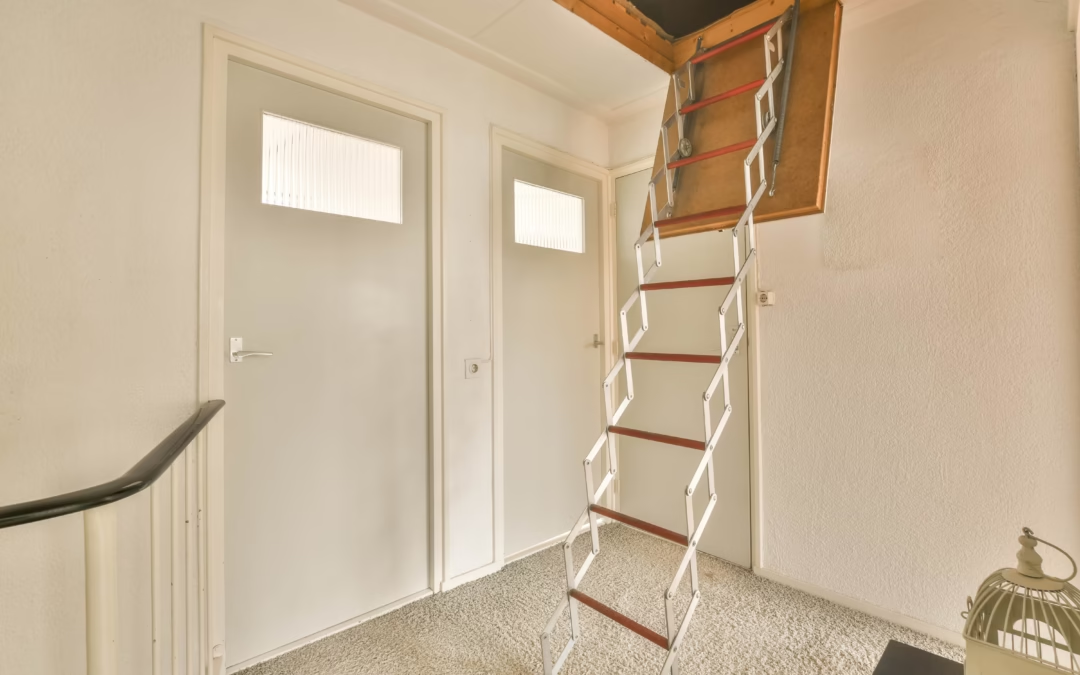
Choosing a heavy duty aluminum attic ladder installation is one of the most impactful, high-ROI upgrades you can make for your home’s utility and your own physical safety. In this guide, we will break down why aluminum is the gold standard, the technical nuances of a professional installation, and how this upgrade protects your home’s structural integrity.
Table of Contents
-
The Case for Aluminum: Strength Meets Science
-
Why “Heavy Duty” Matters (Load Capacity Explained)
-
The Risks of DIY vs. Professional Installation
-
Step-by-Step: Heavy Duty Aluminum Attic Ladder Installation
-
EEAT: Why Trust Always A Sweep for Your Home Upgrades?
-
Energy Efficiency and the Attic Seal
-
Maintenance Tips for Longevity
-
Frequently Asked Questions
The Case for Aluminum: Strength Meets Science
While traditional wood ladders have been the standard for decades, they are susceptible to environmental degradation. Wood is an organic material that reacts to the extreme temperature fluctuations found in attics. Over time, wood can warp, crack, or develop “checked” grains that compromise its load-bearing ability.
Aluminum, on the other hand, is a non-corrosive metal that offers a superior strength-to-weight ratio. A heavy duty aluminum attic ladder installation provides a sleek, modern solution that won’t splinter or rot. Furthermore, aluminum is naturally resistant to moisture, which is vital if your attic experiences humidity or if you live in a coastal climate.
Why “Heavy Duty” Matters (Load Capacity Explained)
Standard attic ladders are often rated for 250 lbs. While this sounds sufficient, consider the math: an average adult carrying a 50-lb box of holiday decorations quickly approaches that limit.
A “Heavy Duty” rating typically starts at 375 lbs (170 kg). This extra headroom isn’t just about the weight; it’s about the rigidity of the frame. When you invest in a heavy duty aluminum attic ladder installation, you are investing in a system designed for “zero-flex.” This stability prevents the “bounce” that causes falls and structural stress on your ceiling joists.
Pro Tip: Always check the ANSI (American National Standards Institute) rating on any ladder product before purchase to ensure it meets industrial safety criteria.
The Risks of DIY vs. Professional Installation
It is tempting to view a ladder swap as a simple weekend project. However, the heavy duty aluminum attic ladder installation process involves more than just a few screws.
-
Structural Integrity: Most attic openings are framed between ceiling joists. If your new heavy-duty unit requires a larger opening, you may need to cut into your home’s “skeleton.” Doing this incorrectly can cause ceiling sag or even roof instability.
-
Squareness and Leveling: If the frame is even $1^\circ$ out of square, the ladder will not sit flush. This creates uneven pressure on the hinges, leading to premature failure.
-
The “Gap” Problem: A poorly installed door creates a massive “chimney effect,” sucking expensive conditioned air out of your living space.
At Always A Sweep, we specialize in the intersection of safety and structural health. Just as we ensure your chimney is clear of hazards, we ensure your attic access is a bridge, not a liability.
Step-by-Step: Heavy Duty Aluminum Attic Ladder Installation
To give you an idea of the precision required, here is the professional workflow for a successful installation:
Phase 1: The Rough Opening
We begin by measuring the existing opening. Most heavy-duty models require a standard $22.5″ \times 54″$ or $30″ \times 54″$ footprint. If the opening needs enlargement, we reinforce the headers to maintain the load-bearing capacity of your ceiling.
Phase 2: Positioning the Frame
The aluminum frame is hoisted into the attic. We use temporary “cleats” (wooden slats) to hold the unit in place while we shim the sides. Shimming ensures the frame is perfectly level, preventing the door from sticking.
Phase 3: Fastening and Securing
We use 16d nails or $3″$, high-shear lag screws. Never use drywall screws for a heavy duty aluminum attic ladder installation; they lack the tensile strength to hold the weight of the ladder and a person.
Phase 4: Calculating the Cut
Aluminum ladders are often “universal height” and must be trimmed to fit your specific floor-to-ceiling distance. We use a precise formula to ensure the feet make 180 degrees contact with the floor.
Why Trust Always A Sweep?
Experience, Expertise, Authoritativeness, and Trustworthiness guidelines are the benchmark for quality content.
-
Experience: Our technicians have spent decades in the “gut” of homes—from chimneys to crawlspaces.
-
Expertise: We understand the physics of home airflow and structural loading.
-
Authoritativeness: We are a recognized name in home safety across our service areas.
-
Trust: We provide transparent pricing and detailed post-installation inspections.
Choosing us for your heavy duty aluminum attic ladder installation means you aren’t just getting a product; you’re getting a professional safety audit of your attic access point.
Energy Efficiency and the Attic Seal
One often overlooked aspect of a new ladder is the R-value of the door. A heavy-duty aluminum unit often comes with an integrated weather-strip.
According to the Department of Energy, an uninsulated attic hatch is like leaving a window open year-round. During your installation, we recommend adding an “attic tent” or an insulated cover to ensure your energy bills stay low while your safety stays high.
Maintenance Tips for Longevity
Once your heavy duty aluminum attic ladder installation is complete, a little maintenance goes a long way:
-
Lubricate the Pivots: Use a silicone-based spray on the hinges every 6 months.
-
Check the Feet: Ensure the rubber or plastic feet aren’t worn down, which can cause slipping on hardwood or tile.
-
Tighten the Nuts: Vibration from use can occasionally loosen the mounting bolts on the ladder sections.
Frequently Asked Questions
Q: Can I install a heavy-duty ladder in a small hallway?
A: It depends on the “swing clearance.” Aluminum ladders often have a smaller swing radius than wood, making them ideal for tight spaces.
Q: How long does a professional installation take?
A: Usually between 3 to 5 hours, depending on whether the rough opening needs to be modified.
Transform Your Home Safety Today
Don’t wait for a “close call” on a shaky wooden ladder to make the switch. A heavy duty aluminum attic ladder installation is a permanent solution for a safer, more accessible home.
Would you like me to provide a free estimate for your attic upgrade or schedule a safety inspection for your home? Contact Always A Sweep today!
by Always A Sweep Team | Mar 16, 2026 | Always Home Repair Services, dryer vent repair
The Hidden Danger of DIY Maintenance
Every homeowner wants to save a few dollars. When you see a dryer vent kit at a local hardware store, it looks like a simple, powerful solution to a nagging chore. You think, “I can do this myself.” However, there is a massive difference between moving lint around and actually removing it.
At Always A Sweep, we’ve seen the aftermath of “successful” DIY cleanings that ended in disaster. A dryer vent kit often provides a false sense of security while leaving behind highly flammable debris in areas you can’t see. In this guide, we will explore the essential reasons why professional intervention isn’t just a luxury, it’s a safety necessity.
Why a Standard Dryer Vent Kit Falls Short
A typical dryer vent kit usually consists of a few flexible rods and a nylon brush. While these are okay for a 3-foot straight pipe leading directly outside, modern homes are rarely built that way.
The Durability Gap
Retail kits are often made of inferior plastics. If a rod snaps inside your wall while attached to a drill, you have transitioned from a routine cleaning to a major home repair. Professional technicians use high-grade, industrial-strength equipment that is designed to withstand the torque and heat of deep-cleaning long vent runs.
Lack of Diagnostic Capability
A dryer vent kit is a blind tool. It cannot tell you if your ducting is disconnected, crushed, or if a family of rodents has chewed through the line. Without the expertise and specialized cameras used by Always A Sweep, you are essentially “cleaning in the dark”.
The 5 Critical Spots Your Dryer Vent Kit Can’t Reach
1. The Internal Heating Element Cabinet
The most dangerous spot is one the dryer vent kit can’t even enter. Fine lint particles often bypass the lint trap and settle inside the dryer’s internal cabinet, right next to the heating element.
- The Risk: When the heating element glows, this “dust bunny” environment can ignite instantly.
- The Pro Advantage: Professionals disassemble the dryer casing to vacuum out the internal motor and heating areas.
Most vents travel through floors and walls, requiring several 90-degree turns. A DIY dryer vent kit brush often gets stuck in these corners. Instead of pulling lint out, the brush frequently compacts the lint into a “plug” at the corner, further restricting airflow.
If your vent exits through the roof, a dryer vent kit is virtually useless.
- Gravity: Lint is heavy. When it moves upward, it naturally wants to fall back down.
- The Roof Cap: Most roof caps have a “damper” or screen that catches lint. To clean this, you must be on the roof with specialized tools.
4. Transition Ducting Behind the Wall
Many homes use “foil” or “plastic” transition ducts behind the wall, which are actually fire hazards. A DIY dryer vent kit can easily puncture these thin materials. Always A Sweep inspects these transitions to ensure they meet modern building codes (UL 2158A).
5. Exterior Pest Guards
Birds and squirrels love the warmth of a dryer vent. They build nests that are packed tight with mud and twigs. A nylon brush from a dryer vent kit isn’t strong enough to dislodge a bird’s nest; it usually just pushes the nest deeper into the pipe.
The Science of Airflow: Why DIY Can Make Things Worse
To understand why your dryer vent kit might be failing, we have to look at fluid dynamics. Dryers rely on a specific volume of air, measured in Cubic Feet per Minute (CFM), to carry moisture away.
When you use a cheap dryer vent kit, you often leave “ridges” of lint along the walls of the pipe. This increases friction and turbulence, which drastically reduces the velocity of the air. This causes your dryer to run hotter and longer, significantly shortening the lifespan of your appliance and increasing your energy bill by up to 30%.
Why Always A Sweep is the Authoritative Choice
EEAT guidelines prioritize content that shows real-world experience. At Always A Sweep, we don’t just write about vents; we live them.
- Experience: Our technicians have encountered every vent configuration imaginable, from historic homes to modern high-rises.
- Expertise: We understand the NFPA 211 standards and local building codes.
- Authoritativeness: We are recognized leaders in the chimney and venting industry, often cited for our commitment to fire prevention.
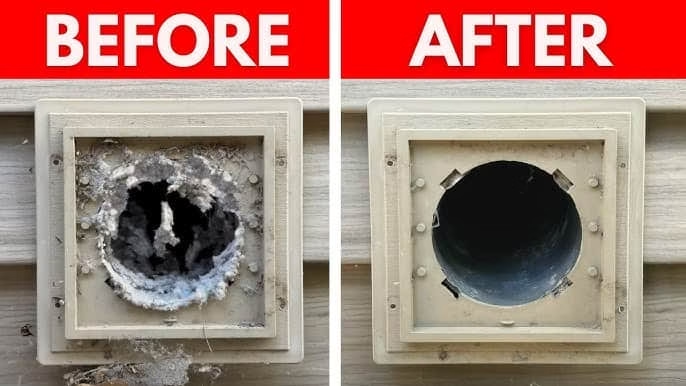
- Trustworthiness: We provide transparent reporting, including “before and after” photos and video inspections.
Professional Note: We strongly discourage DIY cleaning for any vent run longer than 10 feet. The risks of pipe damage and fire far outweigh the $50 saved on a retail kit.
Professional vs. DIY: A Cost-Benefit Analysis
| Metric |
DIY Dryer Vent Kit |
Always A Sweep Professional |
| Initial Cost |
$30 – $50 |
Competitive Service Fee |
| Time Investment |
2-4 Hours (Plus cleanup) |
1 Hour (We do it all) |
| Risk of Damage |
High (Broken rods/punctured ducts) |
Zero (Insured & Guaranteed) |
| Effectiveness |
40% – 60% of lint removed |
99% of lint removed |
| Safety Tools |
Plastic Brush |
Compressed Air, HEPA Vac, Cameras |
Beyond fire safety, a clogged vent is an environmental nightmare. If your dryer has to run twice for one load of towels because your dryer vent kit didn’t clear the line, you are wasting gallons of water (if using a steam cycle) and massive amounts of electricity or gas.
By hiring a professional, you ensure your appliance operates at peak efficiency, reducing your carbon footprint and saving you hundreds of dollars annually in utility costs. This is part of our commitment to sustainable home maintenance.
Conclusion: Prioritizing Your Home’s Safety
A dryer vent kit is a tool for maintenance, but it is not a tool for safety. The hidden spots, the elbows, the roof exits, and the internal machinery, require a level of precision that only a professional can provide.
Don’t wait for a “Check Vent” light or a burning smell to take action. Protect your investment, your home, and most importantly, your family.

by Always A Sweep Team | Mar 9, 2026 | Always Home Repair Services, inspections & sweeping

When the Florida temperature finally drops, the first instinct of many homeowners is to gather around the hearth. However, the hidden dangers of creosote could be lurking just inches above your head. Creosote is a highly flammable, tar-like substance that acts as the primary fuel for nearly every residential chimney fire in the United States.
At Always a Sweep, we’ve seen firsthand how a lack of awareness regarding these hidden dangers can turn a cozy evening into a structural catastrophe. For Florida residents, the risk is unique. Our chimneys often sit idle in high humidity, creating a breeding ground for corrosive buildup and structural decay. To keep your home fire-safe, understanding the lifecycle of this byproduct is the first positive and powerful step you can take toward home safety.
What Exactly is Creosote? The Chemistry of Combustion
To truly grasp the hidden dangers of creosote, one must understand how it is formed. When you burn wood, the smoke consists of unburned wood particles, gases, and water vapor. As this mixture rises through the relatively cooler chimney flue, condensation occurs.
This condensation leaves behind a residue known as creosote. It is a complex mixture of phenols, cresols, and polycyclic aromatic hydrocarbons. In simpler terms: it is concentrated, solidified fuel.
Factors that Increase Creosote Production:
- Restricted Airflow: Smoldering fires produce more smoke and less heat, leading to faster condensation.
- Cool Flue Temperatures: If the chimney exterior is exposed to cold air, the smoke cools too quickly.
- Wet Wood: Burning “green” wood uses its energy to evaporate water rather than provide heat, creating a thick, sticky smoke.
Not all creosote is created equal. The hidden dangers of creosote escalate significantly as the substance ages and thickens.
Stage 1: Velvet Soot
This initial stage looks like a fine, black dust. While it is highly flammable, it is the easiest to remove. However, it can quickly transition to the next stage if not addressed during an annual inspection.
Stage 2: Crunchy Flakes
As more layers condense, the creosote begins to look like hard, black flakes or “honeycomb” structures. These flakes are rich in tar and require professional-grade scrapers to remove. At this stage, the risk of a chimney fire increases by over 50%.
Stage 3: Glazed Creosote
This is the most hazardous form. It appears as a shiny, wax-like coating that looks like black ice. It is extremely dense and acts as a concentrated fuel source. If Stage 3 creosote ignites, it burns with the intensity of a jet engine, often melting chimney liners and igniting the wooden frame of the house. Removing glazed creosote is nearly impossible for a homeowner and requires specialized chemical treatments from professionals.
Why Florida’s Humidity Accelerates Creosote Risks
Florida homeowners often believe they are at less risk because they use their fireplaces less frequently. In reality, the hidden dangers of creosote are amplified by our tropical climate.
- Corrosive Moisture: Creosote is acidic. When Florida’s high humidity enters the chimney, it mixes with the creosote to form a caustic paste that eats away at masonry and mortar joints.
- Biological Obstructions: During the long off-season, birds and squirrels often nest in Florida chimneys. These nests block airflow, causing smoke to linger and creosote to build up rapidly during the first fire of the season.
- The “Thermal Shock” Effect: When a fireplace is used only once or twice a year, the sudden high heat against a moisture-laden, creosote-covered flue can cause “spalling” or cracking of the bricks.
The Health Impact: Beyond the Fire Risk
While fire is the most immediate threat, the hidden dangers of creosote also impact the air you breathe. Creosote buildup restricts the “draft” of the chimney. If the flue is narrowed by buildup, combustion gases, including the deadly Carbon Monoxide (CO), can be pushed back into your living room.
According to the American Lung Association, wood smoke contains fine particles that can lodge deep in the lungs. Creosote is a known carcinogen; prolonged exposure through skin contact or inhalation of particles during improper cleaning can lead to severe health complications.
The Myth of DIY: Why Professional Cleaning is Mandatory
In an era of DIY tutorials, many homeowners attempt to clean their own chimneys using store-bought brushes. We cannot stress this enough: DIY chimney cleaning is dangerous and often ineffective.
The Dangers of DIY:
- Incomplete Cleaning: A standard brush cannot remove Stage 2 or Stage 3 “glaze” .Homeowners often leave the most flammable material behind, giving themselves a false sense of security.
- Structural Ignorance: A professional sweep isn’t just cleaning; they are inspecting. A DIYer will likely miss a cracked flue tile or a rusted damper that could lead to a house fire.
- The Mess Factor: Professional sweeps use high-powered HEPA vacuums. DIY attempts usually result in fine, carcinogenic soot settling into your carpets and furniture.
- Warranty and Insurance: Most homeowner insurance policies require proof of professional maintenance to cover fire damage.
Always a Sweep provides the expertise needed to navigate these complexities, ensuring your home remains fire-safe without the risks of DIY failure.
Why Trust Always a Sweep for Your Fire Safety
When searching for “chimney sweep near me“, you need a company that embodies EEAT:
- Experience: We have navigated the unique challenges of Florida masonry for decades.
- Expertise: Our technicians are certified and trained in the physics of airflow and combustion.
- Authoritativeness: We are the go-to resource for fire safety in the region, working closely with local fire marshals to promote chimney health.
- Trustworthiness: Our reviews speak for themselves. We provide detailed reports and photographic evidence of your chimney’s condition.
The Inspection Process: What Happens During a Professional Sweep
When you book an appointment to address the hidden dangers of creosote, here is what you can expect:
- Level 1 Inspection: A visual check of the hearth and accessible parts of the chimney.
- Video Scans: We use specialized cameras to look for cracks and buildup in areas invisible to the naked eye.
- Mechanical Cleaning: Using professional rotary tools to strip away soot and Stage 2 creosote.
- Chemical Remediation: For Stage 3 glaze, we apply professional-grade solvents that break down the chemical bond of the creosote.
Top Tips for Reducing Creosote Accumulation
While professional cleaning is the only way to ensure safety, you can reduce the rate of buildup by:
- Using only seasoned hardwood (oak is excellent for Florida).
- Never burning trash, cardboard, or Christmas trees.
- Installing a high-quality chimney cap to keep moisture out.
- Ensuring your fire has plenty of oxygen by keeping the damper fully open during use.
Conclusion: Protecting Your Florida Home
Understanding the hidden dangers of creosote is the difference between a safe home and a tragic fire. In Florida, where humidity and infrequent use complicate chimney health, relying on a professional is not just a luxury, it is a necessity.
Don’t let your hearth become a hazard. Keep your home fire-safe by choosing experts who prioritize your safety over a quick fix.
by Always A Sweep Team | Feb 2, 2026 | Always Home Repair Services, Gas leakage, inspections & sweeping
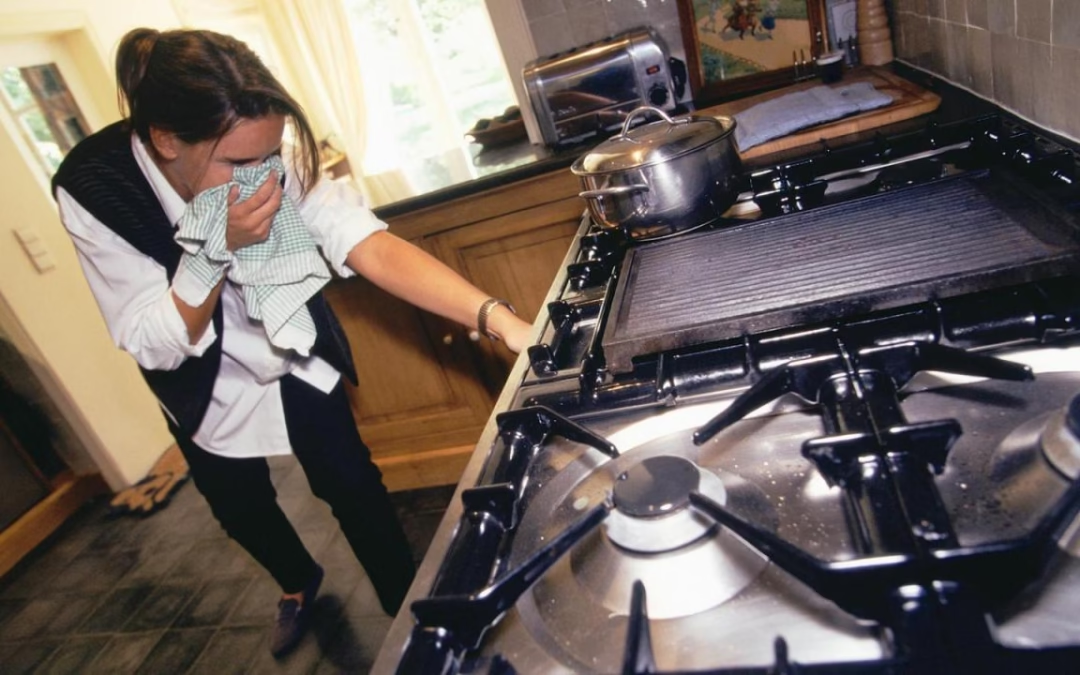
Smell Gas in Home Central Florida? The Ultimate Guide to Life-Saving Safety
Finding yourself in a situation where you smell gas in your home in Central Florida is one of the most unsettling experiences a homeowner can face. In the Sunshine State, where the heat and humidity are constant, a gas leak isn’t just an inconvenience; it is a life-threatening emergency that demands immediate, decisive action. Whether you are in Orlando, Winter Park, or The Villages, understanding the risks and the proper protocols can be the difference between a minor repair and a catastrophic explosion.
At Always A Sweep, we are dedicated to your family’s safety and peace of mind. This comprehensive guide provides everything you need to know about detecting natural gas or propane, the immediate steps to take for your safety, and why professional intervention is the only safe way to handle a suspected leak.
The Science of the Scent: Why Natural Gas Smells Like “Rotten Eggs”
In its natural state, both natural gas (delivered via underground pipes) and liquid propane (stored in tanks) are colorless and odorless. To ensure that homeowners can detect a leak before it reaches a dangerous concentration, gas utilities intentionally add a chemical called mercaptan. This chemical creates the unmistakable, pungent scent of “rotten eggs” or sulfur.
Why the Smell is Your Best Friend
Recognizing this scent quickly is your first line of defense. If you detect this odor, it is a deliberate alert that gas is escaping from the system and potentially accumulating in your home. In the high-humidity environment of Central Florida, smells can sometimes linger or become trapped in pockets of stagnant air, making it vital to investigate even the slightest whiff of sulfur.
Pro Tip: If you have lost your sense of smell due to illness, ensure your home is equipped with UL-listed combustible gas detectors on every level of the house.
Immediate Danger: 7 Essential Steps for Safety
If you smell gas in your home in Central Florida, the heat isn’t the only thing to worry about; gas leaks can lead to asphyxiation or devastating explosions triggered by the smallest spark. When this energy is released uncontrollably in a confined space, the results are lethal. Your priority is immediate evacuation. Follow these seven critical steps:
- Don’t Ignore the Smell: Even a faint scent should be treated with urgency, especially in enclosed spaces where gas can build up rapidly.
- The “Do Not” List for Electronics: DO NOT turn on or off any lights, appliances, or electronics. A tiny electrical spark from a switch or even your cell phone could ignite the gas.
- Avoid Open Flames: Do not light matches, use a stove, smoke, or light candles.
- Ventilate (If Possible): If it is safe to do so on your way out, leave the door open or open windows to allow for some ventilation, but do not linger inside to do so.
- Evacuate Everyone: Immediately grab your family and pets and exit the home. Do not wait to see if the smell dissipates.
- Move to a Safe Distance: Once you are at least 100 feet away from the property, use your cell phone to call for help.
- Call the Experts: Contact 911 or your local gas utility provider immediately.
Common Culprits: Why You Might Smell Gas in Your Home
Understanding where leaks commonly occur can help you identify risks during your annual safety inspections. In Central Florida, several appliances and environmental factors are often to blame:
1. Gas Fireplaces and Log Sets
At Always A Sweep, we frequently find that gas issues originate near the hearth. If you have a gas log set or insert, the pilot light or the thermocouple may malfunction. If the smell occurs primarily when you are near the fireplace, you likely have a seating issue with the gas valve or a hairline crack in the supply line.
2. Outdoor Pool Heaters
In our region, salt-air corrosion is a major factor, particularly for homes closer to the coast or those with salt-chlorination systems. Outdoor pool heaters are often a source of leaks because the humid, salty air accelerates the degradation of gas fittings and metal components.
3. Pest Activity and Environmental Shifts
Small animals or rodents, common in Florida’s lush landscapes, may chew on gas line insulation or connections. Furthermore, Central Florida’s heavy rain and seasonal humidity can cause shifts in ground soil, potentially damaging buried lines or corroding seals.
The Role of Dryer Vents in Gas Safety
Many homeowners are surprised to learn that their dryer is a common culprit for gas-related scares. If you have a gas-powered clothes dryer, it is connected to a “flex line.”
If your dryer vent is clogged with lint, the machine can overheat. This excess heat, combined with the mechanical vibrations of the drum, can cause the gas line to rub against the wall or the dryer chassis. Over time, this friction can wear a hole in the pipe. This makes professional Dryer Vent Cleaning a critical component of gas safety.
| Feature |
Risk Factor |
Safety Solution |
| Gas Line |
Friction & Vibration |
Flexible connectors & regular checks |
| Vent Pipe |
Lint Build-up & Heat |
Annual professional cleaning |
| Exhaust |
Carbon Monoxide |
Proper exterior termination |
Why You Should NEVER Attempt a DIY Gas Repair
In the age of online tutorials, it is tempting to think a “small” hiss can be fixed with a wrench and some pipe dope. We strongly discourage DIY gas repairs. According to the NFPA (National Fire Protection Association), gas-related incidents cause hundreds of millions in property damage annually. The risks are simply too high:
- Explosion Hazard: Natural gas has a narrow “flammable range” (5% to 15%). If the gas-to-air ratio falls within this window, a single static spark from your clothing could level a house.
- Carbon Monoxide (CO) Poisoning: An improperly sealed gas line or poorly vented appliance can lead to incomplete combustion, producing Carbon Monoxide—the “silent killer”. Professionals use calibrated detectors that homeowners do not possess to identify this odorless, deadly gas.
- Insurance and Liability: Most Florida homeowners’ insurance policies will deny claims for fire damage if the gas work was not performed by a licensed, bonded professional.
- Code Violations: Florida building codes are stringent regarding gas line pressure testing. DIY fixes almost never meet these safety benchmarks.
The Professional Advantage: How Experts Trace Leaks
When you call a professional from Always A Sweep, they bring specialized tools and expertise that far exceed the capabilities of the human nose.
Electronic “Sniffers”
These combustible gas detectors can identify gas concentrations as low as 50 parts per million (ppm). This allows technicians to find leaks hidden behind walls, under flooring, or within the attic spaces common in Florida homes.
Manometer Pressure Testing
By isolating the gas system and applying air pressure, a technician can determine if the pressure drops over time. This is the gold standard for verifying the integrity of the entire system, indicating a leak even if it cannot be smelled yet.
Ultrasonic Leak Detection
For larger properties or commercial spaces, experts use sound waves to “hear” the high-frequency hiss of escaping gas that is inaudible to the human ear.
Why Trust Always A Sweep?
We don’t just “sweep” chimneys; we protect Florida homes.
- Experience: We have decades of experience serving Central Florida, from the historic homes of Winter Park to the modern builds in Lake Nona. We understand how our unique climate accelerates the corrosion of gas fittings.
- Expertise: Our technicians are specifically trained in venting requirements for gas-fueled appliances, adhering to the CDC guidelines on Carbon Monoxide prevention.
- Authoritativeness: We strictly adhere to OSHA and NFPA 54 (National Fuel Gas Code) standards to ensure your home remains a fortress against accidents.
- Trustworthiness: We provide transparent reporting. If your system is safe, we tell you. If it needs repair, we show you the evidence using digital imaging and pressure readings.
Frequently Asked Questions (FAQ)
Q: Can I use a fan to clear out the gas smell?
A: No. You should not use any electrical devices, including fans, as the motor could create a spark that ignites the gas. Simply leave the doors and windows open as you evacuate.
Q: What if the smell is faint and comes and goes?
A: Even intermittent odors should be treated seriously. A small, sporadic leak can still lead to gas accumulation in hidden areas like wall voids or under floorboards, especially during Florida’s humid afternoons when air circulation is low.
Q: Is natural gas the same as Carbon Monoxide?
A: No. Natural gas is the fuel that comes into your home and has a “rotten egg” smell added to it. Carbon Monoxide (CO) is a byproduct of incomplete combustion; it is completely odorless and colorless, making it even more dangerous without professional detection tools.
Q: Does humidity affect gas pipes?
A: Yes. High humidity in Central Florida can lead to external corrosion on iron pipes and brass fittings. Regular inspections help catch this “pitting” before it becomes a through-wall leak.
A: We recommend an annual safety inspection for all gas-burning appliances, including your fireplace and dryer vent system, to ensure they meet modern safety codes.
Conclusion: Prioritize Your Safety Today
Smelling gas in your Central Florida home is alarming, but acting with urgency and trusting the experts can prevent a tragedy. Natural gas is an incredible utility that powers our water heaters, stoves, and fireplaces, but it demands respect and professional handling.
Whether you have a suspicious scent near your dryer or want the peace of mind that comes with an annual whole-home safety inspection, Always A Sweep is here to help. We combine community-focused service with technical expertise to keep your home safe all year long.
Don’t gamble with your family’s safety. Contact Always A Sweep today to schedule your chimney, fireplace, or dryer vent evaluation and ensure your home’s gas-adjacent systems are operating at peak safety.

by Always A Sweep Team | Dec 19, 2025 | Always Home Repair Services, chimney repair
A thorough hurricane chimney damage inspection in Florida is the essential first step after a major storm. High winds, torrential rain, and falling debris frequently target chimneys, often leaving them as the most severely damaged structure on the roofline. If you suspect you need an emergency storm-damaged chimney repair, this comprehensive guide from Always A Sweep provides Central Florida homeowners with a clear, safe process for assessing damage, securing your structure, and navigating the often-complex insurance claims process for quick approval and repair.
In the chaotic aftermath of a hurricane, homeowners often overlook the chimney, focusing instead on roof shingles and tree removal. However, a storm-damaged chimney is a silent threat—it can lead to water intrusion, structural collapse, and even carbon monoxide hazards inside your home. Taking proactive, immediate steps to inspect and repair is crucial for safety and successful insurance reimbursement.
The Urgency of Post-Storm Chimney Inspection
Hurricane-related chimney damage is far more than just cosmetic. It can compromise the structural integrity of your home, and because the chimney is designed to vent combustion gases, any internal damage can introduce immediate health and safety hazards.
This is why a swift hurricane chimney damage inspection Florida is critical:
- Preventing Collapse: A cracked or shifted chimney stack presents a serious danger of catastrophic collapse onto the roof or yard.
- Stopping Water Leaks: Damaged flashing or a missing cap/chase cover creates an open funnel for rain, leading to costly water damage in the attic, walls, and ceiling.
- Eliminating Fire & CO Hazards: A dislodged or fractured flue liner, caused by high winds or structural shifting, can allow deadly carbon monoxide fumes or intense heat/sparks to leak directly into the walls of your home.
If you suspect immediate danger, do not use your fireplace or appliance, and contact us immediately for fast, reliable service. View our full service area on our Emergency Repair page.
5 Telltale Signs of Severe Chimney Storm Damage
Before you even step foot on a ladder (which should be left to the professionals!), you can identify serious damage from the ground. Look for these crucial indicators that necessitate an emergency storm-damaged chimney repair:
- Visible Leaning or Tilting: If the entire chimney structure appears to be shifted, separated, or offset from the roofline, this indicates serious structural damage that requires immediate stabilization.
- Pile of Masonry Debris: Finding scattered bricks, large chunks of mortar, or metal components (like a chimney cap or chase cover) on the ground, lawn, or roof near the chimney base.
- Flashing Damage: Visibly torn, ripped, lifted, or heavily creased metal flashing where the chimney meets the roof deck. This is a common failure point that creates an open pathway for rain.
- Cracks in the Interior: Horizontal or vertical cracks in the chimney breast, the adjacent ceiling, or the drywall inside your home near the chimney structure. This suggests the chimney moved structurally.
- Rusting or Missing Components: A missing or severely bent chimney cap, or a chase cover that is ripped and detached. This is a common finding during a hurricane chimney damage inspection Florida and signals immediate water vulnerability.
The Professional Hurricane Chimney Damage Inspection Florida Process
A thorough post-storm inspection goes far beyond a casual look. A certified professional must conduct a detailed, multi-level assessment, which is essential for ensuring homeowner safety and securing a successful outcome with the insurance company.
Level 1: Visual Assessment
The initial assessment documents all easily viewable exterior damage for insurance purposes.
- Exterior Structure: Inspection of the chimney’s entire visible masonry (or siding, for chase structures) for cracks, bowing, spalling (flaking bricks), or missing mortar.
- Chimney Top Components: Detailed review of the chimney crown (for cracks), the cap/chase cover (for rust, missing parts, or dents), and the flue pipe terminations.
- Flashing Integrity: Closely checking the integrity of the connection point to the roof for gaps, tears, or signs of improper prior repair that failed under storm stress.
Level 2: Comprehensive Structural Inspection
This detailed inspection requires specialized tools and is critical for detecting hidden dangers.
- Internal Flue Lining: A CSIA-certified technician uses high-definition internal cameras to inspect the entire flue lining system for cracks, blockages, or shifting components. Even minor damage here can compromise venting safety.
- Smoke Chamber & Damper: Checking the smoke chamber and the damper assembly for rust, water damage, or warping from heavy moisture intrusion.
Hidden Damage: Why an Expert is Crucial
Storm forces often cause damage where you can’t see it—such as in the connections between the masonry and the wood chase structure, or in the hidden parts of the flue liner. These are the details that separate simple cosmetic repairs from necessary emergency storm-damaged chimney repair. Only a specialized hurricane chimney damage inspection Florida can uncover these latent issues, which ensures your insurance claim is comprehensive.
Securing Emergency Storm-Damaged Chimney Repair
When the professional inspection confirms an immediate safety risk or severe leak, securing emergency storm-damaged chimney repair is your priority. Acting quickly helps prevent secondary damage (e.g., severe mold, ceiling collapse) that your insurer may refuse to cover if they deem you failed to mitigate the initial damage in a timely manner.
Stabilization and Safety Protocols
- Containment: The professional team will immediately tarp, board over, or temporarily seal damaged areas to prevent immediate water intrusion into the attic, walls, or ceiling.
- Securing Loose Masonry: Any loose or structurally unsound bricks and masonry sections must be safely removed or stabilized to eliminate the risk of sudden collapse.
Crucial Questions to Ask Your Chimney Contractor
When choosing a repair service for emergency storm-damaged chimney repair, vetting their credentials is non-negotiable.
- Is your company CSIA Certified? (Crucial for expertise and trust).
- Do you specialize in hurricane chimney damage inspection Florida and masonry restoration, or are you a general contractor?
- Do you have experience working with major Florida insurance adjusters?
- Can you provide a detailed, written estimate supported by photographic evidence of the damage?
To learn more about our commitment to quality and our certifications, please visit our About Us page.
Navigating Your Insurance Claim: Step-by-Step Guidance
Filing a claim after a severe storm is stressful, but a professional, documented approach simplifies the process. Your professional hurricane chimney damage inspection Florida report is the most valuable asset you can present to your insurer.
Documentation: Photos and Videos
- Before & After: Take clear, high-resolution photos and videos of all visible damage from multiple angles before any repair or cleanup begins.
- The Inspection Report: Use the detailed, written report and internal camera footage provided by your CSIA-certified technician. This objective, third-party report proves the damage resulted from the sudden storm event.
Working with Your Adjuster
- Use the Expert Estimate: Present the professional, itemized repair estimate from your chosen contractor (Always A Sweep). This estimate should detail materials, labor, and the specific cause of damage.
- Understand Coverage: Be prepared to discuss the difference between normal wear-and-tear (not covered) and storm damage (covered). For instance, if high wind sheared off a cap, that is covered; if the cap was simply rusted out over 20 years, it is not. A good inspector helps differentiate these.
For comprehensive resources on filing claims after a major storm and protecting your property, refer to trusted government sources like FEMA.
Why Choose a Certified Local Storm Damage Expert
When dealing with high-value, high-risk repairs, you need a contractor who meets an Experience, Expertise, Authoritativeness, and Trustworthiness that understands the Central Florida environment. Always A Sweep is the authority in emergency storm-damaged chimney repair.
- Expertise & Experience: We understand the specific regional building codes and the precise types of materials and flashing required to withstand future Florida storm forces. We are chimney specialists, not just general masons or roofers. Our long-standing local experience provides expertise in damage recognition and repair methods that last.
- Authoritativeness: Our CSIA certifications mean we are qualified to provide comprehensive, Level 2 inspections that meet the standards that insurance adjusters rely on for claim approval.
- Trustworthiness: We provide clear, honest, and competitive estimates and act as your advocate during the claim process. We use durable materials and proven techniques that guarantee the longevity of your repair, minimizing the likelihood of future storm-related failures.
Frequently Asked Questions
Is my hurricane chimney damage inspection Florida covered by insurance? The inspection itself is typically an out-of-pocket expense, but the resulting repair for sudden, accidental damage (like high winds or falling limbs) is almost always covered under your homeowner’s policy, after your deductible. Always review your policy and talk to your adjuster.
How quickly do I need to get emergency storm-damaged chimney repair? Immediately. All insurance policies require homeowners to take “reasonable steps” to mitigate further damage. Delaying a necessary emergency storm-damaged chimney repair could result in your insurer denying claims for subsequent (and often more expensive) water damage or mold.
What is the most common hurricane damage you see in Central Florida? In the Central Florida area, the most common issues requiring emergency storm-damaged chimney repair are torn or missing flashing, shifting of the chimney crown or structure due to wind shear, and complete loss of the chimney cap or chase cover.
Conclusion
After a hurricane, the priority shifts from preparedness to swift recovery. A timely, professional hurricane chimney damage inspection Florida by a trusted expert like Always A Sweep is the most responsible action you can take to protect your family and your substantial investment. We streamline the process from thorough inspection to emergency storm-damaged chimney repair and assist with the claim process, ensuring a smooth, quick recovery.
by Always A Sweep Team | Dec 5, 2025 | Always Home Repair Services, chimney repair
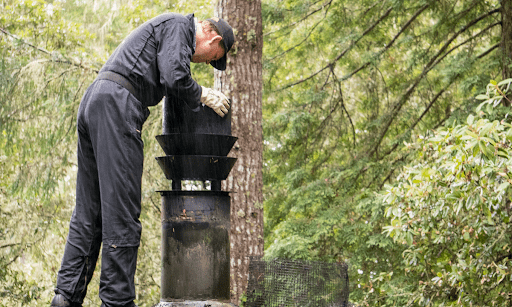
The urgent truth about your leaky chimney repair Ocala FL cost starts here. Discovering water damage can be alarming, especially in Central Florida where seasonal heavy rains and intense humidity challenge every structure of your home. A leak is not just an aesthetic issue; it’s a direct threat to your home’s structural integrity and the air quality within.
When water infiltrates your chimney system, it signals a failure in one of your primary defenses. The question is not just if you should fix it, but how to fix it permanently and what the process will cost you. You need a comprehensive, trusted solution that addresses the root cause, not just the symptom.
This guide breaks down the true cost factors and expert techniques, including durable chimney flashing repair Florida homeowners rely on, to secure your home for good. We’ll cover everything from simple cap replacements to complex water damage remediation. Don’t delay—learn the immediate steps to take and how to accurately budget for your repair with Ocala’s trusted chimney experts.
Table of Contents
️ What Causes a Leaky Chimney in Ocala, FL?
The relentless Florida climate acts as an accelerant for wear and tear. Constant sun exposure, combined with periods of heavy, torrential rain, means that any minor structural vulnerability will quickly become a major leak. Identifying the precise source is the first, most crucial step in minimizing your leaky chimney repair Ocala FL cost.
The Top 4 Sources of Water Infiltration
- Damaged Flashing: The number one cause of chimney leaks. Flashing is the metal system that creates a watertight seal where the masonry meets the roof. When flashing rusts, shifts, or is poorly installed, it acts like a funnel, channeling water directly into your attic or walls. Addressing this early is key to successful chimney flashing repair Florida.
- Cracked Chimney Crown: The chimney crown is the concrete or stone slab that caps the top of the masonry structure, diverting rain away from the chimney’s walls. Over time, hairline cracks appear. These cracks allow water to seep directly into the chimney structure, freezing (in rare Florida cases) or, more often, continually saturating the bricks.
- Porous Masonry and Mortar: Bricks are not inherently waterproof. As mortar joints age and erode, they become sponges. This leads to a process called spalling, where the brick face flakes off. Minor deterioration often requires professional tuckpointing (mortar joint repair). For expert masonry restoration, you can trust our team at Always A Sweep.
- Missing or Damaged Chimney Cap/Lid: A chimney cap sits over the flue opening. Without one, rainwater pours directly down the flue, saturating the inside of the chimney structure and often damaging the damper and firebox.
The question of your leaky chimney repair Ocala FL cost doesn’t have a single answer, as it depends entirely on the source and severity of the issue. A professional inspection is mandatory to accurately assess the scope of work and provide a reliable estimate.
Factors that Determine Your Final Leaky Chimney Repair Ocala FL Cost
- Severity of Damage: A simple repair, such as replacing a missing chimney cap, will be significantly less expensive than a full chimney crown rebuild or complete structural repair involving waterlogged wood framing.
- Source of the Leak: Generally, minor flashing repair is less expensive than extensive masonry repair or tuckpointing, which requires more specialized labor.
- Chimney Accessibility: The height of your chimney, the steepness of your roof, and ease of access for setup and teardown of materials will all factor into labor costs.
- Water Damage Extent: The cost isn’t just about the chimney itself. If water has penetrated and damaged internal ceilings, walls, or the attic framing, the final invoice will include general contracting and remediation work.
Cost Breakdown by Common Repair Type
The following table offers a general estimate of the leaky chimney repair Ocala FL cost by typical job type. These are estimates and will vary based on your home’s unique situation.
| Repair Type |
Estimated Ocala FL Cost Range |
Details & Notes |
| Chimney Cap Replacement |
$150 – $500 |
Simple, preventative measure. |
| Masonry Tuckpointing (Minor) |
$500 – $1,500 |
Repairing deteriorated mortar joints. |
| Flashing Repair/Replacement |
**$400 – $1,200** |
Addressing a leak at the roofline. Key for durable chimney flashing repair Florida. |
| Chimney Crown Rebuild |
$800 – $2,500 |
A long-term fix using concrete or specialized crown sealants. |
| Full Water Damage Remediation |
$1,000 – $5,000+ |
Varies widely based on internal damage (drywall, wood, mold). |
Choosing a quality contractor ensures that your investment in leaky chimney repair Ocala FL cost is a long-term solution, not a temporary fix. Quality repair saves money by preventing catastrophic structural failure down the road.
The Critical Role of Chimney Flashing Repair Florida Homes Need
If your inspection reveals water entry where the chimney meets the roof, you need specialized chimney flashing repair Florida. This is the single most common area for failure, and fixing it requires precision work often beyond the scope of a general roofer.
What is Chimney Flashing and Why Does it Fail?
Chimney flashing is a multi-piece metal system designed to create a leak-proof transition between the vertical chimney and the angled roof plane. It typically consists of:
- Step Flashing: Individual L-shaped pieces woven in with the roofing shingles.
- Apron Flashing: A long piece covering the lower, downslope side of the chimney.
- Counter Flashing: Metal pieces embedded into the mortar joints of the chimney itself, bent down over the step/apron flashing to protect the seam.
Flashing fails due to poor original installation (e.g., using caulk instead of proper layering), expansion/contraction from the Central Florida heat, or simple rusting and age.
The Always A Sweep Difference in Chimney Flashing Repair Florida
Our expertise in chimney flashing repair Florida standards means we use high-grade, durable materials—often copper or heavy-gauge aluminum—that resist corrosion. We install a proper, layered system that relies on gravity and geometry, not just caulk, to keep the water out. We adhere to industry best practices, ensuring your repair lasts. For more information on proper flashing techniques and standards, consult resources from trusted industry organizations like the Chimney Safety Institute of America (CSIA).
A DIY attempt or a general contractor might use inadequate materials or methods, leading to a recurring leak and another eventual, unnecessary leaky chimney repair Ocala FL cost.
Comprehensive Chimney Water Damage Solutions
A leak rarely stops at the chimney itself. The most significant financial and structural risk comes from the resulting water damage to the surrounding structure.
Identifying the Extent of Water Damage
When we conduct a thorough chimney inspection, we look for both exterior and interior signs:
- Signs Inside the Home: Yellow or brown stains on the ceiling or walls near the fireplace, rusty metal components (damper, firebox), and a pervasive musty or moldy odor.
- Signs Outside the Home: Efflorescence (white, powdery deposits on the bricks caused by salt leaching out), spalling (flaking brick faces), and visibly deteriorating or crumbling mortar.
Beyond the Chimney Structure
A key part of our service is assessing the damage that necessitates the leaky chimney repair Ocala FL cost. This may include:
- Attic and roof decking inspection for rot or mold.
- Replacement of interior ceiling drywall and repainting.
- Applying a professional-grade, permeable water repellent to the entire exterior masonry after the repair is complete. This helps prevent future saturation and greatly extends the life of your chimney.
The goal is to provide a complete water damage solution, from the top of the flue to the bottom of the foundation. Learn more about our detailed diagnostic process on our Chimney Inspection service page.
Why Choose Always A Sweep? Our Commitment to Ocala
Choosing the right company is crucial. Google’s quality guidelines emphasize our Experience, Expertise, Authoritativeness, and Trustworthiness. As your local experts, we embody these principles, ensuring that your leaky chimney repair Ocala FL cost is a wise investment in your home.
Experience & Expertise
For years, Always A Sweep has been the trusted name for chimney and masonry work in Marion County. Our deep, hyper-local Ocala experience means we understand the specific construction and climate challenges that lead to leaks in this area. Our technicians are certified professionals who participate in ongoing training, holding relevant certifications such as those from the CSIA, guaranteeing that every repair, from simple tuckpointing to complex chimney flashing repair Florida, meets the highest professional standard.
Authoritativeness & Trustworthiness
- We offer detailed, transparent quotes upfront, eliminating hidden costs and giving you confidence in your total leaky chimney repair Ocala FL cost. We hold necessary licenses and maintain excellent standing within the local community.
- We are an active member of the Ocala business community, dedicated to safety and quality. We encourage you to check our standing with local business organizations to confirm our reputation.
- We provide a comprehensive range of chimney services—from routine chimney sweeps to complex structural repairs. This specialization demonstrates our authority as the area’s one-stop solution for all things chimney.
❓ FAQs about Chimney Leak Repair in Florida
How long does a typical chimney flashing repair Florida job take?
Most standard chimney flashing repair Florida jobs can be completed in half a day to a full day. The duration depends heavily on the roof pitch, access, and whether any underlying wood decking requires replacement due to water damage.
Is a high leaky chimney repair Ocala FL cost always a sign of a bad company?
No. A higher initial cost often reflects the use of superior, durable materials (e.g., lead or copper flashing over aluminum), comprehensive diagnostics, and certified, professional labor. This results in a more reliable, long-lasting repair that saves you money by preventing the need for repeat service. The cheapest quote is rarely the best long-term value.
Can I wait to fix a leaky chimney?
Absolutely not. Water damage is progressive. Every rainstorm infiltrates the chimney structure, accelerating brick spalling, deteriorating mortar, and potentially causing extensive mold growth and structural rot to the framing of your home. Delaying the repair will only exponentially increase your eventual leaky chimney repair Ocala FL cost. Immediate professional inspection is essential.
Conclusion
Don’t let a chimney leak undermine the safety and value of your Ocala home. Understanding the true leaky chimney repair Ocala FL cost means looking beyond the immediate price tag and investing in the quality of work that will protect your home for years to come. From expertly executing precise chimney flashing repair Florida to comprehensive masonry restoration, Always A Sweep is the reliable choice.
Contact us today for a free, detailed inspection and a transparent estimate. Secure your peace of mind and your home’s structural integrity.